
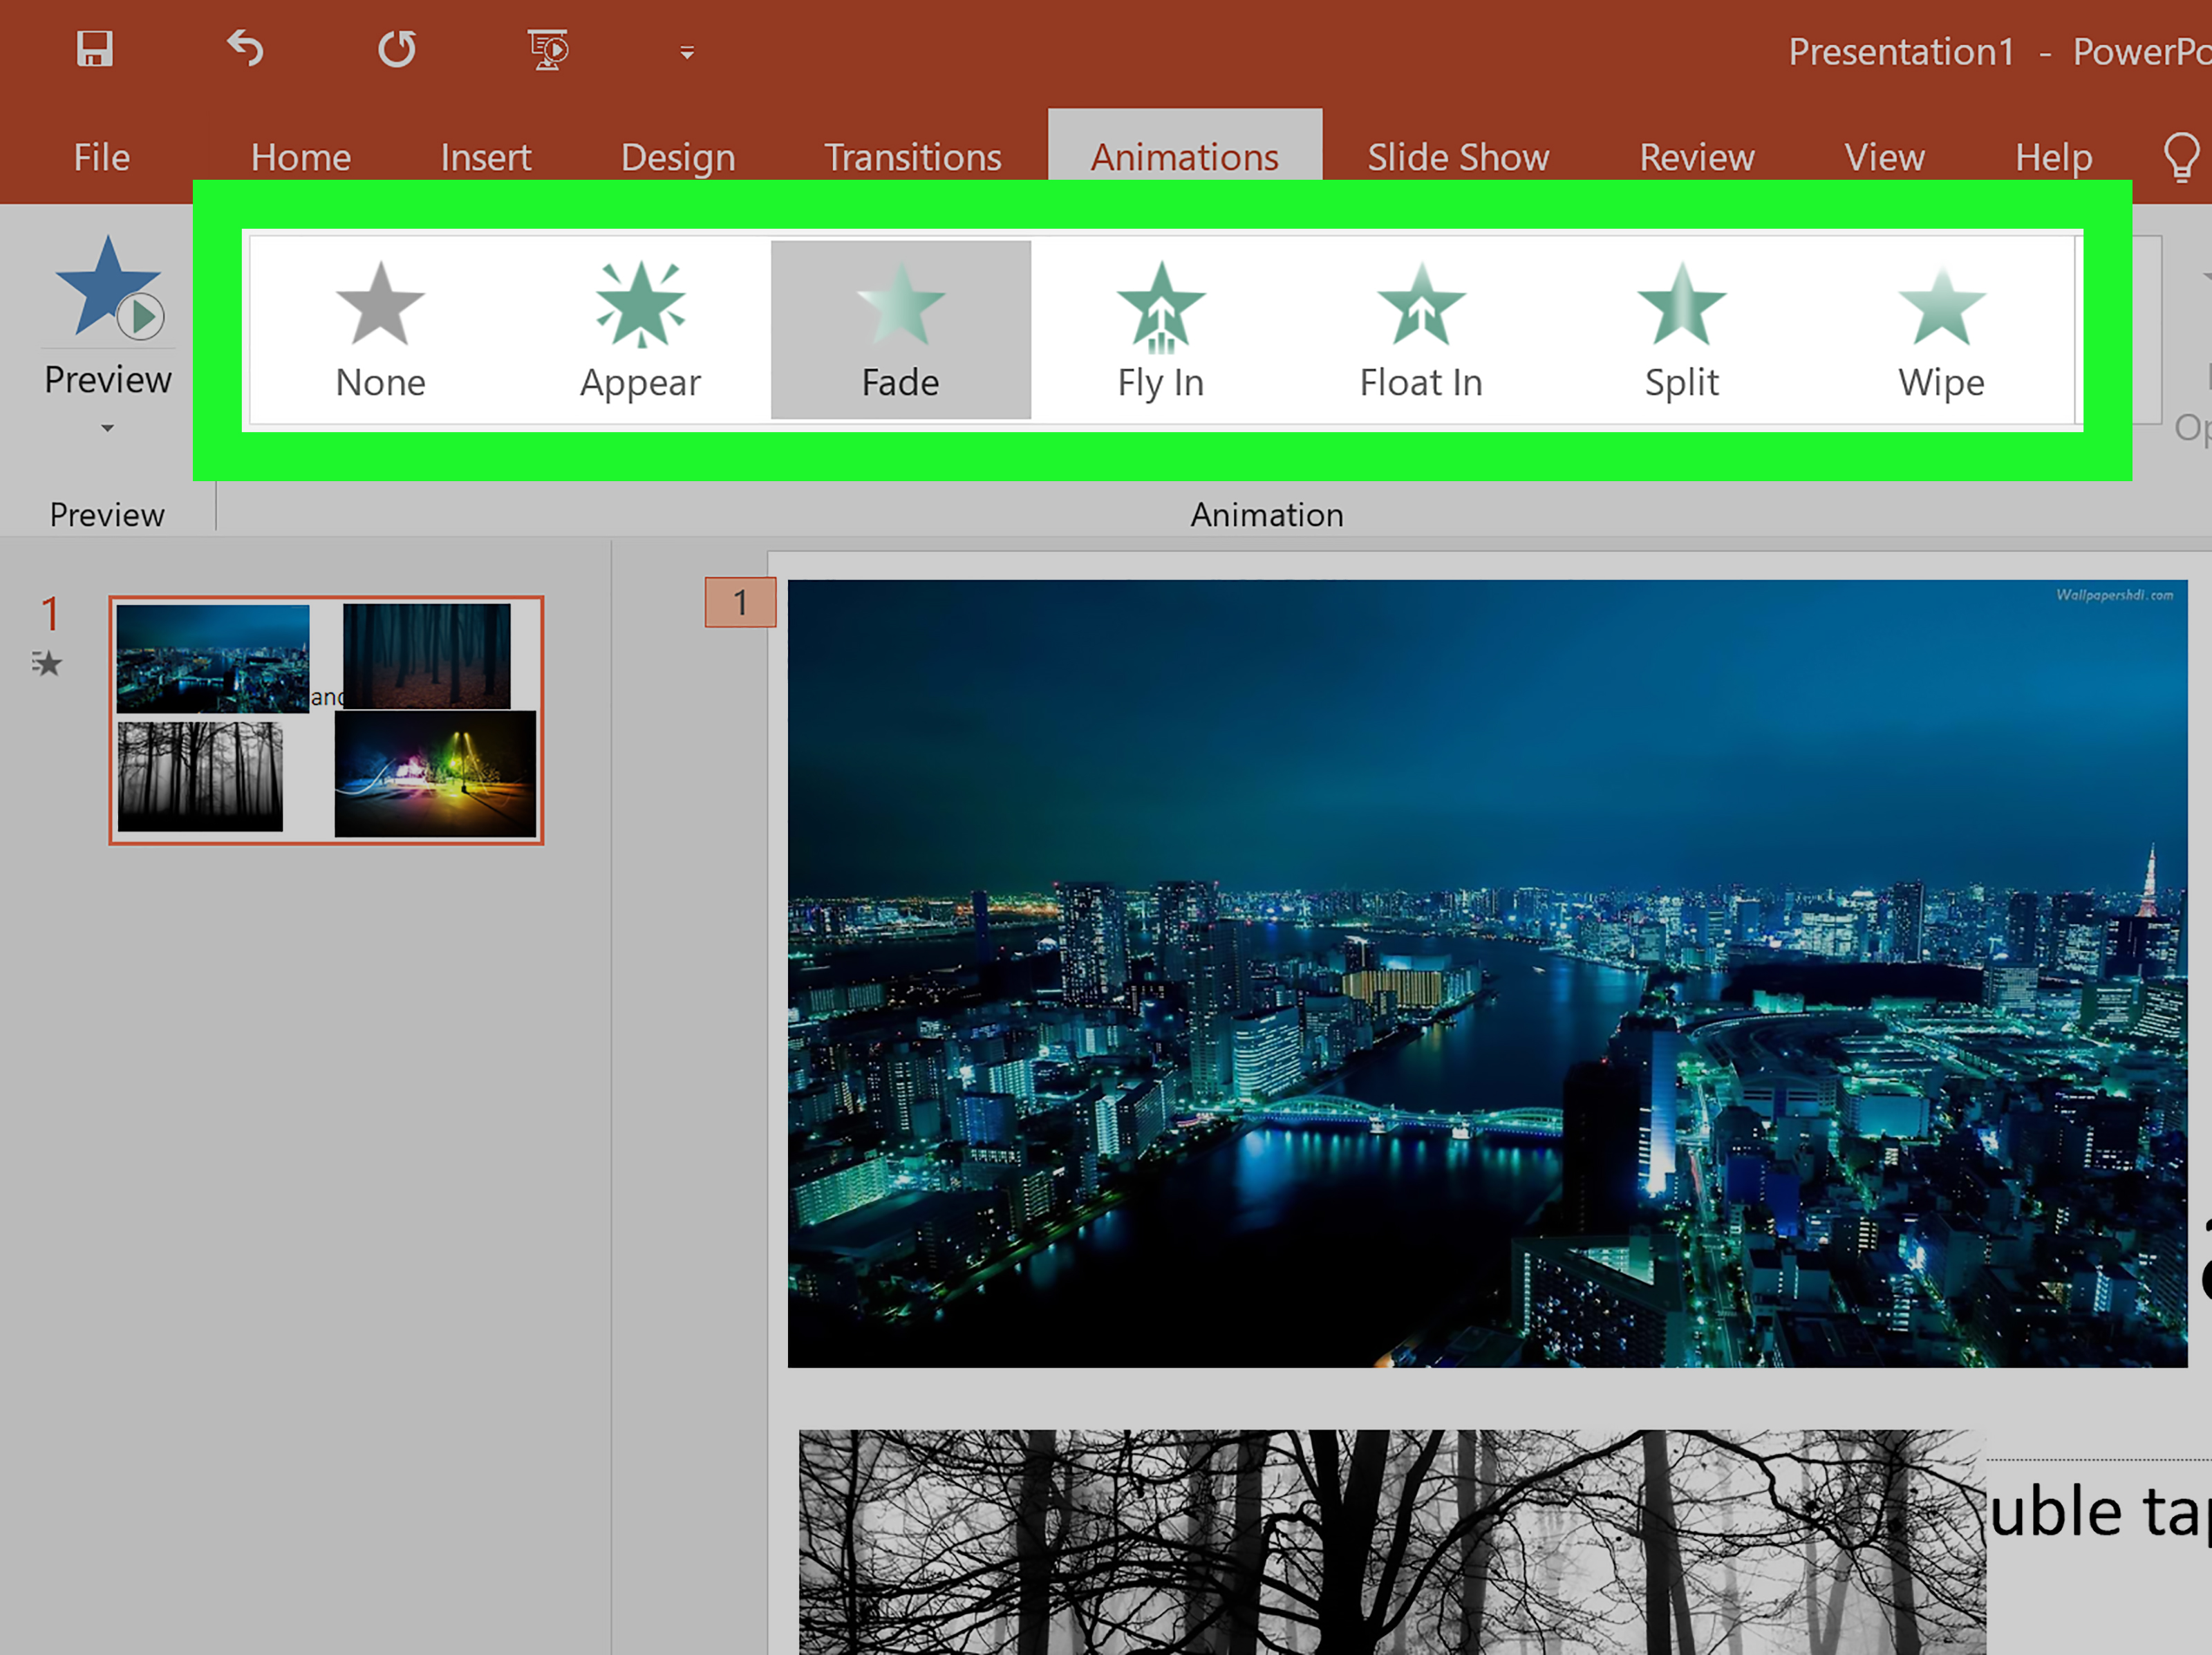
PowerPoint animations are a bit like seasoning: the right amount makes your presentation feel polished, confident, and memorable. Too much, and suddenly your quarterly sales report looks like it escaped from a 2004 screensaver convention. The good news is that learning how to group animations in PowerPoint on PC or Mac is not complicated once you understand what PowerPoint actually means by “grouping.”
Here is the important truth: PowerPoint does not have one magic button called “Group Animations.” Instead, you create grouped animation behavior in a few practical ways. You can group multiple objects and animate them as one unit, sync separate animations so they play together, use the Animation Pane to control timing and order, or copy the same animation settings with Animation Painter. Once you know these methods, your slides stop feeling like a traffic jam and start moving like a well-rehearsed dance routine.
This guide explains the easiest ways to group PowerPoint animations on Windows and macOS, including step-by-step instructions, shortcuts, common mistakes, troubleshooting tips, and practical examples you can use immediately.
What Does “Grouping Animations” Mean in PowerPoint?
When people ask how to group animations in PowerPoint, they usually mean one of three things:
- They want several objects to move, fade, zoom, or appear together.
- They want multiple animation effects to play at the same time or in a controlled sequence.
- They want to reuse the same animation style across several objects without rebuilding it from scratch.
PowerPoint handles each of these needs differently. If you want several shapes, images, icons, or text boxes to behave like one item, you should group the objects first and then apply one animation to the group. If you want objects to stay separate but animate together, you should use the Animation Pane and set the animations to start “With Previous.” If you want several objects to use the same effect, timing, and delay, Animation Painter is your best friend. It is basically the Format Painter’s more dramatic cousin.
Method 1: Group Objects First, Then Apply One Animation
The cleanest way to make multiple objects animate together is to group the objects before adding the animation. This turns several separate elements into one selectable unit. When you apply an animation, PowerPoint treats the group as a single object.
How to Group Objects and Animate Them on a PC
- Open your PowerPoint presentation and go to the slide with the objects you want to animate.
- Hold down Ctrl and click each object you want to include in the group.
- Go to the Shape Format or Picture Format tab.
- Select Group, then choose Group again.
- With the grouped object selected, go to the Animations tab.
- Choose an animation effect, such as Fade, Fly In, Zoom, or Wipe.
- Click Preview to test the animation.
You can also use the Windows shortcut Ctrl + G after selecting multiple objects. To ungroup objects, use Ctrl + Shift + G.
How to Group Objects and Animate Them on a Mac
- Open the slide containing the objects you want to animate.
- Hold down Command and click each object you want to group.
- Go to Shape Format or Picture Format.
- Choose Group, then select Group again.
- Open the Animations tab.
- Apply the animation effect you want.
- Use Preview or start the slide show to check the result.
On Mac, the grouping shortcut is usually Command + Option + G. To ungroup, use Command + Option + Shift + G. If your keyboard layout or PowerPoint version behaves differently, the ribbon menu is the safest path.
Example: Animate a Product Feature Callout
Imagine you have a product photo, a circle around an important detail, an arrow, and a short text label that says “New magnetic lid.” If these objects are animated separately, the arrow may arrive before the circle, the label may appear too late, and the slide may feel clumsy. Instead, select the circle, arrow, and label, group them, and apply a simple Fade animation. Now the callout appears as one clean visual message.
Method 2: Use the Animation Pane to Make Separate Objects Play Together
Sometimes you should not group the objects themselves. For example, you may want three icons to remain individually editable, but still appear at the same time. In that case, use the Animation Pane to synchronize their timing.
Steps to Sync Multiple Animations
- Select the first object and apply an animation.
- Select the second object and apply the same or a different animation.
- Repeat for any other objects.
- Go to the Animations tab and open the Animation Pane.
- Select the animations you want to coordinate.
- Set the first animation to On Click if you want to control when the group starts.
- Set the other animations to With Previous so they begin at the same time.
- Adjust Duration and Delay to fine-tune the movement.
This is one of the most useful PowerPoint animation techniques because it gives you grouped behavior without locking your objects into a single object group. Your icons, photos, shapes, or text boxes remain separate, but their animations act like teammates.
When to Use “With Previous”
Use With Previous when multiple animation effects should happen at the same moment. For instance, a heading can fade in while a line slides underneath it. A photo can zoom slightly while a caption appears. A set of three statistics can pop onto the slide together, instead of making the audience click three times and silently wonder what they did to deserve this.
Method 3: Use “After Previous” to Create a Smooth Animation Sequence
Grouping animations does not always mean everything happens at once. Sometimes you want a group of effects to play in a neat sequence, automatically, after one click. This is where After Previous becomes extremely helpful.
For example, say you have a slide showing a three-step process:
- Step 1: Research
- Step 2: Design
- Step 3: Launch
You may want the first step to appear when you click, then the second step to appear automatically, then the third. To do this, apply animations to each object, open the Animation Pane, set the first effect to On Click, and set the following effects to After Previous. Then adjust the delay so each step has a comfortable pause.
Recommended Timing for Clean Sequences
For most professional slides, subtle timing works best. A duration between 0.3 and 0.75 seconds usually feels smooth without being slow. Delays between 0.1 and 0.5 seconds can create a polished cascade effect. If your animation takes longer than your audience’s patience, shorten it. PowerPoint is a presentation tool, not a suspense thriller.
Method 4: Apply Multiple Animations to One Grouped Object
Once you group objects, you can apply more than one animation effect to the group. This is useful when you want a grouped item to enter, receive emphasis, and then exit.
How to Add Multiple Effects
- Select the grouped object.
- Go to Animations.
- Apply the first effect, such as Fade.
- Click Add Animation instead of simply choosing another effect from the gallery.
- Select a second effect, such as Pulse or Disappear.
- Open the Animation Pane to arrange the order and timing.
The key detail is Add Animation. If you just select a new animation from the gallery, PowerPoint may replace the existing effect instead of adding another one. This tiny button has saved many slides from silent rage-clicking.
Method 5: Use Animation Painter to Copy Grouped Animation Settings
If you have created a beautiful animation setup and want to apply it to another object or group, use Animation Painter. It copies the animation effect and its settings, including timing details, from one object to another.
How to Use Animation Painter
- Select the object or group that already has the animation you like.
- Go to the Animations tab.
- Click Animation Painter.
- Click the object or group that should receive the same animation.
For applying the same animation to several items, double-click Animation Painter, then click each target object. When finished, press Esc or click Animation Painter again to turn it off.
This is especially useful for training decks, sales presentations, product slides, and classroom materials where you want a consistent animation style across multiple slides. Consistency makes your deck feel intentional. Random animation styles make it feel like every slide was designed by a different intern during a coffee emergency.
Method 6: Use the Selection Pane to Manage Complex Animated Slides
When a slide has many objects, grouping animations can get messy. The Selection Pane helps by showing every object on the slide. You can rename objects, hide objects temporarily, and select items that are difficult to click directly.
Why Renaming Objects Helps
In the Animation Pane, PowerPoint may show names like “Rectangle 12,” “Picture 7,” or “TextBox 34.” That is technically accurate, but not exactly poetic. Renaming objects in the Selection Pane helps you understand what each animation controls.
Instead of guessing whether “Oval 9” is your blue icon or the decorative dot near the footer, rename it something clear, such as:
- Pricing Icon
- Step 1 Text
- Product Photo
- CTA Button
- Arrow Callout
This small habit is a huge time-saver when creating grouped animation sequences. It also makes troubleshooting much easier, especially when animations play in the wrong order.
Method 7: Use Triggers for Interactive Animation Groups
Triggers let an animation start when you click a specific object. This is useful for interactive slides, quizzes, menus, dashboards, and training presentations. While triggers are not exactly “grouping,” they can control several animations from one click target.
Example: Click a Button to Reveal a Group
- Create a button shape that says “Show Details.”
- Create the objects you want to reveal, such as a text box, icon, and chart highlight.
- Group those reveal objects or apply separate animations to them.
- Open the Animation Pane.
- Select the animation effect.
- Choose Trigger, then select On Click Of.
- Choose the “Show Details” button as the trigger object.
Now the animation plays only when that specific button is clicked. This is great for non-linear presentations where you want the audience or presenter to control what appears next.
PC vs Mac: What Is Different?
The core animation tools are very similar in PowerPoint for Windows and PowerPoint for Mac. Both versions allow you to group objects, apply animations, open the Animation Pane, adjust timing, set delays, and use Animation Painter. However, the interface can vary slightly depending on your PowerPoint version, Microsoft 365 updates, ribbon layout, and whether you are using the simplified ribbon.
Useful Shortcuts
| Action | Windows | Mac |
|---|---|---|
| Group selected objects | Ctrl + G | Command + Option + G |
| Ungroup selected objects | Ctrl + Shift + G | Command + Option + Shift + G |
| Select all objects on a slide | Ctrl + A | Command + A |
| Undo | Ctrl + Z | Command + Z |
If a shortcut does not work, use the ribbon command. PowerPoint versions, keyboard settings, language settings, and operating system shortcuts can occasionally interfere with expected behavior.
Common Problems When Grouping Animations
The Group Button Is Grayed Out
This usually means you have selected only one object, or one of the selected items cannot be grouped with the others. Make sure you have selected at least two compatible objects. Try selecting shapes, text boxes, icons, and pictures first. Some placeholders, tables, charts, or embedded objects may behave differently depending on the version of PowerPoint.
Animations Play in the Wrong Order
Open the Animation Pane and check the sequence. Drag effects up or down, or use Move Earlier and Move Later. Remember that the order shown in the Animation Pane is the order PowerPoint follows during the slide show.
One Object Moves but the Others Do Not
You may have animated an individual object instead of the group. Select the group itself, not one object inside it. A grouped object usually has one selection box around all grouped items. If you see only one shape selected inside the group, click the outer boundary or select the group from the Selection Pane.
A New Animation Replaced the Old One
Use Add Animation when applying a second, third, or fourth effect. Selecting another animation directly from the gallery often replaces the current effect.
The Animation Looks Too Busy
Simplify. Use fewer effects, shorter durations, and consistent motion directions. A good PowerPoint animation should guide attention, not steal the entire meeting and demand its own agent.
Best Practices for Professional PowerPoint Animation Groups
Use Animation to Support the Message
Every animation should have a job. Use it to reveal information, show relationships, emphasize a key point, or guide the viewer’s eye. If the animation exists only because it looks fun, save it for your personal “PowerPoint disco” file.
Keep Motion Direction Logical
If your content flows from left to right, use animations that follow that direction. If you are showing a vertical process, reveal items from top to bottom. Logical movement helps the audience understand the structure without extra explanation.
Choose Subtle Effects
For business, education, and professional presentations, effects like Fade, Wipe, Appear, and gentle Zoom are usually safer than dramatic spins or bounces. Unless you are presenting at a circus strategy summit, restraint is your friend.
Preview Often
Animations can feel different in editing view than they do in slide show mode. Preview the slide frequently. Better yet, run the presentation from the beginning and check whether the flow feels natural.
Test on the Device You Will Present With
If you build the deck on a Mac but present on a PC, test it on the PC. If you build it in the desktop version but someone opens it in PowerPoint for the web, check whether the animations still behave as expected. Desktop PowerPoint generally gives you the most complete control over animation editing.
Practical Workflow: Build a Clean Grouped Animation in Five Minutes
Here is a simple workflow you can use for almost any slide:
- Finish the slide design first. Do not animate while the layout is still changing.
- Group objects that should behave as one visual unit.
- Apply one simple animation to each group.
- Open the Animation Pane and arrange the order.
- Set timing using On Click, With Previous, or After Previous.
- Use Animation Painter for repeated effects.
- Preview the entire slide show.
This workflow prevents the most common PowerPoint animation headache: trying to repair a chaotic slide after twenty effects have already been added. Animation is much easier when the design is organized first.
Experience-Based Notes: What Works Best in Real Presentation Projects
In practical presentation work, the biggest animation problem is rarely technical. It is usually planning. People often start by adding animations because they want the slide to feel exciting. Then they keep adding more until every object has its own entrance, emphasis, exit, and emotional backstory. The result is a slide that technically moves, but does not communicate clearly.
The most effective approach is to decide what the audience should notice first, second, and third. Once that order is clear, grouped animations become much easier. For example, on a slide with a headline, three benefits, and a chart, the headline might appear first, the three benefits might fade in together, and the chart might appear last. That is a simple structure, but it feels polished because the animation supports the viewer’s attention.
Another useful experience is to group visual elements by meaning, not just by location. If an icon, number, and label all explain the same idea, group them and animate them together. This makes the slide feel cleaner because the audience receives one complete thought at a time. If those three items animate separately, the viewer has to assemble the meaning piece by piece. That may be fine for a dramatic reveal, but for everyday business slides, it often feels slow.
For team presentations, consistency matters even more. When one slide uses Fade, another uses Fly In, and another uses Bounce, the deck feels stitched together from different universes. A simple rule helps: choose one entrance style, one emphasis style, and one exit style for the whole presentation. Animation Painter makes this easy because you can copy the same settings instead of recreating them manually. This saves time and keeps the deck looking intentional.
It is also worth naming objects when the slide gets complicated. A slide with ten animated objects can quickly turn into a mystery novel starring “Rectangle 23” and “Picture 14.” Renaming objects in the Selection Pane sounds boring, but it is one of those small professional habits that pays off immediately. When a client asks you to make the “pricing badge” appear earlier, you can find it quickly instead of clicking random shapes like you are defusing a bomb.
Finally, the best grouped animations are usually the ones nobody talks about after the presentation. That sounds strange, but it is true. If the audience says, “Great point,” the animation worked. If they say, “Wow, that text really flew in aggressively,” the animation may have stolen attention from the message. Use movement to guide, clarify, and pace the story. Keep the showmanship under control, and your PowerPoint deck will feel sharper, smoother, and far more professional.
Conclusion
Learning how to group animations in PowerPoint on PC or Mac is really about learning how to control motion with purpose. You can group objects and animate them as one unit, synchronize separate effects with With Previous, create automatic sequences with After Previous, reuse animation settings with Animation Painter, and manage complex slides with the Animation Pane and Selection Pane.
The best method depends on your goal. If several objects should behave like one item, group them first. If objects should stay separate but move together, sync them in the Animation Pane. If you need consistency across slides, copy effects with Animation Painter. Keep the timing short, the motion logical, and the style consistent. Your audience will thank you, even if they never realize why your deck feels so smooth.
Note: This article is based on current PowerPoint desktop workflows for Windows and macOS. Menu names and shortcut behavior may vary slightly depending on the PowerPoint version, Microsoft 365 updates, ribbon layout, and keyboard settings.











