
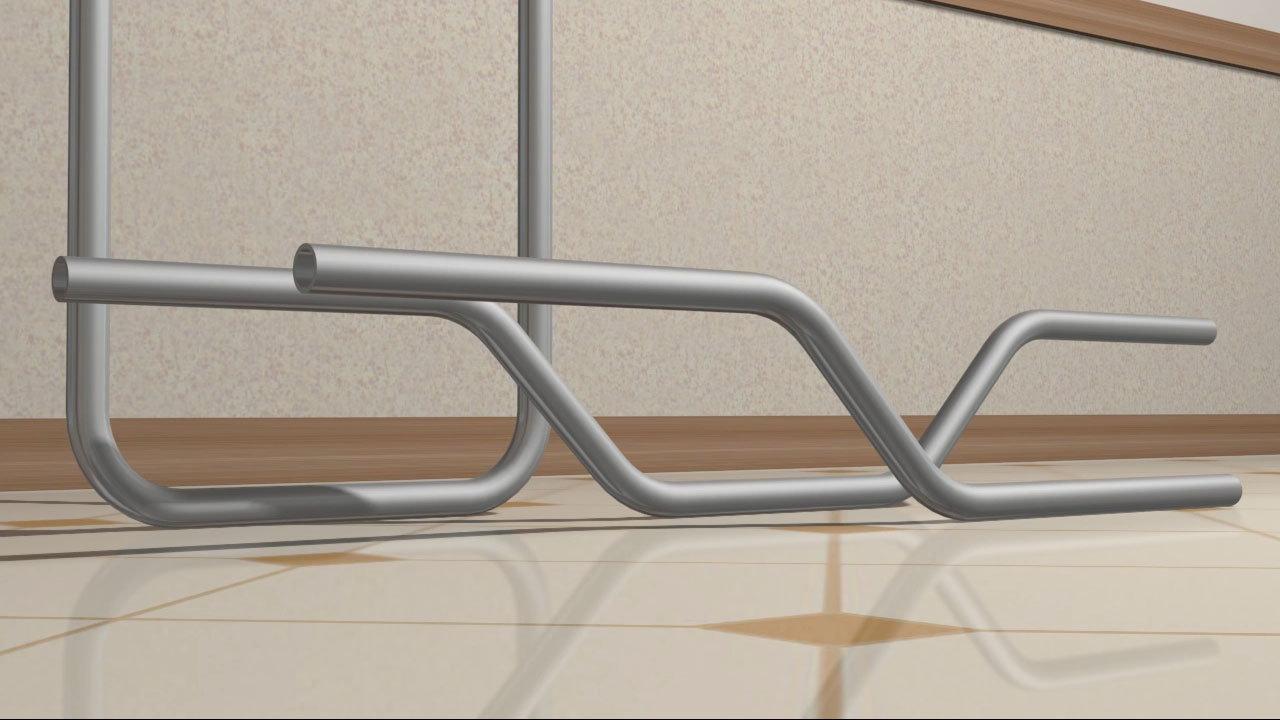
Bending conduit is one of those skills that looks like wizardry from across the room and feels like a mild arm workout up close. The good news: it’s not magic. It’s measurement, a couple of repeatable “conduit math” shortcuts, and learning how to keep a 10-foot stick of EMT from turning into modern art.
This guide focuses on the most common jobsite scenario in the U.S.: bending EMT (Electrical Metallic Tubing) with a hand bender for clean stub-ups, offsets, saddles, and “please line up with that box or my soul will leave my body” tweaks. We’ll also touch on when it’s smarter to use mechanical/hydraulic/electric benders (because sometimes your legs and pride don’t need that fight).
What “Bending Conduit” Really Means
Conduit is a protective raceway for wiring. Bending it lets you follow building structure, avoid obstacles, and enter boxes neatly. In the U.S., EMT is popular because it’s light and bendable with hand toolsperfect for many residential and light commercial runs. Larger sizes, rigid/IMC, and repetitive production bends often shift you toward mechanical, hydraulic, or electric benders.
Tools & Materials
- Conduit (commonly EMT: 1/2″, 3/4″, 1″, etc.)
- Hand bender sized for your conduit (don’t “make it fit”that’s how kinks are born)
- Tape measure and marker/pencil
- Torpedo level (your best friend for straight stub-ups)
- Reamer or deburring tool (or a file) for cleaned cut ends
- Conduit cutter or hacksaw
- Safety gear: gloves, eye protection, and boots with a decent sole
Meet Your Bender: The Markings Matter
Most hand benders include a few “alignment marks” cast into the head. Brands vary, but the big ideas are the same:
- Arrow: commonly used to align for stub-ups and offsets.
- Star / notch / “back-of-90” mark: used for back-to-back bends (so you measure from the back of a 90).
- Degree scale (10°, 22.5°, 30°, 45°, 60°): helps you hit consistent angles for offsets/saddles.
- Take-up / stub height: the “amount to subtract” when laying out a 90° stub-up.
Translation: your bender already knows some of the math. You just have to read the “tiny metal fortune cookie” stamped into it.
Conduit-Bending Math Cheat Sheet (The Stuff That Saves Your Afternoon)
Two-bend offsets and saddle bends depend on the angle you choose. Smaller angles spread bends farther apart (gentler pull, more space needed). Bigger angles tighten everything up (more compact, harder pulls, more chance of flattening if you’re sloppy).
Offset multipliers & shrink (common field constants)
For an offset, you usually calculate two things: (1) distance between bend marks and (2) shrink (how much the conduit “shortens” along the run). Shrink matters when you must land in a specific spot (like a box), not when you’re simply dodging something with extra length to spare.
| Offset Bend Angle | Distance Between Bends | Shrink (per inch of offset depth) | Quick Jobsite Memory Trick |
|---|---|---|---|
| 10° | Offset depth × 6.0 | 1/16″ per inch | Small “box offsets,” gentle but long |
| 22.5° | Offset depth × 2.6 | 3/16″ per inch | Nice compromise angle |
| 30° | Offset depth × 2.0 | 1/4″ per inch | Most common “no chart” offset |
| 45° | Offset depth × 1.4 | 3/8″ per inch | Compact, sharper pull |
| 60° | Offset depth × 1.2 | 1/2″ per inch | Very tight, use carefully |
If you only memorize one thing, make it the 30° offset: distance between marks is 2× the offset depth, and shrink is 1/4× the offset depth. It’s fast, it works, and it’s the reason so many electricians sound like they’re doing math in their head while holding a 10-foot metal noodle.
How to Bend Conduit: 14 Steps
-
Step 1: Plan the route (and minimize bends)
Walk the path. Identify boxes, height changes, beams, pipes, and where you’ll strap the conduit. Aim for a run that follows the structure neatly. Fewer bends means easier wire pulling and a cleaner look. Also remember that electrical codes limit the total degrees of bends allowed between pull pointsso “just one more little turn” can become a real problem later.
-
Step 2: Choose the right conduit and the right bender
Match the bender to the conduit size and type. A 3/4″ EMT bender is not a “close enough” tool for 1″ EMT. Using the wrong size can flatten conduit, kink it, or give you ugly bends that fight you during installation.
If you’re bending larger conduit, rigid/IMC in bigger sizes, or doing lots of repetitive bends, consider mechanical/hydraulic/electric bending equipment. It’s not “cheating”it’s professional efficiency.
-
Step 3: Learn your bender’s take-up (stub height)
A 90° stub-up isn’t measured from the bend’s startit’s measured from the finished end height. Your bender’s take-up value accounts for the arc formed by the shoe. Many benders include a chart or the value cast into the head.
Example concept: If you want a 14″ stub and your bender’s take-up is 6″, you mark at 8″, align the arrow to that mark, then bend to 90°. This is how you land your stub height without guessing and re-cutting.
-
Step 4: Measure carefully and mark like you mean it
Use a tape measure and put a clear mark where you want the bend reference to be. For accuracy, wrap the mark around the conduit (a “saddle mark ring”) so you can see it from any angle and keep everything in the same plane.
Pro move: put a small arrow on your mark showing which direction the bend should go. That tiny doodle can save you from making a perfect bend… in the wrong direction.
-
Step 5: Set up your stance (because your feet are part of the tool)
Place the bender on the floor for a “ground bend” when you can. Keep the conduit flat to the floor, step firmly on the bender’s foot pedal/heel, and apply smooth pressure on the handle. Heavy, steady foot pressure helps keep the conduit seated in the shoe so it doesn’t kink.
-
Step 6: Make a clean 90° stub-up
Layout: Decide the finished stub height. Subtract your bender’s take-up. Mark that distance from the end of the conduit. Align the arrow on the bender with your mark.
Bend: Apply strong foot pressure. Pull the handle until you reach 90°. Use a level against the stub to confirm it’s truly vertical. Slight springback happens; many benders account for this, but your eyes and level are still the truth serum.
-
Step 7: Bend a back-to-back 90° (the “U” shape)
Back-to-back bends are two 90s in the same plane, usually to span between two parallel surfaces. You typically measure the distance needed between the backs of the 90s (not the arrows).
Bend the first 90. Then measure from the back of the bend to where the next bend’s back should land. Use your bender’s back-of-90 mark (often a star/notch) to align and bend the second 90. Check that both legs are parallelthis is where doglegs like to sneak in.
-
Step 8: Bend a basic offset (the everyday obstacle dodge)
An offset is two equal bends in opposite directions so the conduit shifts up/down but stays parallel. Choose a common angle30° is a favorite because the math is simple and the bend is smooth for pulling wire.
Example: You need to clear a 2″ obstruction. Using 30° offsets: distance between bends = 2 × 2″ = 4″. Shrink = 1/4 × 2″ = 1/2″. If you’re landing into a box, add the shrink to your measured run location before placing marks.
Mark the first bend location, then measure the bend-to-bend spacing and mark the second. Bend the first to 30°, rotate/flip as needed (keeping the plane consistent), then bend the second to match. Check parallelism.
-
Step 9: Make a box offset (small offset into a box)
A box offset is a tiny offsetoften done with two small bends (commonly around 10°) to bring the conduit into the knockout cleanly without forcing the connector at an angle.
Many electricians “feel” box offsets rather than chart them: place the conduit in the bender, make a slight bend, slide a short distance, reverse orientation, make the matching slight bend. The goal is a connector that sits flush with the box without stress.
-
Step 10: Bend a 3-point saddle (jumping a small obstruction)
A 3-point saddle uses three bends: a center bend and two outer bends. Typically the center bend is double the angle of the outer bends (like 60° center with two 30° outsides, or 45° center with two 22.5° outsides).
Layout concept: Measure to the center of the obstruction. Apply shrink if you must land precisely. Mark your center point. Then mark equal distances on either side for the outer bends based on your chosen angles and saddle height.
Bend the center first, then roll the conduit 180° for the outer bends so they mirror each other. Check that the saddle clears the obstacle and that both ends return to the same plane.
-
Step 11: Bend a 4-point saddle (for wider or taller obstacles)
A 4-point saddle is basically two offsets back-to-back (four bends total). It’s useful when the obstruction is wide (like ductwork or a big pipe), because it keeps the conduit path more gradual.
Layout concept: You’ll mark four points: two bends to rise, a flat-ish “over” section across the obstacle width, then two bends to drop back. Use consistent angles (often 30° or 22.5°) for a smoother pull and easier alignment.
-
Step 12: Add a kick (a small directional tweak)
A “kick” is a single bendusually less than 45°used to change direction slightly or to bring a conduit into alignment after another bend. Common use: a kicked 90 (stub-up plus a small kick) to land perfectly on a box or avoid a small obstruction.
Mark where you want the kick to start, align with the arrow, and bend a small angle. Use a level and a sight line down the conduit to keep it straight. This is a finesse move, not a wrestling match.
-
Step 13: Correct mistakes (without turning the conduit into a pretzel)
Overbend? Many benders let you “bend back” by using the handle/end as a lever to open the angle slightly. Dogleg? That’s when your bends aren’t in the same plane and the conduit twists. Fixes include minor corrective kicks, careful re-bending, orsometimesthe humble choice to re-bend a new stick if perfection matters.
Flattening/kinks? This usually comes from poor foot pressure, the conduit slipping in the shoe, or using the wrong bender size. Slow down, keep the conduit seated, and use steady pressure.
-
Step 14: Cut, ream, and test-fit before you “final install”
Once your bends look right, cut to length and ream/deburr the ends. Sharp edges can damage wire insulation during pulls. Dry-fit the conduit into couplings/boxes to confirm everything lands cleanly. Then strap and fasten according to your layout plan.
Troubleshooting & Pro Tips
Keep bends in one plane
The fastest way to ruin a good offset is to rotate the conduit slightly between bends. Use your wrap-around mark and keep your reference line consistent. When doing multiple bends, take an extra second to confirm the bender orientation before you pull.
Choose angles with wire pulling in mind
Tight, sharp bends can make pulling conductors harder. When space allows, 30° offsets are a solid balance of compactness and pull-friendliness. Save 45° and 60° offsets for situations where you truly need them.
Don’t “stack bends” too close in different directions
Multiple bends in different planes close together can make it difficult to pull a fish tape and conductors. If your route is getting complicated, consider adding an accessible pull point or rethinking the path.
Measure twice. Mark once. Bend once (ideally).
Conduit is cheaper than your time, but you still don’t want to waste it. A clean layoutespecially accounting for take-up and shrinkturns bending from “trial-and-error sculpture” into “repeatable craft.”
Field Notes: of Real-World Conduit-Bending Experiences
Ask ten electricians about conduit bending and you’ll get eleven opinions, a couple of nicknames for bad bends, and at least one story that starts with “So I thought I could eyeball it…” Here are some real-world patterns that show up again and againuse them as friendly guardrails while you build your own muscle memory.
1) Everyone learns the hard way that the bender is only half the tool. The other half is your stance. When beginners struggle, it’s rarely because they don’t understand the math; it’s because they’re not keeping the conduit fully seated in the shoe. That’s why seasoned folks talk about foot pressure like it’s a religion. If your foot is light, the conduit can creep, flatten, or kinkespecially on sharper angles. Once you lock the conduit into the groove and bend smoothly, suddenly your “mysterious” kinks mostly disappear.
2) The first dogleg feels personal. You’ll make a gorgeous offset… and then notice one end is rotated like it’s trying to wave at you. That’s the classic dogleg: bends not kept in the same plane. The fix isn’t secret knowledge; it’s discipline. Wrap your marks around the conduit so you can always see them, pick a consistent reference line, and when you flip or roll the conduit, do it intentionally. People who bend clean conduit aren’t “lucky”they’re consistent.
3) 30° offsets become your jobsite native language. Not because other angles are wrong, but because 30° is a sweet spot: it’s gentle enough for pulling, compact enough for most obstacles, and the math is fast. In practice, crews often standardize around a few moves they can do quickly and accurately. A common rhythm is: measure to obstacle, add shrink if you’re landing into something, mark, space the bends, bend to 30°, check parallel, tweak if needed. It’s not glamorousbut it’s reliable.
4) The best “pro tip” is dry-fitting early. In the field, walls aren’t perfectly square, floors aren’t perfectly level, and sometimes the “center of that knockout” is more of an emotional concept than a measurement. Benders who look like geniuses often do one simple thing: they test-fit the conduit as soon as it’s close. A quick hold-up to the box and straps tells you if you need a tiny kick, a slight correction, or a re-thinkbefore you’ve committed to cutting and reaming and installing hardware.
5) Re-bending isn’t failureit’s craftsmanship. A lot of beginners think one bend must be perfect the first time. In reality, small corrections are normal. Springback varies by conduit batch, temperature, and how aggressively you bend. Experienced hands expect to check, adjust, and re-check. The difference is that the adjustment is controlledsmall corrections instead of big, angry yanks that distort the conduit.
Bottom line: conduit bending is a skill you earn through repetition. Learn the layout rules, respect your bender markings, stay consistent with your plane, and practice the core bend types until they feel boring. Once it’s boring, it’s dependableand dependable is what makes installations look clean, pull easily, and pass inspection without drama.
Conclusion
Bending conduit well is a mix of simple math and good habits: correct bender size, clear marks, steady foot pressure, and checking your work with a level and dry-fit. Start with the fundamentalsstub-ups, offsets, saddles, and kicksand you’ll quickly build the confidence to handle real-world obstacles without turning your conduit run into a roller coaster.












