
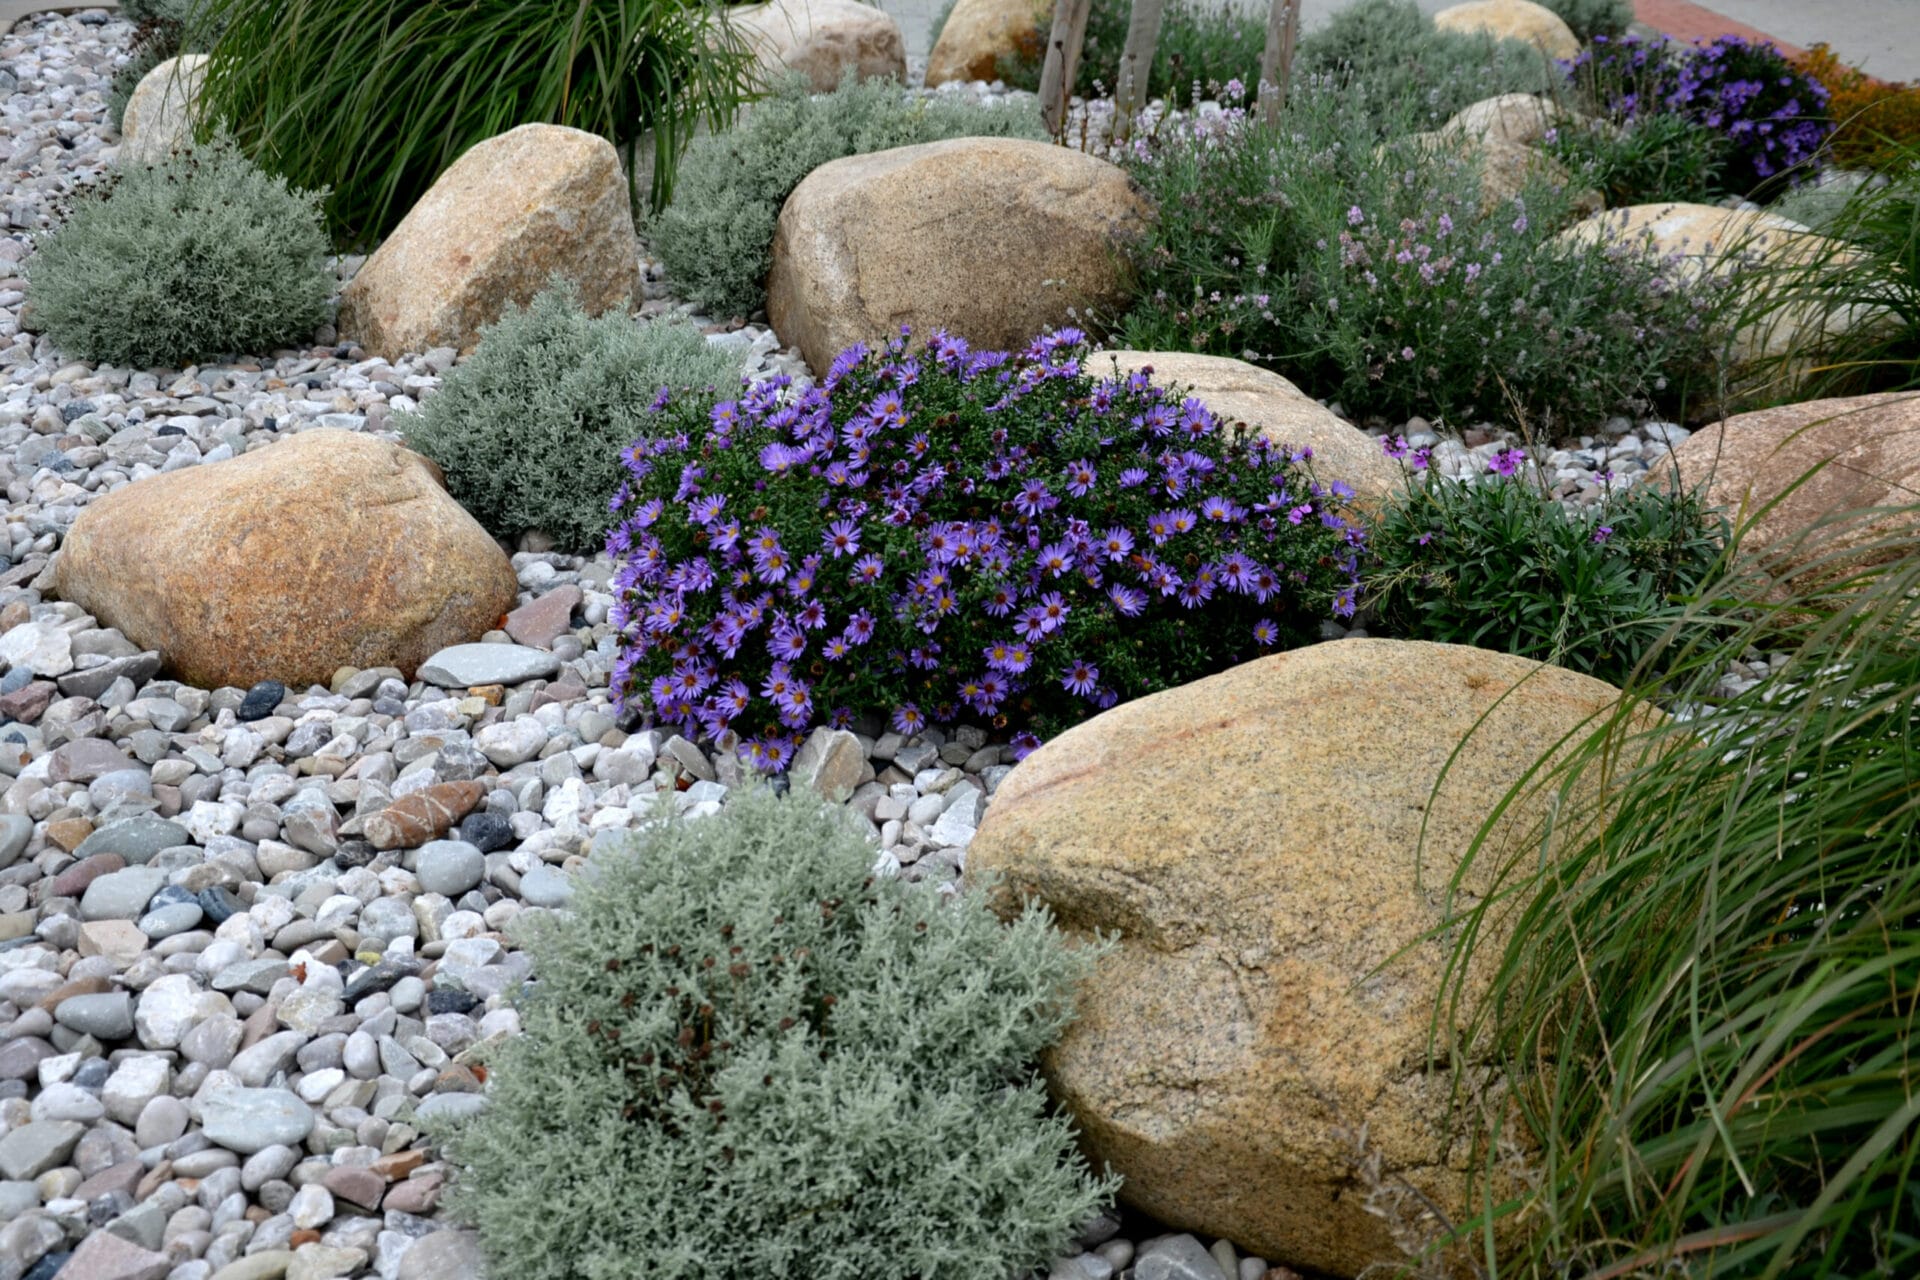
Landscaping rocks are the jeans of the outdoor design world: durable, practical, surprisingly stylish, and able to make almost anything look more put together. Whether you want a tidy garden path, a dry creek bed, a modern front yard, a low-maintenance border, or a dramatic boulder that says, “Yes, I planned this,” rocks can do a lot of heavy lifting in your landscape.
But choosing landscaping rocks is not as simple as grabbing the prettiest bag at the garden center and hoping your yard turns into a magazine cover by Tuesday. Different rocks serve different purposes. Pea gravel feels different underfoot than crushed stone. River rock handles drainage differently than lava rock. Decomposed granite creates a totally different mood from white marble chips. And yes, rock mulch can be helpful in some places and a tiny oven for plants in others.
This guide explains how to choose and use landscaping rocks the smart way, with practical examples, design tips, installation advice, and a few hard-earned lessons that can save your back, budget, and weekend.
What Are Landscaping Rocks?
Landscaping rocks are natural or manufactured stone materials used to shape, decorate, protect, drain, or define outdoor spaces. They can be tiny, like pea gravel; medium-sized, like river rock; flat, like flagstone; angular, like crushed granite; or massive, like boulders that require machinery and a strong respect for gravity.
Unlike organic mulch, landscaping rocks do not decompose and enrich the soil. That is both a benefit and a limitation. Rocks last for years, resist wind, help reduce erosion, and create clean visual structure. However, they do not feed plants, improve soil biology, or cool root zones the way organic mulch can. In short: rocks are excellent design tools, but they are not magical plant babysitters.
Why Use Landscaping Rocks?
Landscaping rocks are popular because they solve several outdoor problems at once. They can reduce mud, define beds, slow erosion, improve drainage, suppress some weeds, and add texture to a yard that feels flat or unfinished.
They Add Structure and Contrast
Plants change with the seasons. Flowers bloom, leaves fall, grasses flop dramatically after a storm. Rocks stay put. That makes them useful for giving a garden “bones.” A border of river rock can make a flower bed look intentional, while a few boulders can anchor a planting design and make young shrubs look less lonely.
They Can Reduce Maintenance
Rock does not need annual replacement like some organic mulches. In dry climates, rock gardens and xeriscape designs can reduce lawn area and lower water demand when paired with drought-tolerant plants. Gravel paths also reduce mowing and keep shoes cleaner after rain.
They Help With Drainage and Erosion
Used correctly, rocks can slow runoff, protect soil from washing away, and guide water through a landscape. Dry creek beds, gravel swales, and stone-lined drainage areas can be both functional and attractive. The keyword is “correctly.” Dumping stones into a drainage problem without grading is like putting sunglasses on a raccoon: stylish, but not a solution.
Common Types of Landscaping Rocks
Pea Gravel
Pea gravel is made of small, rounded stones, usually about the size of peas. It is comfortable underfoot, affordable, and great for informal paths, patios, dog runs, garden seating areas, and spaces where you want a soft, casual look.
Because pea gravel is rounded, it shifts more than angular gravel. That means it needs edging to stay in place. Without edging, pea gravel will slowly migrate into the lawn like it has career goals.
River Rock
River rock is smooth, rounded stone available in many sizes and colors. It looks natural around water features, dry creek beds, foundation borders, and garden edges. Larger river rock works well where you want decorative coverage without a “gravel driveway” look.
However, river rock can be difficult to walk on if the stones are too large. It is also harder to clean under trees that drop leaves, seeds, berries, or other botanical confetti.
Crushed Stone
Crushed stone has sharp, angular edges that lock together better than rounded stones. This makes it a strong choice for paths, driveways, patios, base layers, and drainage projects. It compacts more firmly, which is useful when you need stability.
For walkways, smaller crushed stone is usually more comfortable and easier to manage than large chunks. For drainage, clean crushed stone with minimal fines is often preferred because water can move through it more freely.
Decomposed Granite
Decomposed granite, often called DG, has a fine, natural texture that can create elegant garden paths and patios. It comes in earthy tones and works especially well in Southwestern, Mediterranean, desert, and modern landscapes.
Loose DG can track into the house, so it is best used with edging and proper compaction. Stabilized decomposed granite includes a binder that helps it stay firmer, making it better for higher-traffic paths.
Lava Rock
Lava rock is lightweight, porous, and usually red, brown, or black. It creates a bold look and can work in drought-tolerant beds, fire-wise zones, and modern landscapes. Because it is porous, it can hold some moisture, but it can also be rough to handle and harsh around delicate plants.
Flagstone
Flagstone is flat natural stone used for patios, stepping-stone paths, garden walkways, and seating areas. It has a timeless look and pairs beautifully with groundcovers, gravel joints, or mortar.
Flagstone is more expensive than loose rock and requires more careful installation, especially if you want a stable patio. But when done well, it looks like the landscape has been there foreverin a good way, not an abandoned-castle way.
Boulders
Boulders are large decorative stones used as focal points, retaining elements, natural seats, slope accents, or anchors in planting beds. A single well-placed boulder can add drama and maturity to a new landscape.
The trick is scale. A tiny boulder in a large yard looks like a lost potato. A huge boulder in a small front bed can look like it landed from space. Choose boulders that match the size of your house, beds, and surrounding plants.
How to Choose the Right Landscaping Rocks
Start With the Purpose
Before choosing a rock, decide what job it needs to do. Decorative ground cover, walkway surface, drainage solution, erosion control, fire-safe buffer, and garden accent are different jobs. One rock rarely does everything perfectly.
For example, pea gravel may look lovely in a courtyard but perform poorly on a steep slope. Crushed stone may work well under a patio but feel too harsh around a cottage garden. River rock may be ideal for a dry creek bed but annoying under a maple tree that drops leaves every fifteen minutes in fall.
Match Rock Size to Use
Small stones are better for walking surfaces. Medium stones are great for decorative beds and borders. Large stones work for drainage channels, erosion control, and visual accents. Boulders are best used sparingly, like exclamation points in landscape design.
For paths, choose gravel that is small enough to walk on comfortably and angular enough to stay stable. For decorative areas, larger stones reduce tracking but may be harder to rake clean. For drainage, choose stone that allows water to move through rather than compacting into a hard, muddy layer.
Consider Color Carefully
Rock color matters more than many people expect. A small sample may look subtle in your hand, but spread across 500 square feet, it becomes a major design statement. Bright white rock can glare in full sun. Black rock can absorb heat. Red rock can look striking in the right setting and wildly out of place in the wrong one.
Look at your home’s roof, siding, brick, stucco, pavers, fencing, and local stone. The safest choice is usually a rock color that echoes something already present in the landscape. Tan, gray, buff, and muted earth tones tend to age well.
Think About Heat
In sunny areas, rock mulch can absorb and radiate heat. That can stress some plants, especially shallow-rooted perennials, young shrubs, and plants that prefer cool soil. In hot climates or south-facing beds, use rock around drought-tolerant plants rather than moisture-loving varieties.
If your garden includes hydrangeas, hostas, ferns, or other plants that enjoy cool, moist soil, organic mulch is usually kinder. For succulents, ornamental grasses, lavender, yucca, sedum, and many native dryland plants, rock can be a good match.
Check Drainage and Slope
Rocks are often used for drainage, but they cannot fix bad grading on their own. Water should move away from buildings, not toward foundations, patios, or low spots. If your yard has standing water, start by observing where the water comes from and where it naturally wants to go.
A dry creek bed, gravel trench, or swale can help guide runoff, but the area must be shaped correctly. When in doubt, consult a landscape professional, especially near foundations. Water is patient, sneaky, and very committed to finding your basement.
Plan for Maintenance
Rock landscapes are low-maintenance, not no-maintenance. Leaves, weeds, dust, soil, and seeds will eventually settle into the gaps. Over time, that organic debris can create a perfect little nursery for weeds. Congratulations, your gravel bed has become a farm.
Choose larger rock under trees only if you are willing to blow or rake debris out regularly. Use edging to keep stones contained. Pull weeds early, before roots weave through the rock layer like tiny underground villains.
Where to Use Landscaping Rocks
Garden Paths
Gravel paths are affordable, charming, and flexible. Use crushed stone or compacted decomposed granite for stable walking surfaces. Add landscape edging along both sides to prevent spreading. For a more natural look, combine stepping stones with gravel or low-growing groundcovers.
Dry Creek Beds
A dry creek bed is one of the best ways to make drainage look intentional. Use a mix of stone sizes: larger rocks along the edges and bends, medium river rock through the channel, and smaller gravel to fill gaps. Curves look more natural than straight lines.
Do not make the creek bed too narrow. A tiny trickle of rocks in a big yard may look accidental. Shape it like water would actually flow, with wider areas at curves and lower points.
Rock Mulch Around Beds
Rock mulch can work well in low-water beds, foundation strips, mailbox gardens, and areas where organic mulch washes away. Apply it at a moderate depth, often around 2 to 3 inches for many decorative uses, and keep it away from plant crowns and woody stems.
Avoid piling rock directly against tree trunks, shrub stems, or siding. Plants need air movement near their crowns, and buildings need moisture management. Rock should look neat, not like it is trying to bury everything alive.
Foundation Borders
Gravel or river rock can create a clean strip around a house foundation, especially where roof drip lines or splashback are a problem. The key is grading. Soil should slope away from the house before rock is added. Rock should never be used to hide a slope that sends water toward the foundation.
Keep stones below siding and away from untreated wood. If you have drainage concerns, downspouts, gutters, soil slope, and extensions matter more than decorative rock.
Rock Gardens
A rock garden combines stones with plants that enjoy fast drainage and lean soil. Alpine plants, succulents, sedums, ornamental grasses, creeping thyme, and drought-tolerant natives can all work depending on climate.
For a natural look, bury part of each rock so it appears settled into the ground. Rocks sitting directly on top of soil can look staged. Rocks partially embedded look like they belong there and have been quietly judging the neighborhood for centuries.
Fire-Wise Landscaping Zones
In areas with wildfire risk, noncombustible materials such as decorative rock or gravel can be useful near structures. Many fire-wise landscape recommendations discourage flammable organic mulches immediately next to the home. Rock can help create a cleaner, safer border when paired with proper plant spacing and maintenance.
How to Install Landscaping Rocks
Step 1: Measure the Area
Measure length and width to calculate square footage. For irregular beds, divide the area into smaller rectangles or circles and estimate each section. Order a little extra for curves, settling, and future touch-ups.
Step 2: Remove Weeds and Debris
Clear existing weeds, grass, roots, and loose debris before installing rock. If you simply cover weeds, many will return with the determination of a movie villain in the final scene.
Step 3: Shape and Grade the Soil
Level path areas and shape drainage areas before adding stone. For patios and walkways, a compacted base may be needed. For drainage features, create the slope and channel first, then add fabric and rock if appropriate.
Step 4: Add Edging
Edging is what keeps gravel from wandering into lawns, beds, and driveways. Steel, aluminum, stone, brick, concrete pavers, and composite edging can all work. Choose edging that matches the style of your landscape and is tall enough to hold the stone depth.
Step 5: Use Landscape Fabric Selectively
Landscape fabric can help separate rock from soil and reduce weeds in some gravel installations. It is especially useful under decorative rock paths and non-planted stone areas. However, fabric can complicate planting beds over time, trap debris, and interfere with soil improvement.
For areas with trees and shrubs, be cautious. Many plants are healthier when soil can breathe, receive organic matter, and support root growth. If you use fabric, choose permeable material and cut generous openings around plants.
Step 6: Spread Rock at the Right Depth
For most decorative rock beds, 2 to 3 inches is enough. Too little rock allows bare spots and weeds. Too much rock can be expensive, heavy, difficult to maintain, and stressful around plants. For paths or patios, depth depends on the material, base preparation, and expected traffic.
Step 7: Rake and Rinse
After spreading, rake the rock evenly. Some stone arrives dusty and may need rinsing from rain or a light hose spray. Do not blast fine gravel with a high-pressure stream unless you enjoy watching your new path relocate itself.
Design Tips for a Polished Look
Use Fewer Rock Types
One or two rock types usually look better than five. Too many colors and textures can make a yard feel busy. Choose a main rock for coverage and a secondary stone for accents, borders, or boulders.
Repeat Materials
Repeating the same stone in different areas creates unity. For example, use the same gravel in a side path, around stepping stones, and as a border near the patio. Repetition tells the eye, “This was designed,” not “The clearance bin was powerful.”
Mix Rocks With Plants
Rock-only landscapes can look harsh. Plants soften stone, add seasonal color, cool the space, and support pollinators. Combine gravel with grasses, succulents, native shrubs, creeping groundcovers, or small trees to create balance.
Use Boulders in Odd Numbers
Groups of three or five boulders often look more natural than pairs. Vary the size slightly and partially bury them. A good boulder arrangement should look discovered, not delivered yesterday and dropped in a panic.
Common Mistakes to Avoid
Using Rock Everywhere
Landscaping rocks are useful, but a full yard of stone can feel hot, sterile, and reflective. Leave room for plants, shade, soil health, and seasonal change.
Ignoring Plant Needs
Do not place heat-loving rock mulch around plants that prefer cool, rich, moist soil. Match the mulch to the plant community, not just the color of your shutters.
Skipping Edging
Loose rock needs containment. Without edging, gravel spreads into lawns, gets thrown by mowers, and appears in places where nobody invited it.
Installing Too Much Rock
Deep layers are expensive and hard to move. A thick layer of large stones can also trap debris and make future planting difficult. Use the right depth, not the “more must be better” approach.
Forgetting Long-Term Cleanup
Rock under messy trees can become a maintenance headache. Leaves and seeds settle between stones, decompose, and support weeds. Consider leaf drop before choosing gravel or river rock under large trees.
Real-World Experiences: What Homeowners Learn After Using Landscaping Rocks
The first thing many homeowners learn about landscaping rocks is that stone looks lighter in a sample bucket than it feels in real life. A few bags from the store seem manageable until the project expands, the sun comes out, and suddenly every shovel of gravel feels like a personal fitness challenge designed by someone with no mercy. For anything larger than a tiny border, bulk delivery is usually easier and often cheaper than buying dozens of bags.
Another common lesson is that edging is not optional. Many people install pea gravel or river rock in a bed and think the stone will politely stay there. It will not. Rain, foot traffic, pets, kids, lawn equipment, and gravity all encourage rock to travel. A firm edge made of metal, pavers, brick, or stone keeps the project neat and saves hours of future cleanup. Think of edging as a fence for tiny geological livestock.
Homeowners also discover that rock color changes the mood of a yard dramatically. White stone can look crisp and modern on day one, but in full sun it can be bright enough to make everyone squint like they are interrogating the driveway. Dark stone looks sophisticated, but it may absorb more heat around tender plants. Natural tan, gray, and mixed earth tones are often more forgiving because dust, leaves, and weathering blend in better.
One of the best practical experiences is using rock where organic mulch repeatedly fails. Along downspout areas, narrow side yards, driveway edges, and spots where bark mulch washes away, gravel or river rock can be a smart upgrade. A dry creek bed can turn a soggy problem area into a feature that looks intentional even when it is dry. During storms, it can guide water while adding texture to the landscape.
But people also learn that rock is not always the best choice around trees. Organic mulch is often better for tree health because it improves soil over time, protects roots, and keeps the root zone cooler. Rock can be useful in certain decorative or fire-safe zones, but piling stone over tree roots and against trunks can create stress. If the goal is a healthy tree, wood chips usually deserve the trophy.
Finally, the most valuable lesson is to design before buying. Sketch the area, test samples in wet and dry conditions, check how the color looks next to your house, and imagine maintenance six months later. Landscaping rocks can be beautiful, durable, and practical, but they work best when they are chosen for the sitenot just because they looked handsome at the supply yard. Rocks may be low-maintenance, but they are still heavy. Choose wisely, because changing your mind after delivery is when landscaping becomes weightlifting with consequences.
Conclusion
Landscaping rocks can transform an outdoor space when they are chosen with purpose. Use pea gravel for casual paths, crushed stone for stability, river rock for natural drainage features, decomposed granite for elegant walkways, lava rock for bold low-water designs, flagstone for patios, and boulders for structure. Match the rock to the job, the climate, the plants, and the maintenance you are willing to do.
The best rock landscapes balance beauty and function. They guide water, frame plants, reduce maintenance, and add year-round texture without overwhelming the yard. Choose the right size, color, depth, and placement, and your landscape will look polished for years. Choose randomly, and you may spend next weekend raking gravel out of your lawn while questioning all your life choices.














