There are two kinds of umbrellas in this world: the practical ones that keep your hair from turning into a weather experiment, and the fun ones that make strangers say, “Wait, where did you get that?” The good news is that you do not need to buy a designer umbrella to own something bright, personal, and delightfully dramatic. With the right paint, a little planning, and a small amount of patienceyes, the hardest craft supply to findyou can decorate an umbrella at home and turn rainy days into your personal parade.
This guide explains how to decorate an umbrella in 10 steps, using beginner-friendly methods such as fabric paint, waterproof paint markers, stencils, permanent vinyl, decals, tassels, and simple embellishments. Whether you want a cute kids’ craft, a custom wedding umbrella, a rainy-day photo prop, a patio umbrella makeover, or a personalized gift, the process is surprisingly approachable. The key is choosing materials that flex with the canopy, resist moisture, and do not crack the first time the umbrella opens like a tiny portable spaceship.
Before we begin, remember that most umbrella canopies are made from synthetic materials such as polyester, nylon, pongee, or clear plastic. These surfaces are slick, water-resistant, and sometimes coated, which means regular craft paint may peel if you slap it on without preparation. A successful DIY umbrella design starts with cleaning, testing, sketching, layering lightly, and letting everything cure properly. Let’s make your umbrella look less “lost-and-found bin” and more “main character in a spring montage.”
What You Need to Decorate an Umbrella
You do not need every item on this list. Choose supplies based on your design style and umbrella material.
- Plain umbrella, preferably white, clear, black, or a solid color
- Mild dish soap and water
- Soft cloth or sponge
- Chalk, washable pencil, or painter’s tape for marking
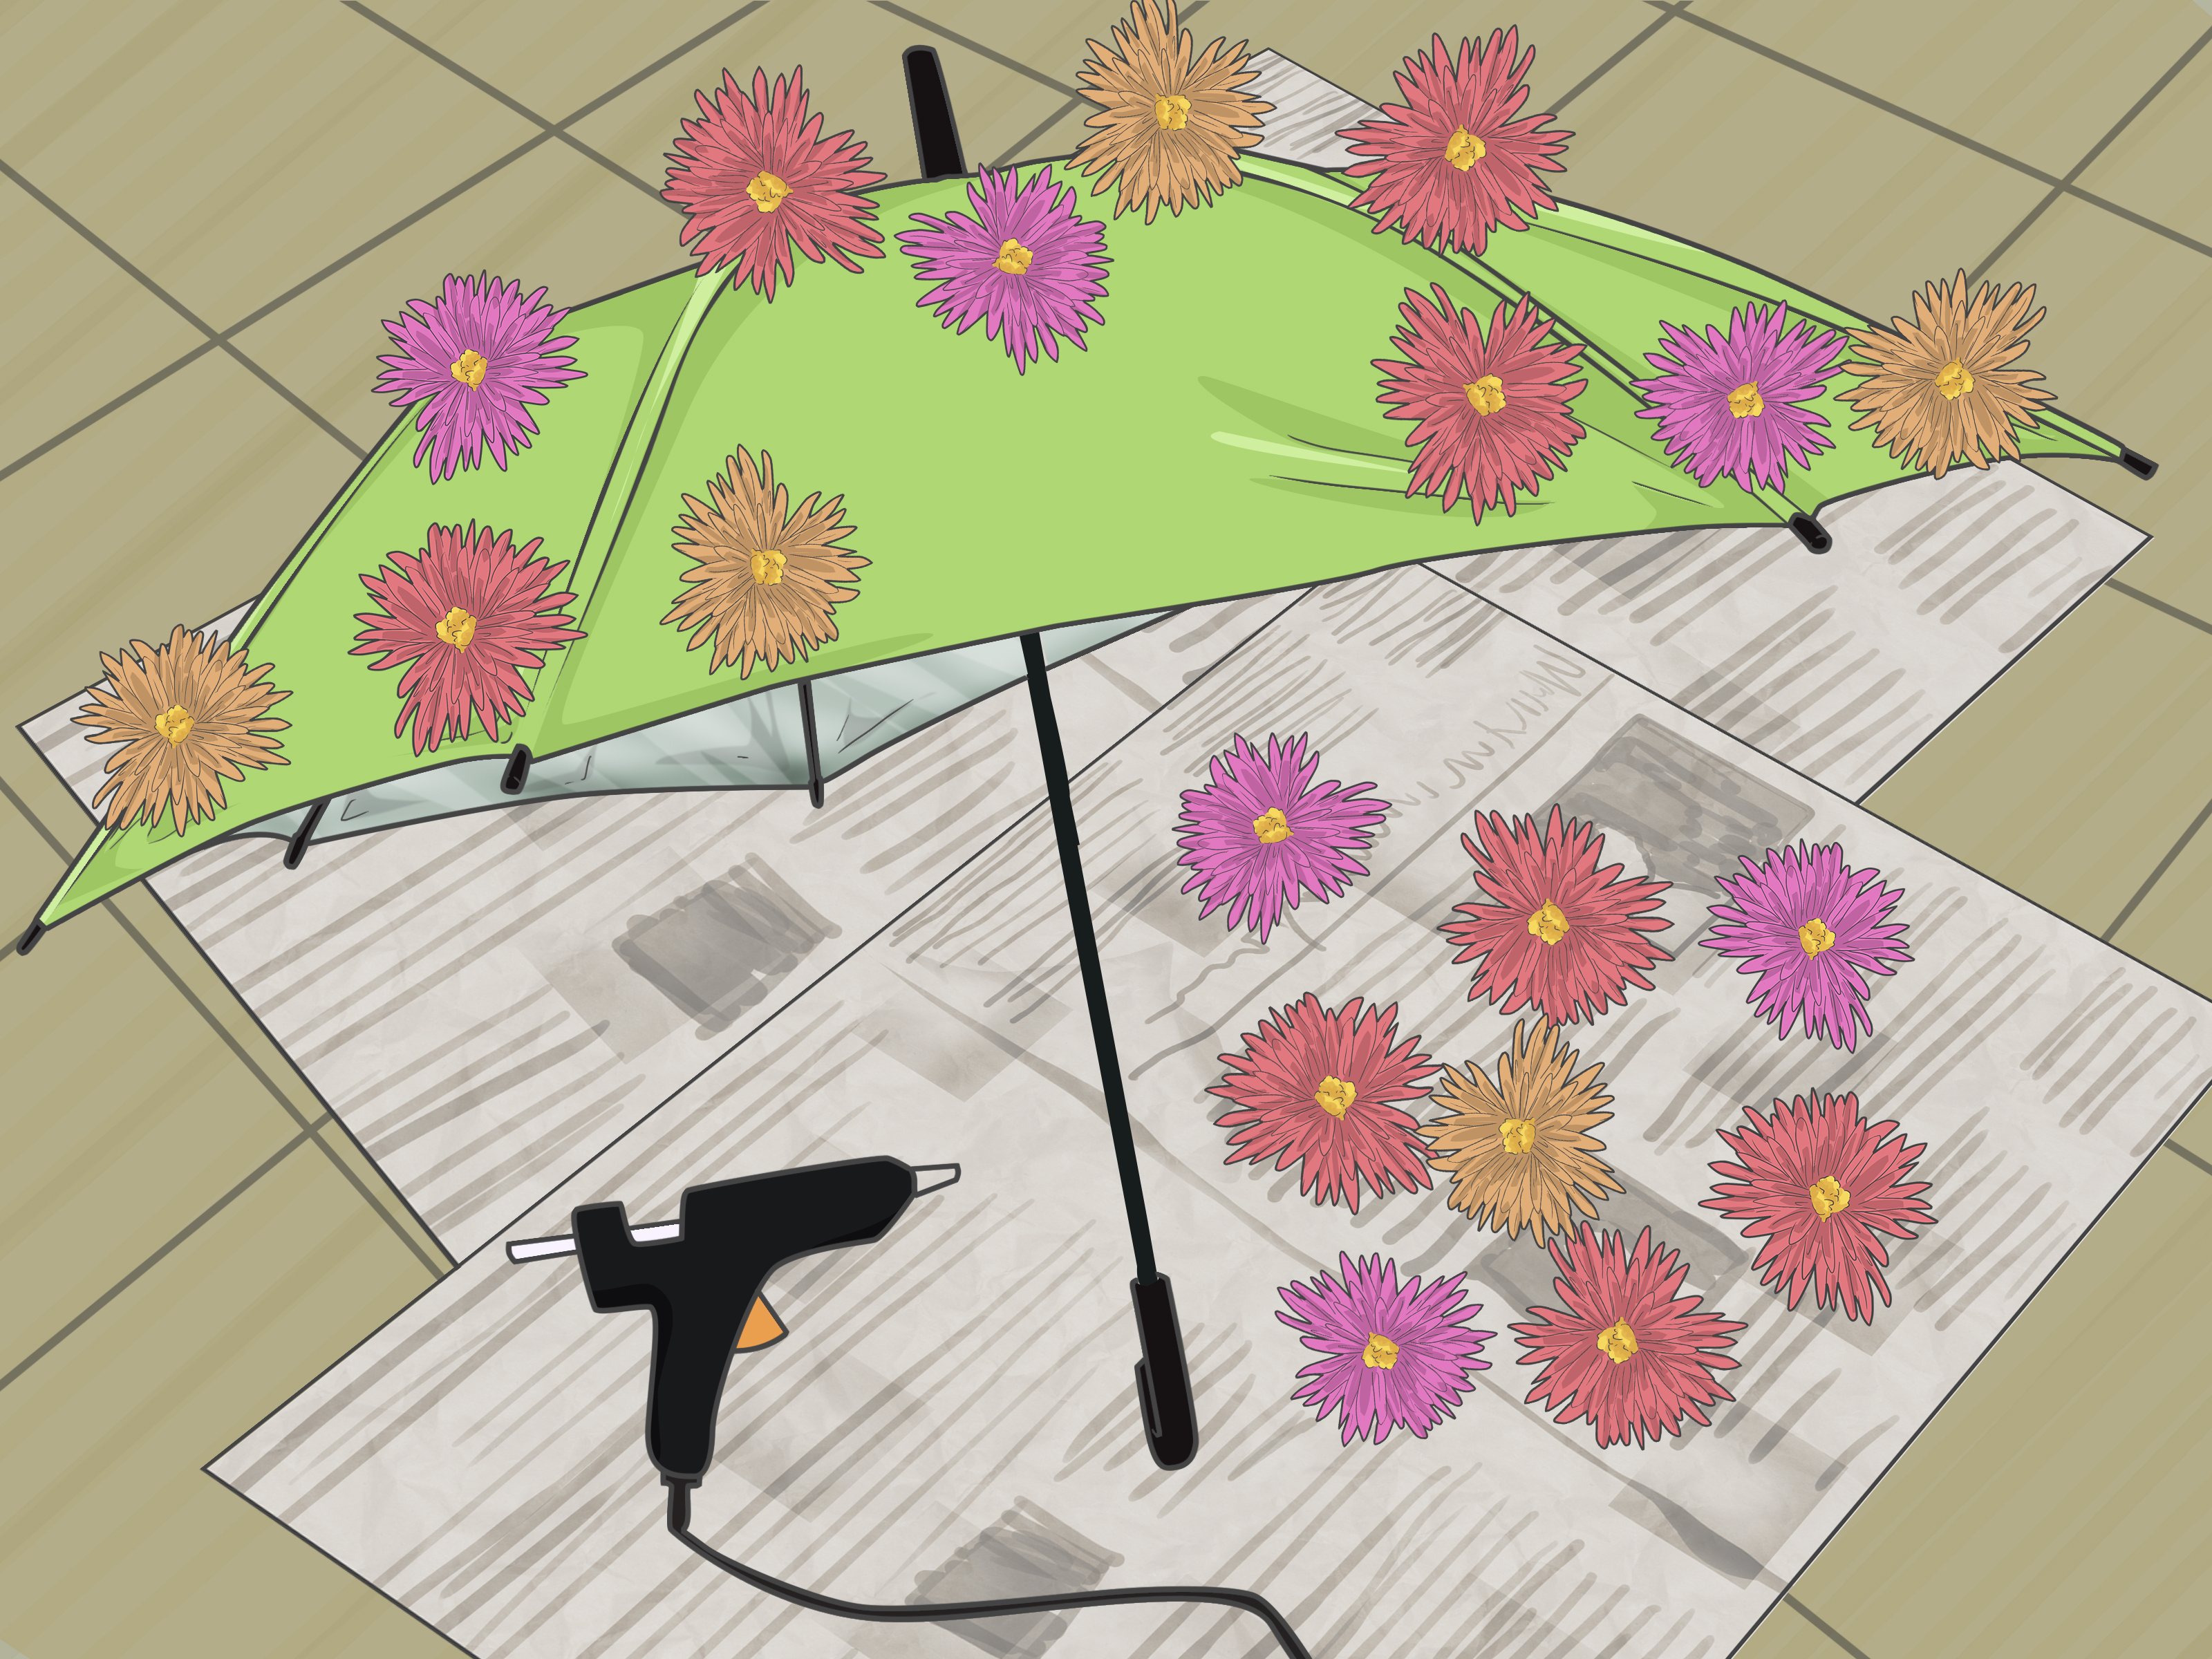
- Fabric paint, outdoor fabric spray paint, or acrylic paint mixed with fabric medium
- Waterproof paint markers or oil-based paint pens
- Foam brushes, detail brushes, or stencil brushes
- Stencils, vinyl shapes, stickers, or painter’s tape
- Permanent adhesive vinyl or heat-transfer vinyl, if using a cutting machine
- Plastic drop cloth or old newspaper
- Optional: tassels, fringe, ribbon, charms, waterproof fabric glue, or needle and thread
- Optional: clear outdoor fabric sealer, if compatible with your materials
How to Decorate an Umbrella in 10 Steps
Step 1: Choose the Right Umbrella
Start with an umbrella that opens smoothly, has a clean canopy, and is not torn, greasy, or flaky. A white umbrella is the easiest canvas because colors show clearly. A black umbrella looks stylish with metallic markers, white paint, neon designs, stars, moons, quotes, or galaxy patterns. A clear bubble umbrella is great for vinyl decals and paint-marker designs because the artwork can be seen from the outside while you stay under your little transparent dome of superiority.
If you are decorating a patio umbrella, check whether the fabric is faded but still strong. Paint can refresh color, but it cannot repair brittle, ripped, or mold-damaged fabric. If the canopy feels like it might disintegrate when someone sneezes near it, replace the umbrella instead of decorating it.
Step 2: Clean and Dry the Canopy
Paint and vinyl stick best to a clean surface. Open the umbrella fully and wipe the canopy with mild dish soap and water. Remove dust, pollen, dirt, sunscreen residue, and mysterious outdoor grime. Rinse lightly with a damp cloth, then let the umbrella air-dry completely while open.
Do not rush this step. Moisture trapped under paint can cause streaking, weak adhesion, or peeling. Think of cleaning as the boring but heroic opening scene of your craft movie. Nobody claps yet, but the ending depends on it.
Step 3: Decide on a Design Theme
Before you touch paint, decide what kind of umbrella you want. A decorated umbrella works best when the design has a clear idea. You can go minimal with tiny raindrops, playful with fruit slices, romantic with florals, bold with stripes, or magical with constellations. For kids, try dinosaurs, rainbows, hearts, smiley faces, planets, clouds, or “rain, rain, go away” lettering. For adults, try botanical silhouettes, geometric panels, initials, monograms, city skylines, or a single dramatic quote on the inside canopy.
Here are a few umbrella decorating ideas that work well:
- Rainbow umbrella: Paint each panel in a different color or add curved rainbow bands.
- Watermelon umbrella: Use green trim, red panels, white tape lines, and black seed shapes.
- Galaxy umbrella: Sponge dark blue, purple, and silver shades, then dot stars with white paint.
- Flower garden umbrella: Paint flowers around the lower edge so they “grow” upward.
- Quote umbrella: Add a short phrase inside the canopy for a secret rainy-day message.
- Wedding umbrella: Use white vinyl lettering, pearl accents, lace trim, or a couple’s initials.
Step 4: Sketch or Tape the Layout
Once your theme is ready, mark the umbrella lightly. Chalk is useful because it wipes away from many surfaces, while painter’s tape helps create clean stripes, borders, and geometric patterns. If your umbrella is light-colored, you can place a printed template under thin fabric and trace the shape from above. This works especially well for lettering, raindrops, hearts, and simple icons.
Keep the umbrella open while you plan. The design will stretch across curved panels, ribs, and seams, so a pattern that looks perfect on a flat table may behave differently on an actual umbrella. Avoid placing tiny detailed artwork directly over thick ribs because the brush will bounce, skip, and generally act like it has personal issues.
Step 5: Test Your Paint or Marker First
Always test your paint, marker, or vinyl on a hidden area before decorating the main surface. The inside edge of a canopy is usually a good test spot. Let the test dry, then gently flex the fabric. If the paint cracks, flakes, beads up, or smears, switch materials.
Fabric paint is often the safest choice for cloth umbrellas because it remains more flexible than standard acrylic. Outdoor fabric spray paint can work well for large patio umbrellas or full-color makeovers. Acrylic paint can be used if mixed with fabric medium, which helps the paint move with the fabric instead of drying into a crunchy shell. Paint markers are great for outlines, dots, lettering, and controlled details. Permanent vinyl can work beautifully on clear umbrellas or smooth surfaces, but adhesion depends on the plastic type and surface coating.
Step 6: Paint the Main Shapes First
Start with the largest areas of color. Use a foam brush for broad shapes, a stencil brush for dabbing, and a detail brush for smaller artwork. Apply thin layers rather than one heavy coat. Thick paint can crack when the umbrella opens and closes. It can also make the canopy stiff, which is not ideal unless your goal is to carry a decorative satellite dish.
If you are painting stripes, tape the edges carefully and press the tape down along the seams. Paint away from the tape edge rather than pushing wet paint underneath it. Remove tape while the paint is slightly damp if the product instructions allow it, or wait until dry if the paint is very wet and likely to smear.
For stencils, hold or tape the stencil firmly against the canopy. Dab paint with a nearly dry brush instead of brushing back and forth. This reduces bleeding under the stencil. Lift the stencil straight up, then let the design dry before repeating it on another panel.
Step 7: Add Details, Outlines, and Personality
After the base layer dries, add details. This is where your umbrella starts looking intentional instead of like it survived a craft-store explosion. Use paint markers for clean outlines, small dots, lettering, cartoon faces, stars, vines, or raindrops. Metallic markers look especially good on dark umbrellas. White paint pens can create clouds, moon phases, snowflakes, or handwritten quotes.
If you are adding words, keep them short. Umbrellas curve, fold, and move, so long sentences can become hard to read. A few good options include “Let it rain,” “Sunshine on standby,” “Rain is confetti,” “Bloom anyway,” or “Weather? Handled.” For wedding umbrellas, try “Just married,” initials, the wedding date, or a small floral border.
Step 8: Use Vinyl Decals for Crisp Designs
Vinyl is a strong option if you want a polished look without hand-painting. Permanent adhesive vinyl works best on smooth surfaces such as clear plastic umbrellas. If you use a cutting machine, size the design to fit between the umbrella ribs. Clean the surface, let it dry, apply transfer tape, and press the vinyl down slowly from the center outward to avoid bubbles.
Some crafters apply vinyl on the inside of a clear umbrella so the design shows through from the outside and gets extra protection from rain. If you use heat-transfer vinyl, be extremely careful. Umbrella fabric can melt, warp, or wrinkle under high heat. Use a protective sheet, low heat, short pressing time, and test first. When in doubt, adhesive vinyl is less dramatic and less likely to turn your umbrella into modern art by accident.
Step 9: Add Optional Trim or 3D Embellishments
If you want texture, add trim after the painted design is dry. Small tassels, fringe, ribbon, lace, or pom-pom trim can make an umbrella look festive. Attach embellishments along the outer edge, not across the folding sections. Use waterproof fabric glue for light decorations, or sew trim by hand if the canopy fabric allows it.
Keep weight in mind. Umbrellas are designed to open and close smoothly, not carry a chandelier. Heavy beads, thick charms, or too much trim can pull on the fabric and make the umbrella awkward to use. For a cute but practical look, decorate only the edge, handle, or one or two panels.
Step 10: Let Everything Cure Before Using
Drying and curing are not the same. Paint may feel dry to the touch after a few hours, but it often needs longer to fully bond. Follow the product directions. Many fabric paints need about 24 to 72 hours before washing or heavy use. Keep the umbrella open while it dries so wet areas do not touch and transfer.
Once cured, gently open and close the umbrella a few times. Look for sticky spots, cracking, or lifting vinyl edges. If anything peels, press it down, touch it up, or seal it only with a product compatible with your paint and fabric. Avoid soaking the umbrella immediately after decorating. Your umbrella has just had a makeover; give it a moment before sending it into battle against a thunderstorm.
Best Materials for Decorating an Umbrella
Fabric Paint
Fabric paint is one of the best choices for cloth umbrellas because it is designed to stay flexible. It works well for hand-painted designs, lettering, stencils, and kids’ crafts. Choose a weather-resistant or outdoor formula when possible.
Outdoor Fabric Spray Paint
Outdoor fabric spray paint is useful for patio umbrellas, faded canopies, and large color blocks. Apply several light coats instead of one heavy coat. Spray outdoors or in a very well-ventilated area, protect nearby surfaces, and allow proper drying time between coats.
Paint Markers
Paint markers are ideal for drawing on umbrellas because they offer control. Use them for outlines, lettering, dots, small illustrations, or decorative borders. Waterproof gloss paint markers work especially well on slick materials.
Permanent Vinyl
Permanent vinyl creates clean graphics, monograms, and names. It works best on smooth umbrellas, especially clear plastic ones. Vinyl may not stick well to heavily textured, coated, or flexible fabric, so test before committing to a full design.
Acrylic Paint with Fabric Medium
Plain acrylic paint can become stiff on fabric, but fabric medium improves flexibility. Mix according to the medium instructions. This option is useful if you already own acrylic paint and want more color variety.
Common Mistakes to Avoid
- Skipping the cleaning step: Dirt and oils can prevent paint or vinyl from sticking.
- Using thick paint layers: Heavy paint can crack when the umbrella folds.
- Not testing materials: Some coatings repel paint, markers, or vinyl.
- Painting over wet fabric: Moisture can cause poor adhesion and uneven color.
- Decorating across ribs carelessly: Ribs create bumps that make details harder to paint.
- Closing the umbrella too soon: Wet paint may transfer, smear, or glue panels together.
- Adding heavy embellishments: Too much decoration can affect how the umbrella opens.
Creative Umbrella Decorating Ideas
For Kids
Kids love umbrella decorating because the canvas is big, unusual, and slightly magical. Try foam sticker resist shapes, large polka dots, rainbows, handprints, animals, or clouds. Use washable planning marks and supervise paint pens, scissors, and glue. A child’s decorated umbrella may not look like it belongs in a museum, but it will probably have more personality than anything in the museum gift shop.
For Gifts
A decorated umbrella makes a thoughtful gift because it is both personal and useful. Add someone’s initials, favorite flowers, pet silhouette, favorite quote, or birthday colors. For a teacher, decorate with apples, books, or cheerful raindrops. For a friend, add inside jokesjust make sure they are jokes the friend wants displayed in public during a drizzle.
For Weddings and Events
White umbrellas are popular for weddings, engagement photos, bridal showers, baby showers, garden parties, and outdoor ceremonies. Use subtle vinyl lettering, lace trim, pearl-like accents, or painted florals. Keep the design elegant and water-resistant. A wedding umbrella should say “romantic,” not “craft table accident at 2 a.m.”
For Patio Umbrellas
Large patio umbrellas can be revived with outdoor fabric paint, stencils, stripes, or a border pattern. Clean the canopy thoroughly, paint in thin coats, and let it dry completely. A faded patio umbrella can often look dramatically fresher with a color refresh, especially if the frame is still sturdy.
How to Care for a Decorated Umbrella
Once your umbrella is decorated, treat it gently. Shake off rain after each use and let it dry open before storing. Wipe dirt with a damp cloth instead of scrubbing aggressively. Avoid harsh cleaners unless your paint and fabric can handle them. Store the umbrella away from extreme heat, direct sun, and damp corners where mildew likes to throw tiny parties.
If your design includes vinyl, check the edges occasionally. Press down any lifting corners before they collect dirt. If your design is painted, touch up small chips with the same paint. For patio umbrellas, consider reapplying fabric protection if cleaning or painting changes the water resistance of the canopy.
Personal Experience: What Decorating an Umbrella Actually Feels Like
The first time I decorated an umbrella, I made the classic beginner mistake: I thought confidence could replace preparation. I had a plain black umbrella, a silver paint marker, and the kind of optimism usually seen in people assembling furniture without reading the manual. My plan was to draw tiny stars across the inside canopy so it would look like a private night sky whenever it rained. Very poetic. Very dreamy. Very quickly humbling.
I opened the umbrella on the floor, started drawing, and discovered that umbrella panels are not flat. They dip, stretch, curve, and bounce. The marker skipped over the seams, the stars looked more like startled insects, and one panel somehow collected twice as many dots as the others. But after I slowed down, the project improved. I learned to work one panel at a time, rotate the umbrella instead of twisting my wrist into a pretzel, and use the ribs as natural borders. By the end, the design looked charming in a handmade way. Not perfect, but definitely lovable.
Another useful lesson came from painting a white umbrella with a simple floral border. I used fabric paint and a small brush, planning to create delicate vines around the lower edge. The first flowers were too thick, and when the umbrella dried, those spots felt stiff. On the next section, I thinned the paint slightly and used two light coats instead of one heavy blob. The difference was huge. The lighter flowers looked cleaner, dried softer, and moved better when the umbrella closed. That project taught me that umbrella decorating rewards restraint. Thin layers are your friend. Thick paint is the villain with a dramatic cape.
Vinyl was a different adventure. I tried applying white permanent vinyl letters to a clear umbrella, and the result looked surprisingly professional. The trick was cleaning the surface well and pressing slowly from the center outward. The curved plastic made the transfer a little fiddly, but using smaller sections helped. Large decals wanted to wrinkle, while smaller words and icons behaved much better. If you are nervous about painting, vinyl is a great option because the edges look crisp and you do not need a steady hand worthy of a brain surgeon.
For kids’ umbrella decorating, my favorite method is stencil and sponge painting. Children can get bold results without needing precise brush control. Foam stickers also work nicely as temporary resist shapes: stick them onto the umbrella, dab fabric paint around them, then remove them after the paint begins to dry. The reveal feels like magic. Just cover the work area generously because children interpret “small amount of paint” as “volcano science experiment.”
The biggest experience-based tip is this: decorate for how the umbrella will actually be used. A photo prop can be more delicate. A daily rain umbrella needs flexible, durable materials. A patio umbrella needs outdoor-rated paint and patient drying time. A child’s umbrella should prioritize fun over perfection. A wedding umbrella should be simple enough to photograph beautifully from a distance. When you match the technique to the purpose, the finished umbrella looks better and lasts longer.
Decorating an umbrella is also more satisfying than it should be. There is something wonderfully rebellious about customizing an object usually treated as disposable or boring. A painted umbrella says, “Yes, the sky is leaking, but I came prepared with style.” It turns a gray day into a chance to show off color, humor, or creativity. And if a few lines wobble or a stencil smudges, that is part of the charm. Rainy days are already messy. Your umbrella is allowed to have a little personality.
Conclusion
Learning how to decorate an umbrella is a simple, creative project that can transform a basic rainy-day tool into something personal, practical, and fun. The best results come from choosing the right umbrella, cleaning the canopy, planning your layout, testing materials, applying thin layers, and giving paint or vinyl enough time to cure. Fabric paint, outdoor fabric spray paint, waterproof paint markers, and permanent vinyl all have their place, depending on whether you want hand-painted charm, bold color, crisp lettering, or an event-ready design.
Most importantly, do not overthink it. Your umbrella does not need to be flawless to be fabulous. Start with a simple idea, use materials that match the surface, and let your creativity have a little weatherproof fun. The next time clouds roll in, you will not just be ready for rainyou will be ready for compliments.