
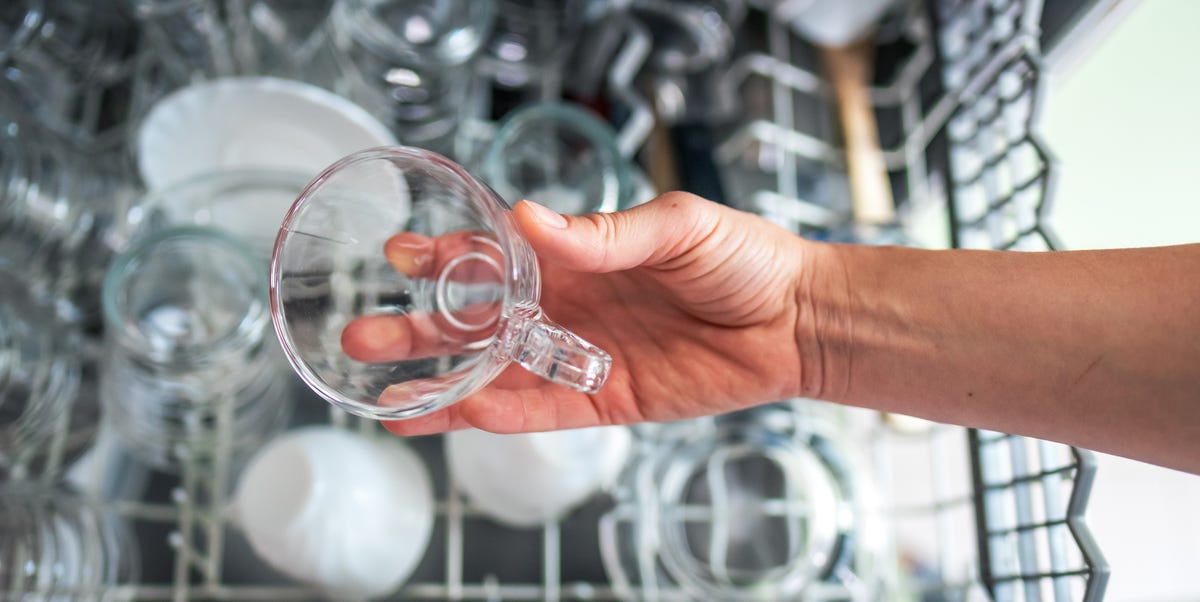
You open the dishwasher expecting warm, sparkling dishes. Instead, you find dripping coffee mugs, damp bowls, and plastic containers holding enough water to start a very small aquarium.
Fortunately, wet dishes after a dishwasher cycle do not always mean the appliance is broken. Drying performance depends on the selected cycle, rinse aid, water temperature, loading technique, dish material, ventilation, and the dishwasher’s drying design. A few small adjustments can often produce noticeably drier dishes without requiring a repair appointment or an enthusiastic session with a dish towel.
This guide explains how to get your dishwasher to dry dishes more effectively, why plastics remain wet, which settings matter, and when poor drying may indicate a mechanical problem.
Why Is Your Dishwasher Not Drying Dishes?
Dishwashers do not all dry dishes in the same way. Understanding your machine’s drying system makes troubleshooting much easier.
Heated drying
Traditional heated-dry systems use an electric heating element to raise the temperature inside the tub after the final rinse. The additional heat encourages moisture to evaporate. This method can dry ceramic, glass, and metal effectively, but it consumes more energy and may not be appropriate for delicate plastics.
Condensation drying
Many modern energy-efficient dishwashers use condensation drying. During the hot final rinse, dishes absorb heat. Moisture then evaporates from the dishes and condenses on the cooler stainless-steel walls of the dishwasher before draining away.
This system can work very well on glass, ceramic, and stainless steel. Plastic is more troublesome because it does not retain heat as effectively. When everything else is dry but the food-storage lids still look as though they were caught in a rainstorm, condensation drying is often functioning normally rather than failing.
Fan-assisted or automatic-door drying
Some dishwashers circulate air with a fan, while others automatically open the door near the end of the cycle. Both designs help humid air escape instead of remaining trapped around the dishes. Certain models combine heated rinsing, fans, minerals, or automatic ventilation for better results on hard-to-dry items.
1. Fill the Rinse Aid Dispenser
The most effective first step is also one of the simplest: use liquid rinse aid.
Rinse aid reduces the surface tension of water. Instead of forming stubborn droplets that cling to plates and glasses, water spreads into a thinner sheet and slides away. Less water remaining on the surface means faster drying, fewer spots, and fewer mysterious puddles hiding under the rims of bowls.
Check the dispenser near the detergent compartment. Fill it according to the dishwasher manual, close the cap securely, and adjust the dispensing level if your model allows it. Increase the setting gradually when dishes remain wet or heavily spotted. Reduce it if glassware develops rainbow-like streaks or a slippery film.
Detergent tablets labeled “all in one” may contain rinse-aid ingredients, but manufacturers often still recommend filling the dishwasher’s separate rinse-aid reservoir for consistent drying. Major dishwasher brands and independent testing organizations identify rinse aid as one of the most important tools for improving drying performance.
2. Select a Cycle That Includes Adequate Drying
Quick, express, eco, and rinse-only cycles may reduce temperature, shorten the drying stage, or skip heated drying entirely. That saves energy and time, but it can leave more moisture behind.
When you need dishes ready to put away immediately, choose a normal, auto, heavy, or pots-and-pans cycle and activate an option such as:
- Heated Dry
- Extended Dry
- Extra Dry
- High-Temperature Rinse
- Dry Boost
- Power Dry
- ProDry or Fan Dry
Names vary by manufacturer, so consult the control panel or owner’s manual. On some machines, pressing the drying button once selects standard heated drying and pressing it again selects a longer drying option.
Extended drying is especially useful for loads containing plastic containers, silicone utensils, deep bowls, and insulated cups. However, check that each item is dishwasher-safe before exposing it to additional heat. Thin plastics, wooden utensils, adhesive labels, and delicate finishes may warp or deteriorate.
3. Start With Hot Water
A hot final rinse helps dishes store enough heat to evaporate moisture. If the dishwasher initially fills with cold water from the supply line, cleaning and drying may be less effective, particularly on shorter cycles.
Before starting the dishwasher, run the kitchen faucet until the water becomes hot. This clears cooled water from the plumbing line so the appliance begins with a warmer supply. Thirty to sixty seconds is usually sufficient.
Many manufacturers recommend a household hot-water supply near 120 degrees Fahrenheit for effective cleaning and drying. Do not raise the water-heater temperature carelessly, especially in homes with children or older adults, because excessively hot water can cause burns. Follow the dishwasher manual and local safety recommendations.
Some newer machines heat incoming water internally and may require less preparation, but running the faucet remains a useful test when drying suddenly becomes disappointing.
4. Load Dishes So Water Can Drain
A dishwasher can remove food, but it cannot negotiate with gravity on your behalf. If a cup has a flat or concave base facing upward, water will collect there regardless of how advanced the drying system may be.
Angle cups, bowls, and containers so water runs toward the tub. Avoid placing items perfectly horizontal when a slight tilt is possible. Keep dishes separated rather than allowing them to touch or overlap.
Better loading habits
- Face dirty surfaces toward the center and spray arms.
- Angle bowls downward instead of stacking them vertically.
- Place cups between rack tines, not directly over them.
- Keep tall pans from blocking spray-arm rotation.
- Avoid nesting spoons tightly together.
- Leave small gaps around plates and storage containers.
- Secure lightweight plastics so they cannot flip over and fill with water.
Overloading restricts both water circulation and airflow. A tightly packed dishwasher may appear efficient, but adding one last cereal bowl can turn the rack into a ceramic traffic jam. Two properly loaded cycles can perform better than one overloaded cycle followed by twenty minutes of hand drying.
5. Put Plastics in the Right Place
Plastic cools quickly and does not retain heat as well as glass, ceramic, or metal. As a result, water evaporates more slowly from plastic surfaces.
Place dishwasher-safe plastics on the upper rack unless the manual specifically states otherwise. The top rack generally keeps lightweight items farther from an exposed heating element. Angle food-storage containers and lids sharply enough for water to escape, and avoid creating flat surfaces that act like tiny swimming pools.
For plastic-heavy loads, use rinse aid and an extended-dry option. If your dishwasher has a specialized drying feature for plastics, activate it. Even then, a few droplets may remain in recessed handles, lid channels, and concave bottoms. That is often a limitation of the item’s shape and material rather than a dishwasher defect.
6. Open the Door After the Cycle
When the cycle finishes, humid air may remain trapped inside the tub. Opening the door a few inches allows steam to escape and cooler, drier room air to enter.
Wait until the cycle has completely ended before opening the door. Some dishwashers pause temporarily during operation, and opening them too early can interrupt the final rinse or drying phase.
After the completion indicator appears, crack the door and leave the dishes inside for approximately 15 to 30 minutes. This low-energy method can significantly improve results, particularly with condensation-drying machines.
Automatic-door-opening dishwashers perform this step for you. If your model has an Open Dry, AutoRelease, or similar feature, make sure it is enabled in the settings.
7. Unload the Bottom Rack First
Always unload the lower rack before the upper rack. Cups, mugs, and plastic containers on top frequently retain small puddles. Pulling out the upper rack first can dump that water onto the dry plates below.
The dishwasher may have dried the lower rack perfectly, only for you to recreate a rain shower during unloading. Bottom first, top second, and the silverware basket whenever it is convenient.
8. Clean the Filter, Spray Arms, and Interior
Poor drying can begin with poor rinsing or drainage. If dirty water cannot circulate and drain correctly, more moisture and residue may remain after the cycle.
Remove and clean the dishwasher filter according to the owner’s manual. Rinse away food particles, grease, labels, and mineral deposits with warm water and a soft brush. Check the spray-arm openings for seeds or debris, and confirm that each arm rotates freely.
Inspect the bottom of the tub after a cycle. A small amount of water in the sump area may be normal, but standing water covering the floor of the dishwasher suggests a drainage problem. Possible causes include a blocked filter, clogged air gap, obstructed drain hose, or an issue at the garbage disposal connection.
Clean only the components identified as user-serviceable in the manual. Do not pour ordinary liquid dish soap into the machine; it can generate enough foam to make the kitchen look like a low-budget bubble festival.
9. Use the Correct Detergent Amount
Too little detergent may leave grease and film that hold moisture. Too much detergent can leave residue, especially when combined with soft water or a lightly soiled load.
Use automatic-dishwasher detergent rather than hand-washing liquid. Store powder and tablets in a dry location because moisture can cause them to clump or lose effectiveness. Match the amount to the load, water hardness, and manufacturer instructions.
Hard water can produce mineral spots that resemble incomplete drying. Rinse aid helps, but severe buildup may require adjusting the dishwasher’s water-hardness setting, using an approved dishwasher cleaner, or addressing the home’s water quality.
Avoid pouring vinegar into the rinse-aid dispenser unless the appliance manufacturer explicitly permits it. Repeated exposure to concentrated acid may damage rubber seals or dispenser components.
10. Check Whether the Dishwasher Is Actually Heating
At the end of a heated cycle, ceramic plates and metal utensils should normally feel warm. If every item is cold and dripping wet, the drying stage may not have operated.
First, confirm that the selected cycle included drying and that the cycle completed without an error code. Check whether the door was opened early or the machine lost power. On models without a display, blinking lights may indicate an interrupted cycle or fault.
If the cycle completed but the interior remains cold, possible problems include:
- A failed heating element
- A faulty high-limit thermostat
- A defective drying fan
- A blocked or malfunctioning vent
- A damaged temperature sensor
- A control-board or wiring problem
Do not touch, disconnect, or test electrical components unless you are qualified to do so. Dishwasher repairs may involve household voltage, sharp metal edges, hot surfaces, and water connections. A trained appliance technician can safely test the heater, thermostat, fan, and control system.
Match the Symptom to the Likely Solution
Glass and ceramic are dry, but plastics are wet
This is commonly related to the low heat retention of plastic. Use rinse aid, angle the items, place them on the upper rack, and select extended drying.
Everything is wet but warm
The dishwasher is probably generating heat, but moisture may be trapped. Check the rinse-aid level, improve spacing, use a longer drying option, and open the door after completion.
Everything is wet and cold
Verify the cycle settings and look for error indicators. If a heated cycle completed normally but no warmth is present, arrange professional diagnosis.
Dishes have spots or cloudy film
Increase rinse aid slightly, check detergent quantity, and investigate hard water. Confirm that the dispenser opens and that the rinse-aid cap is installed properly.
Water collects on cup bottoms
Change the loading angle. Heated dry cannot remove a deep puddle from a concave surface as effectively as it removes a thin film of moisture.
Standing water remains in the dishwasher
Clean the filter and inspect accessible drainage areas. Persistent standing water points to a drainage issue rather than an ordinary drying limitation.
An Energy-Saving Drying Strategy
You do not have to select maximum heat for every load. For everyday plates and glasses, try using rinse aid with an air-dry or no-heat setting, then open the door after the cycle. ENERGY STAR recommends rinse agent as a way to support effective drying while using a no-heat option.
Reserve heated or extended drying for loads that must be put away quickly or contain many plastics. This approach balances convenience and energy use without condemning you to towel-dry every spoon.
Real-World Experience: A Seven-Load Drying Experiment
The following representative household experiment illustrates how several small changes can transform dishwasher drying performance. The dishwasher in this scenario was a modern stainless-steel model using condensation drying. It cleaned well, but the owner regularly found water on mugs, mixing bowls, and plastic food-storage containers.
Load one: The overloaded baseline
The first load was packed tightly after dinner. Plates touched, two bowls overlapped, and several plastic lids rested almost flat on the upper rack. The normal cycle ran without rinse aid or an extra-dry option.
The results were predictable. Ceramic plates were mostly dry, but water remained between touching dishes. Every plastic lid had droplets, and a mug with a recessed base held a small puddle. This load demonstrated that the machine could produce heat, but the loading arrangement prevented water from draining.
Load two: Better spacing
For the second load, one large bowl was washed separately, leaving more room between dishes. Cups were tilted, lids were placed vertically between rack supports, and spray-arm clearance was checked before closing the door.
Drying improved immediately. The plates and glasses were dry, while plastics remained slightly damp. Better loading solved the trapped-water problem, but it did not change the physical reality that plastic releases heat quickly.
Load three: Adding rinse aid
The empty rinse-aid reservoir was filled and set to a middle dispensing level. The same normal cycle and similar load were used.
After the cycle, the glassware had fewer visible droplets and almost no spotting. Plastic containers still retained moisture in their recessed rims, but broad plastic surfaces were noticeably drier. Rinse aid did not perform magic; it simply gave water fewer opportunities to cling.
Load four: Hot start and extended drying
Before the fourth cycle, the kitchen faucet ran until hot. The extended-dry option was selected, and the door remained closed until the completion light appeared.
This produced the best immediate result. Plates, bowls, utensils, and glasses were ready for the cabinet. Most plastics were dry except for narrow channels around two container lids. The trade-off was a longer cycle and additional energy use.
Load five: Air drying without extra heat
For comparison, the fifth load used the normal cycle without extended drying. As soon as the machine finished, the door was opened approximately three inches and left that way for 25 minutes.
The final result was nearly as good as extended drying for glass and ceramic. Plastics retained a few droplets, but far less than during the baseline load. This became the preferred everyday routine because it required no towel and used less heating time.
Load six: Maintenance day
Before the sixth load, the filter was removed. A thin layer of grease and several food fragments were found beneath it. The filter was washed, the spray-arm holes were checked, and the door gasket was wiped clean.
The drying improvement was modest, but drainage was faster and the interior smelled fresher. Maintenance did not replace rinse aid or proper loading, yet it helped the entire wash-and-dry process operate as intended.
Load seven: The final routine
The successful routine combined all the practical lessons: fill the rinse-aid dispenser, space dishes properly, angle anything that can hold water, run the faucet until hot, choose normal rather than quick wash, open the door after completion, and unload the lower rack first.
The household still found an occasional droplet inside a plastic lid, because no dishwasher can repeal the laws of thermodynamics. However, the need for manual towel drying dropped from nearly every load to only a few oddly shaped items.
The larger lesson is that dishwasher drying rarely depends on one dramatic fix. It is usually the product of several ordinary details working together. Rinse aid improves sheeting, heat encourages evaporation, spacing supports circulation, proper angles prevent puddles, and ventilation releases humidity. When those elements cooperate, the dishwasher finally completes both halves of its job: washing and drying.
Conclusion
To get your dishwasher to dry dishes more effectively, begin with rinse aid, a suitable drying cycle, and better loading. Angle cups and containers so water can drain, avoid overcrowding, start with hot water when recommended, and open the door after the cycle to release humid air.
Remember that plastics naturally dry more slowly than ceramic, glass, and metal. A few droplets on a plastic lid do not necessarily mean something is wrong. However, completely cold and wet dishes after a heated cycle, persistent standing water, error codes, or a nonworking fan may justify professional service.
With the correct settings and a little maintenance, your dishwasher can produce dishes that are clean, dry, and ready for the cabinetrather than clean, wet, and waiting for you with a towel.
Note: Turn off electrical power and the water supply before attempting any repair that goes beyond routine filter cleaning or loading adjustments. Consult the owner’s manual or a qualified appliance technician when heating, wiring, drainage, or control components may be defective.












