
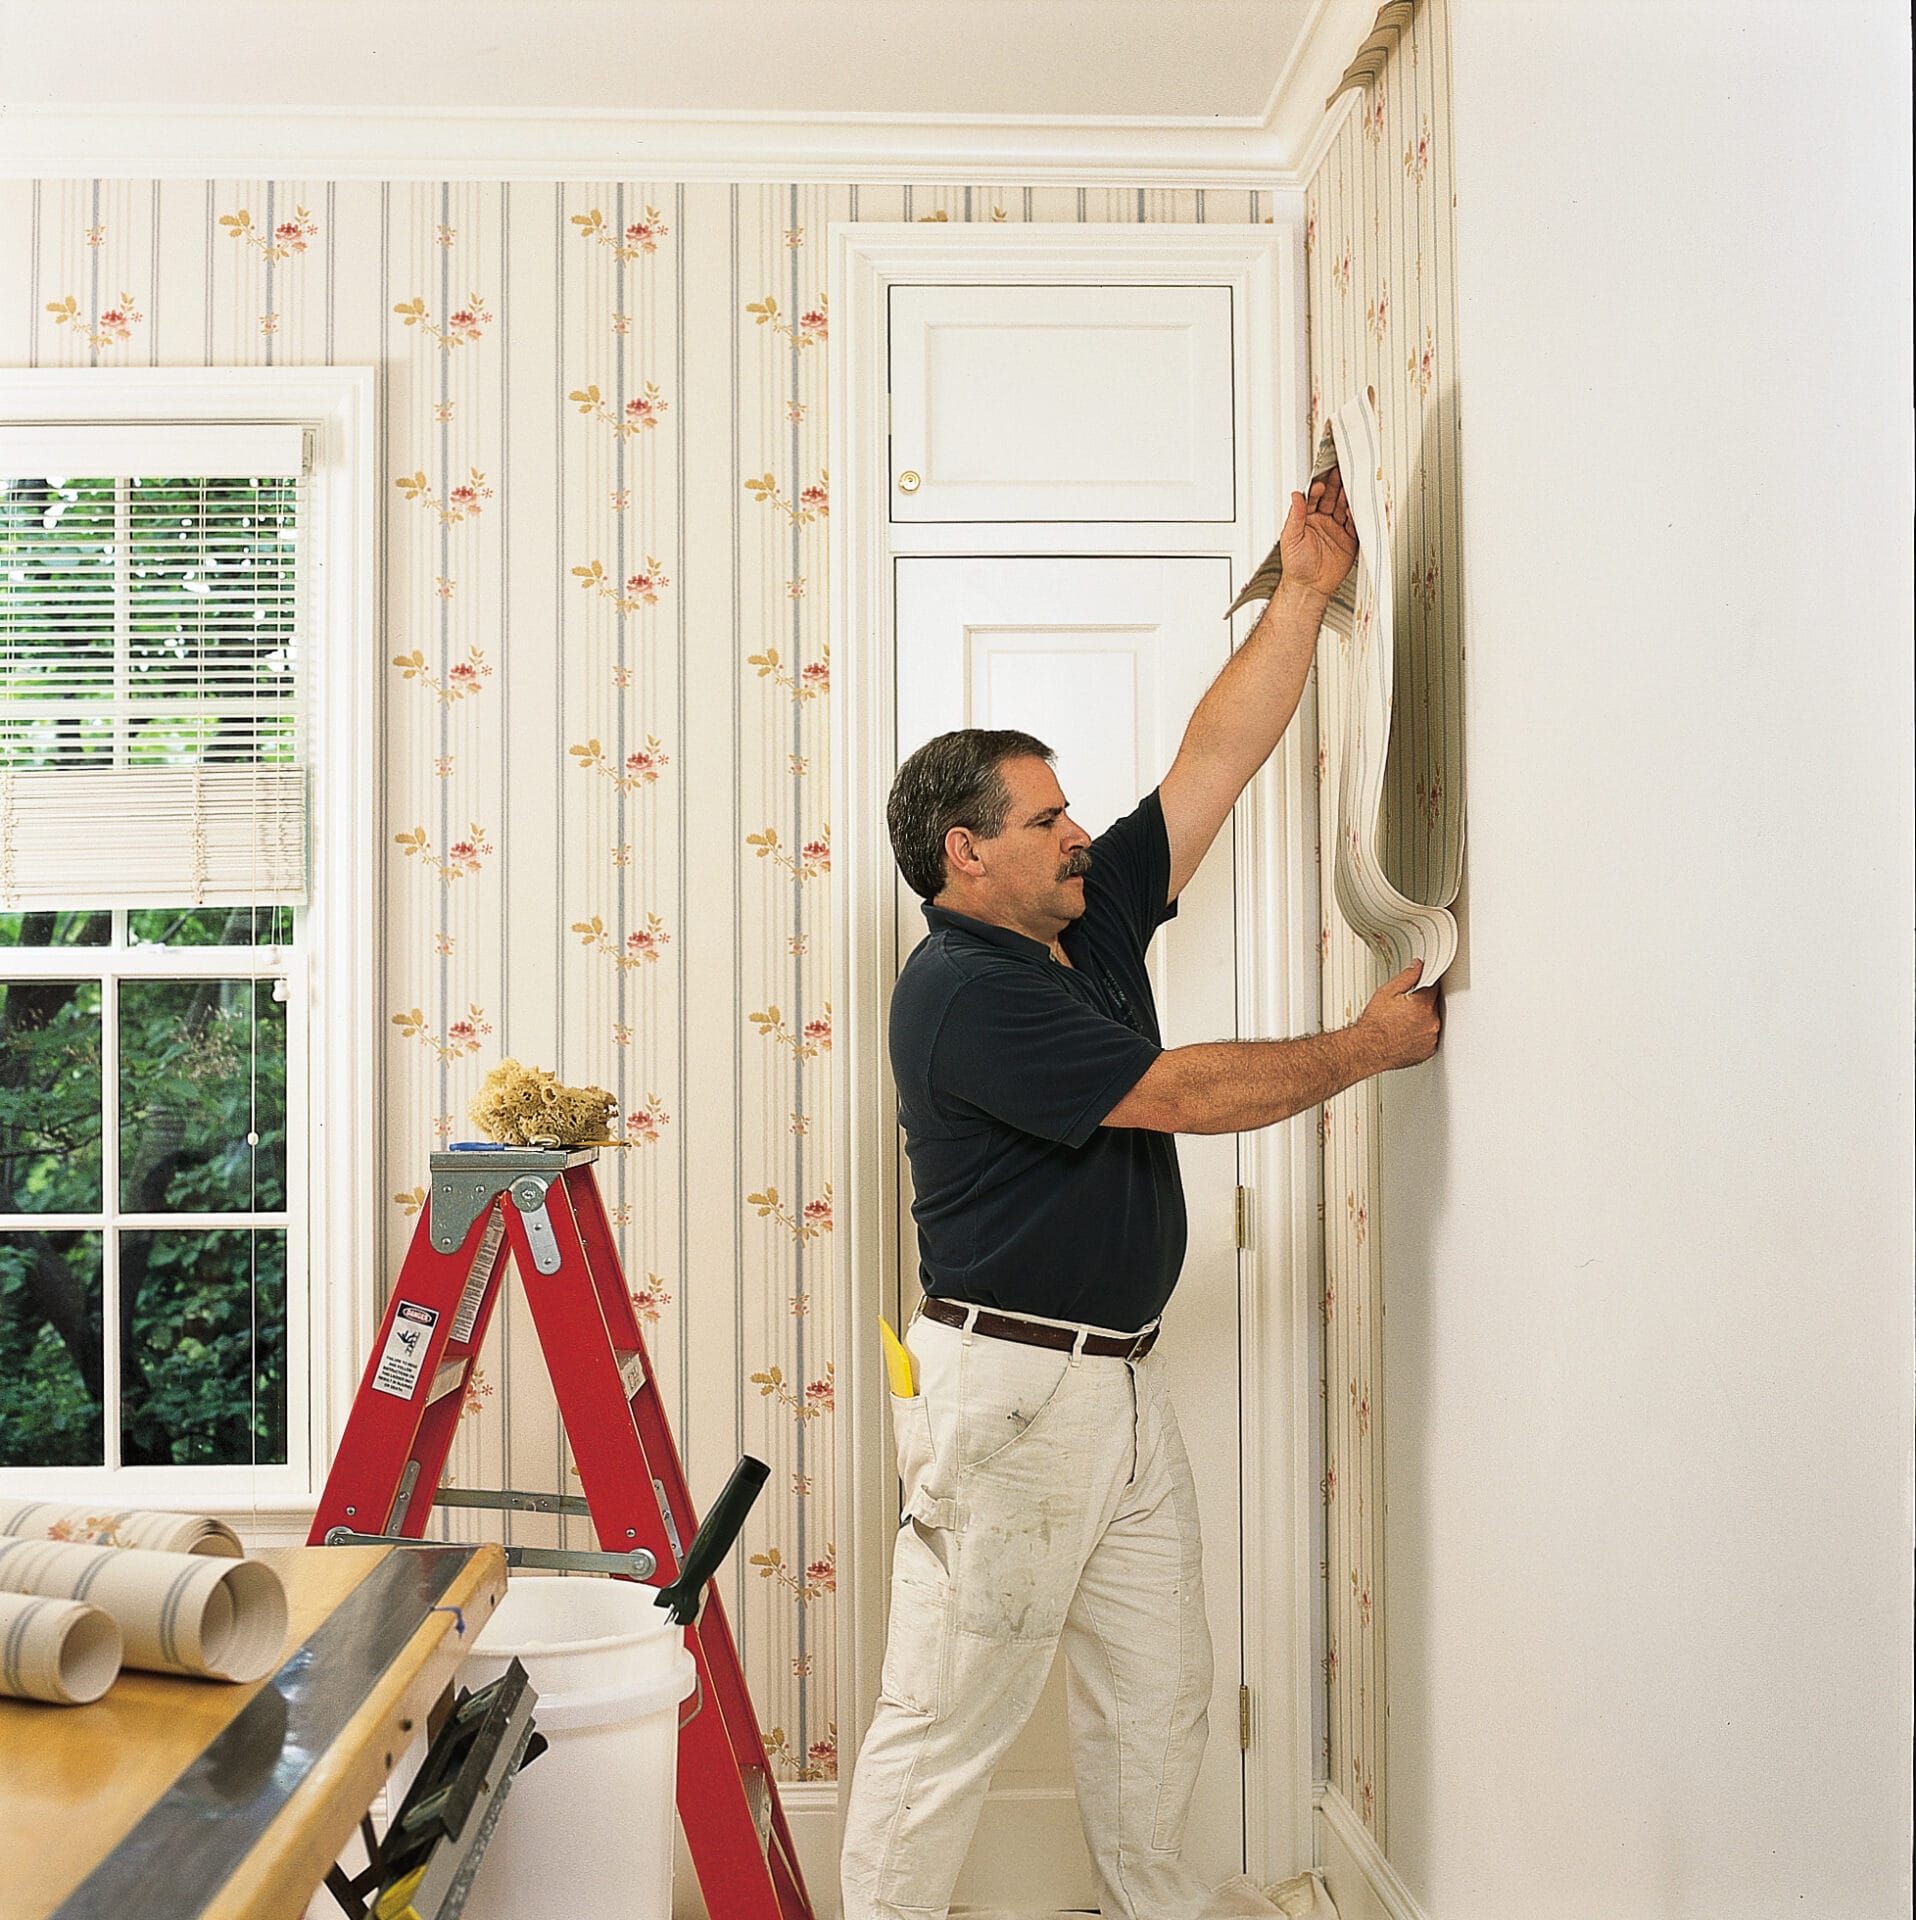
Wallpaper is one of the fastest ways to give a room personality without buying new furniture, moving walls, or pretending that “minimalism” means you forgot to decorate. Whether you want a dramatic floral accent wall, a soft grasscloth texture, a cheerful powder room, or a classic print that makes your dining room feel like it owns a library card, learning how to hang wallpaper can turn a plain wall into a design moment.
The good news: wallpaper installation is absolutely doable for a careful DIYer. The slightly less glamorous news: it rewards patience more than speed. A beautiful wallpaper job depends on straight lines, clean walls, sharp blades, good planning, and the emotional strength to measure twice when your brain is yelling, “Close enough!”
This guide walks you through how to hang wallpaper in 8 steps, including wall prep, measuring, cutting, pasting, booking, smoothing, trimming, matching seams, and fixing common mistakes. The process applies mainly to traditional pasted, prepasted, and paste-the-wall wallpaper, with notes for peel-and-stick wallpaper where the method differs. By the end, you will know how to wallpaper a wall with confidenceand maybe only a tiny amount of dramatic sighing.
Before You Start: Choose the Right Wallpaper for the Room
Not all wallpaper behaves the same. Vinyl and vinyl-coated wallpaper are popular choices because they are durable and easier to clean, making them practical for busy areas such as kitchens, bathrooms, hallways, and kids’ rooms. Nonwoven wallpaper is often easier to handle and remove later. Grasscloth, foil, flocked, and other specialty wallcoverings can look stunning, but they are less forgiving and may be better left to experienced installers, especially in rooms with lots of corners, outlets, or moisture.
Peel-and-stick wallpaper is renter-friendly and avoids paste, water trays, and messy work tables. However, it can still be tricky because the adhesive grabs quickly, bubbles can form, and large sheets may stretch if pulled too hard. Traditional wallpaper gives you more time to slide, align, and correct panels before the adhesive sets.
Always read the manufacturer’s instructions before opening the paste or peeling the backing. Wallpaper is a little like pasta: the basic idea is simple, but the timing matters.
Tools and Materials You Will Need
Gathering tools first makes wallpaper installation smoother and keeps you from discovering, halfway up a ladder, that your only “smoothing tool” is a credit card and optimism.
Essential Wallpaper Tools
- Wallpaper rolls from the same dye lot or batch number
- Tape measure
- Level or plumb line
- Pencil
- Sharp utility knife with extra blades
- Straightedge or broad putty knife
- Wallpaper smoother or smoothing brush
- Seam roller
- Sponge and clean water
- Drop cloth
- Step ladder
- Wallpaper primer or sizing
- Wallpaper paste and roller or brush, if using unpasted wallpaper
- Water tray or spray bottle, if using prepasted wallpaper
Extra blades are not optional. A dull knife tears wet wallpaper, chews edges, and turns a neat trim line into something that looks like a raccoon helped. Change blades often, especially when cutting around trim, outlets, and corners.
Step 1: Measure the Room and Plan the Layout
Start by measuring the height and width of each wall. Multiply height by width to estimate square footage, then compare that number with the usable coverage listed on the wallpaper label. Do not subtract for windows and doors unless they are unusually large. Wallpaper patterns require matching, trimming, and waste, so plan to buy extra.
Check that every roll has the same dye lot or batch number. Even when the pattern is identical, different batches can have slight color variations. On the wall, those tiny differences can suddenly look very obviouslike one panel spent a week at the beach and the others stayed home.
Next, decide where the first strip should go. For a full room, begin in the least noticeable corner, such as behind a door. For an accent wall, many installers start at the center so the pattern looks balanced. Large-scale prints, murals, and geometric wallpaper need especially careful planning because a crooked or off-center first panel can throw off the entire wall.
Pro Layout Tip
Dry-fit the first few strips on the floor before applying paste. This helps you see how the pattern repeats and where the design will land around windows, doors, and corners. If the wallpaper has a bold motif, try to avoid cutting the main design awkwardly at the ceiling or leaving a tiny sliver near a corner.
Step 2: Prepare the Walls Like a Perfectionist
Wall prep is the difference between wallpaper that looks professionally installed and wallpaper that whispers, “We made choices.” Remove old wallpaper, nails, screws, switch plates, outlet covers, dust, grease, and flaking paint. Turn off power before working around electrical outlets and switches.
Patch holes and dents with spackle or joint compound, let repairs dry, then sand them smooth. Wallpaper hides some minor color variation, but it does not hide bumps, ridges, crumbs, paint drips, or mystery wall texture from 1997. If the surface feels rough under your hand, it will likely show under the paper.
After sanding, wipe the walls with a damp sponge or microfiber cloth and allow them to dry fully. If the wall has heavy texture, consider using a wallpaper liner or skim coating the surface. Hanging wallpaper over orange peel, knockdown, or rough plaster can cause poor adhesion and visible texture through the paper.
Why Primer Matters
Use a wallpaper primer or sizing before installation. Primer helps seal porous surfaces, improves adhesion, gives the wallpaper a little “slip” for positioning, and makes future removal easier. New drywall, patched areas, glossy paint, and older walls benefit from the correct primer. If the wall was freshly painted, follow the wallpaper manufacturer’s waiting period before installing; many products require paint to cure before wallpaper goes up.
Step 3: Draw a Straight Plumb Line
Walls, ceilings, and corners are rarely perfectly straight. That is why your first strip should not simply follow the corner. Instead, use a level or plumb line to draw a vertical guideline.
Measure out from your starting corner the width of the wallpaper minus about half an inch to one inch. This allows the first strip to wrap slightly into the corner rather than leaving a gap. Mark the spot near the ceiling, middle, and baseboard, then connect those marks with a straight vertical pencil line.
This plumb line is your best friend. It keeps the first strip straight, and every other strip depends on it. If the first panel leans, the pattern may march diagonally across the room like it has somewhere urgent to be.
Step 4: Measure and Cut the First Wallpaper Strip
Measure from ceiling to baseboard, then add 2 to 4 inches of extra length. This gives you room to trim neatly at the top and bottom. Roll the wallpaper out on a clean work surface, pattern side up, and cut the first strip with a sharp utility knife and straightedge.
For plain wallpaper, the next strips can usually be cut to the same length. For patterned wallpaper, match the repeat before cutting each new panel. Lay strips side by side to make sure the design lines up correctly. Label the back of each strip lightly with a pencil so you know the hanging order.
Do not rush this part. Pattern matching is where wallpaper earns its reputation. A floral mismatch may look like the wall sneezed. A geometric mismatch can look like a math problem with commitment issues.
Step 5: Apply Paste, Activate Adhesive, or Peel the Backing
The next step depends on the type of wallpaper you are using.
For Unpasted Wallpaper
Place the strip face down on a clean table. Use a roller or paste brush to apply an even coat of wallpaper adhesive from the center outward, making sure the edges are fully covered. Dry edges cause lifting seams, which are extremely good at annoying you later.
For Prepasted Wallpaper
Activate the adhesive according to the product directions. Some prepasted wallpaper is dipped in a water tray, while other products can be sprayed evenly with clean water. Make sure the entire back is wet, especially the edges.
For Peel-and-Stick Wallpaper
Do not remove all the backing at once. Peel down only 12 to 24 inches from the top, position the panel, then gradually remove more backing as you smooth the wallpaper down the wall. This reduces bubbles, wrinkles, stretching, and the classic DIY moment known as “it stuck to itself.”
Step 6: Book the Wallpaper When Required
Booking means folding pasted wallpaper onto itself, adhesive side to adhesive side, without creasing the paper. Usually, you fold the top end toward the middle and the bottom end toward the middle, then let it rest for the amount of time recommended by the manufacturer.
Booking allows the adhesive to activate evenly and lets the wallpaper relax. This helps prevent bubbles, wrinkles, and expansion after the strip is on the wall. Not every wallpaper requires booking, so check the label. If the instructions say to book it, book it. Wallpaper is not the place to freestyle like you are on a cooking show.
While the paper books, clean paste from your table and prepare the wall area. Keep your sponge nearby, but do not soak the front of the wallpaper. Too much water can damage delicate surfaces or weaken the adhesive.
Step 7: Hang, Smooth, and Trim the First Strip
Carry the booked strip to the wall carefully. Unfold the top half and position it against the wall, leaving a little excess at the ceiling. Align one edge with your plumb line. Gently press the top section into place, then unfold the bottom half and continue smoothing downward.
Use a wallpaper smoother or brush to remove air bubbles. Work from the center outward and from top to bottom. Be firm, but do not bully the paper. Stretching wallpaper can distort the pattern and create gaps when it dries.
Once the panel is smooth, trim the excess at the ceiling and baseboard. Hold a broad putty knife or straightedge firmly into the corner as a guide, then cut with a sharp utility knife held at a low angle. Wipe away paste residue with a clean damp sponge before it dries.
Cutting Around Outlets and Switches
Make sure power is off. Hang the paper over the outlet or switch area, then carefully cut an X or small opening where the box is located. Trim only enough paper so the cover plate hides the edges. Reinstall plates after the wallpaper has had time to dry.
Step 8: Match Seams and Continue Around the Room
Hang the second strip next to the first, matching the pattern carefully. Most wallpaper is installed edge-to-edge, not overlapped, unless the manufacturer says otherwise. Align the design at eye level first, then smooth upward and downward. This keeps the most visible area looking crisp.
Use a seam roller lightly to set seams, but avoid pressing too hard. Over-rolling can squeeze out too much adhesive or flatten textured wallpaper. Wipe away paste from seams with a damp sponge. Continue panel by panel, checking your alignment with a level as you go.
When turning a corner, do not force a full-width strip around it. Corners are often uneven, and wrapping a full sheet can cause wrinkles and crooked seams. Instead, trim the strip so it wraps slightly around the corner, then start the next wall with a new plumb line.
Common Wallpaper Mistakes and How to Avoid Them
Skipping Wall Prep
Dirty, glossy, bumpy, or unprimed walls can cause bubbles, poor adhesion, stains, or difficult removal later. Prep may not be glamorous, but neither is redoing a wall because one dusty patch refused to cooperate.
Using a Dull Blade
A sharp blade creates clean edges. A dull blade drags, tears, and makes trim lines look ragged. Change the blade often, especially after cutting through pasted paper.
Ignoring the Pattern Repeat
Pattern repeat affects how much wallpaper you need and how each strip should be cut. Before cutting several panels, confirm the repeat and match the design carefully.
Pressing Too Hard on Seams
Seams should be flat, not crushed. Gentle pressure is usually enough. If paste squeezes out, wipe it away immediately with clean water.
Installing in a Damp Room Without Planning
Bathrooms and laundry rooms need good ventilation and the right wallpaper type. Avoid installing wallpaper where water will splash constantly unless the product is designed for that use.
How Long Does Wallpaper Take to Dry?
Most wallpaper needs at least 24 hours to dry, but humidity, wall condition, adhesive type, and room temperature can change the drying time. Keep the room well ventilated, but avoid strong drafts, blasting heat, or direct airflow that dries one area too quickly. Let the adhesive cure naturally so seams stay tight and the paper dries evenly.
Should You DIY or Hire a Professional?
DIY wallpaper installation is a great project for an accent wall, small powder room, simple pattern, or peel-and-stick update. Hire a professional if you are using expensive wallpaper, grasscloth, silk, foil, murals, ceiling wallpaper, stairwells, or rooms with complicated architecture. A pro installer can save time, reduce waste, and prevent costly mistakes.
If you are new to wallpaper, start with one flat wall and a forgiving pattern. Small repeating designs, textured vinyl, and nonwoven wallpaper are usually easier than giant murals or razor-straight stripes. Stripes are beautiful, but they will reveal every tiny wobble like a home-improvement lie detector.
Real-World Experience: What Wallpaper Teaches You After the First Wall
The first thing most DIYers learn about hanging wallpaper is that confidence is useful, but humility is cheaper. You may begin the project imagining a relaxing afternoon, a playlist, and a room transformation worthy of applause. Then the first strip refuses to align, the paste gets on your elbow, and your ladder suddenly feels like it was designed by someone who hates balance. That is normal. Wallpaper is not impossible; it is simply precise.
One helpful experience is to treat the first panel like the foundation of a house. Do not rush it. If the first strip is straight, smooth, and properly positioned, the rest of the wall becomes much easier. If it is crooked, every following strip becomes a negotiation. Spend extra time on the plumb line, then check the top, middle, and bottom before smoothing the entire panel. It feels slow at first, but it saves time later.
Another lesson is that paste has a personality. Too little paste and the edges lift. Too much paste and seams can slide, bubble, or ooze. The goal is an even coat, especially along edges and corners. Keep a damp sponge nearby, but wring it out well. A dripping sponge can damage delicate wallpaper surfaces, while a barely damp sponge can clean paste before it dries into shiny marks.
Pattern matching also teaches patience. The best approach is to match the design at eye level first. People naturally notice the middle of the wall more than the ceiling line or baseboard. Once the pattern aligns where the eye lands, gently adjust the panel upward and downward. Avoid stretching the paper to “make” a pattern fit. It may look fine while wet, then shrink or shift as it dries.
Cutting is where many beginners improve fastest. A fresh blade makes you look more skilled than you feel. Use a straightedge, press it firmly into the corner, and cut in one smooth pass when possible. If the paper starts tearing, stop and change the blade. Utility blades are inexpensive; ruined wallpaper is not.
Finally, wallpaper teaches you to respect the room itself. Corners may not be square. Ceilings may slope. Baseboards may wave gently like they are remembering the ocean. Instead of fighting every imperfection, work with reference lines and small overlaps. Start each new wall with a fresh plumb line. Trim carefully. Step back often. The goal is not mathematical perfection under a microscope; it is a beautiful wall that looks intentional, clean, and finished when someone walks into the room.
The best part comes when the last strip is trimmed and the room suddenly feels designed. Wallpaper has a way of making a space look complete, like it finally put on its good shoes. And once you have done one wall successfully, the next project feels less intimidating. You will still measure twice. You will still keep extra blades nearby. But you will also know that with patience, preparation, and a little humor, hanging wallpaper is a skill you can actually master.
Conclusion
Learning how to hang wallpaper in 8 steps comes down to preparation, planning, and steady technique. Measure carefully, prep the walls, draw a plumb line, cut with extra length, apply or activate adhesive correctly, book the paper when required, smooth from the center outward, and match seams as you continue around the room. Wallpaper can test your patience, but it also delivers one of the most satisfying DIY transformations a home can get.
Start with the right wallpaper for your skill level, follow the manufacturer’s instructions, and give yourself time. The wall does not care how fast you finish; it only cares whether the seams line up. With the right tools and a careful approach, you can create a polished wallpaper installation that looks custom, stylish, and far more expensive than the project actually was.












