
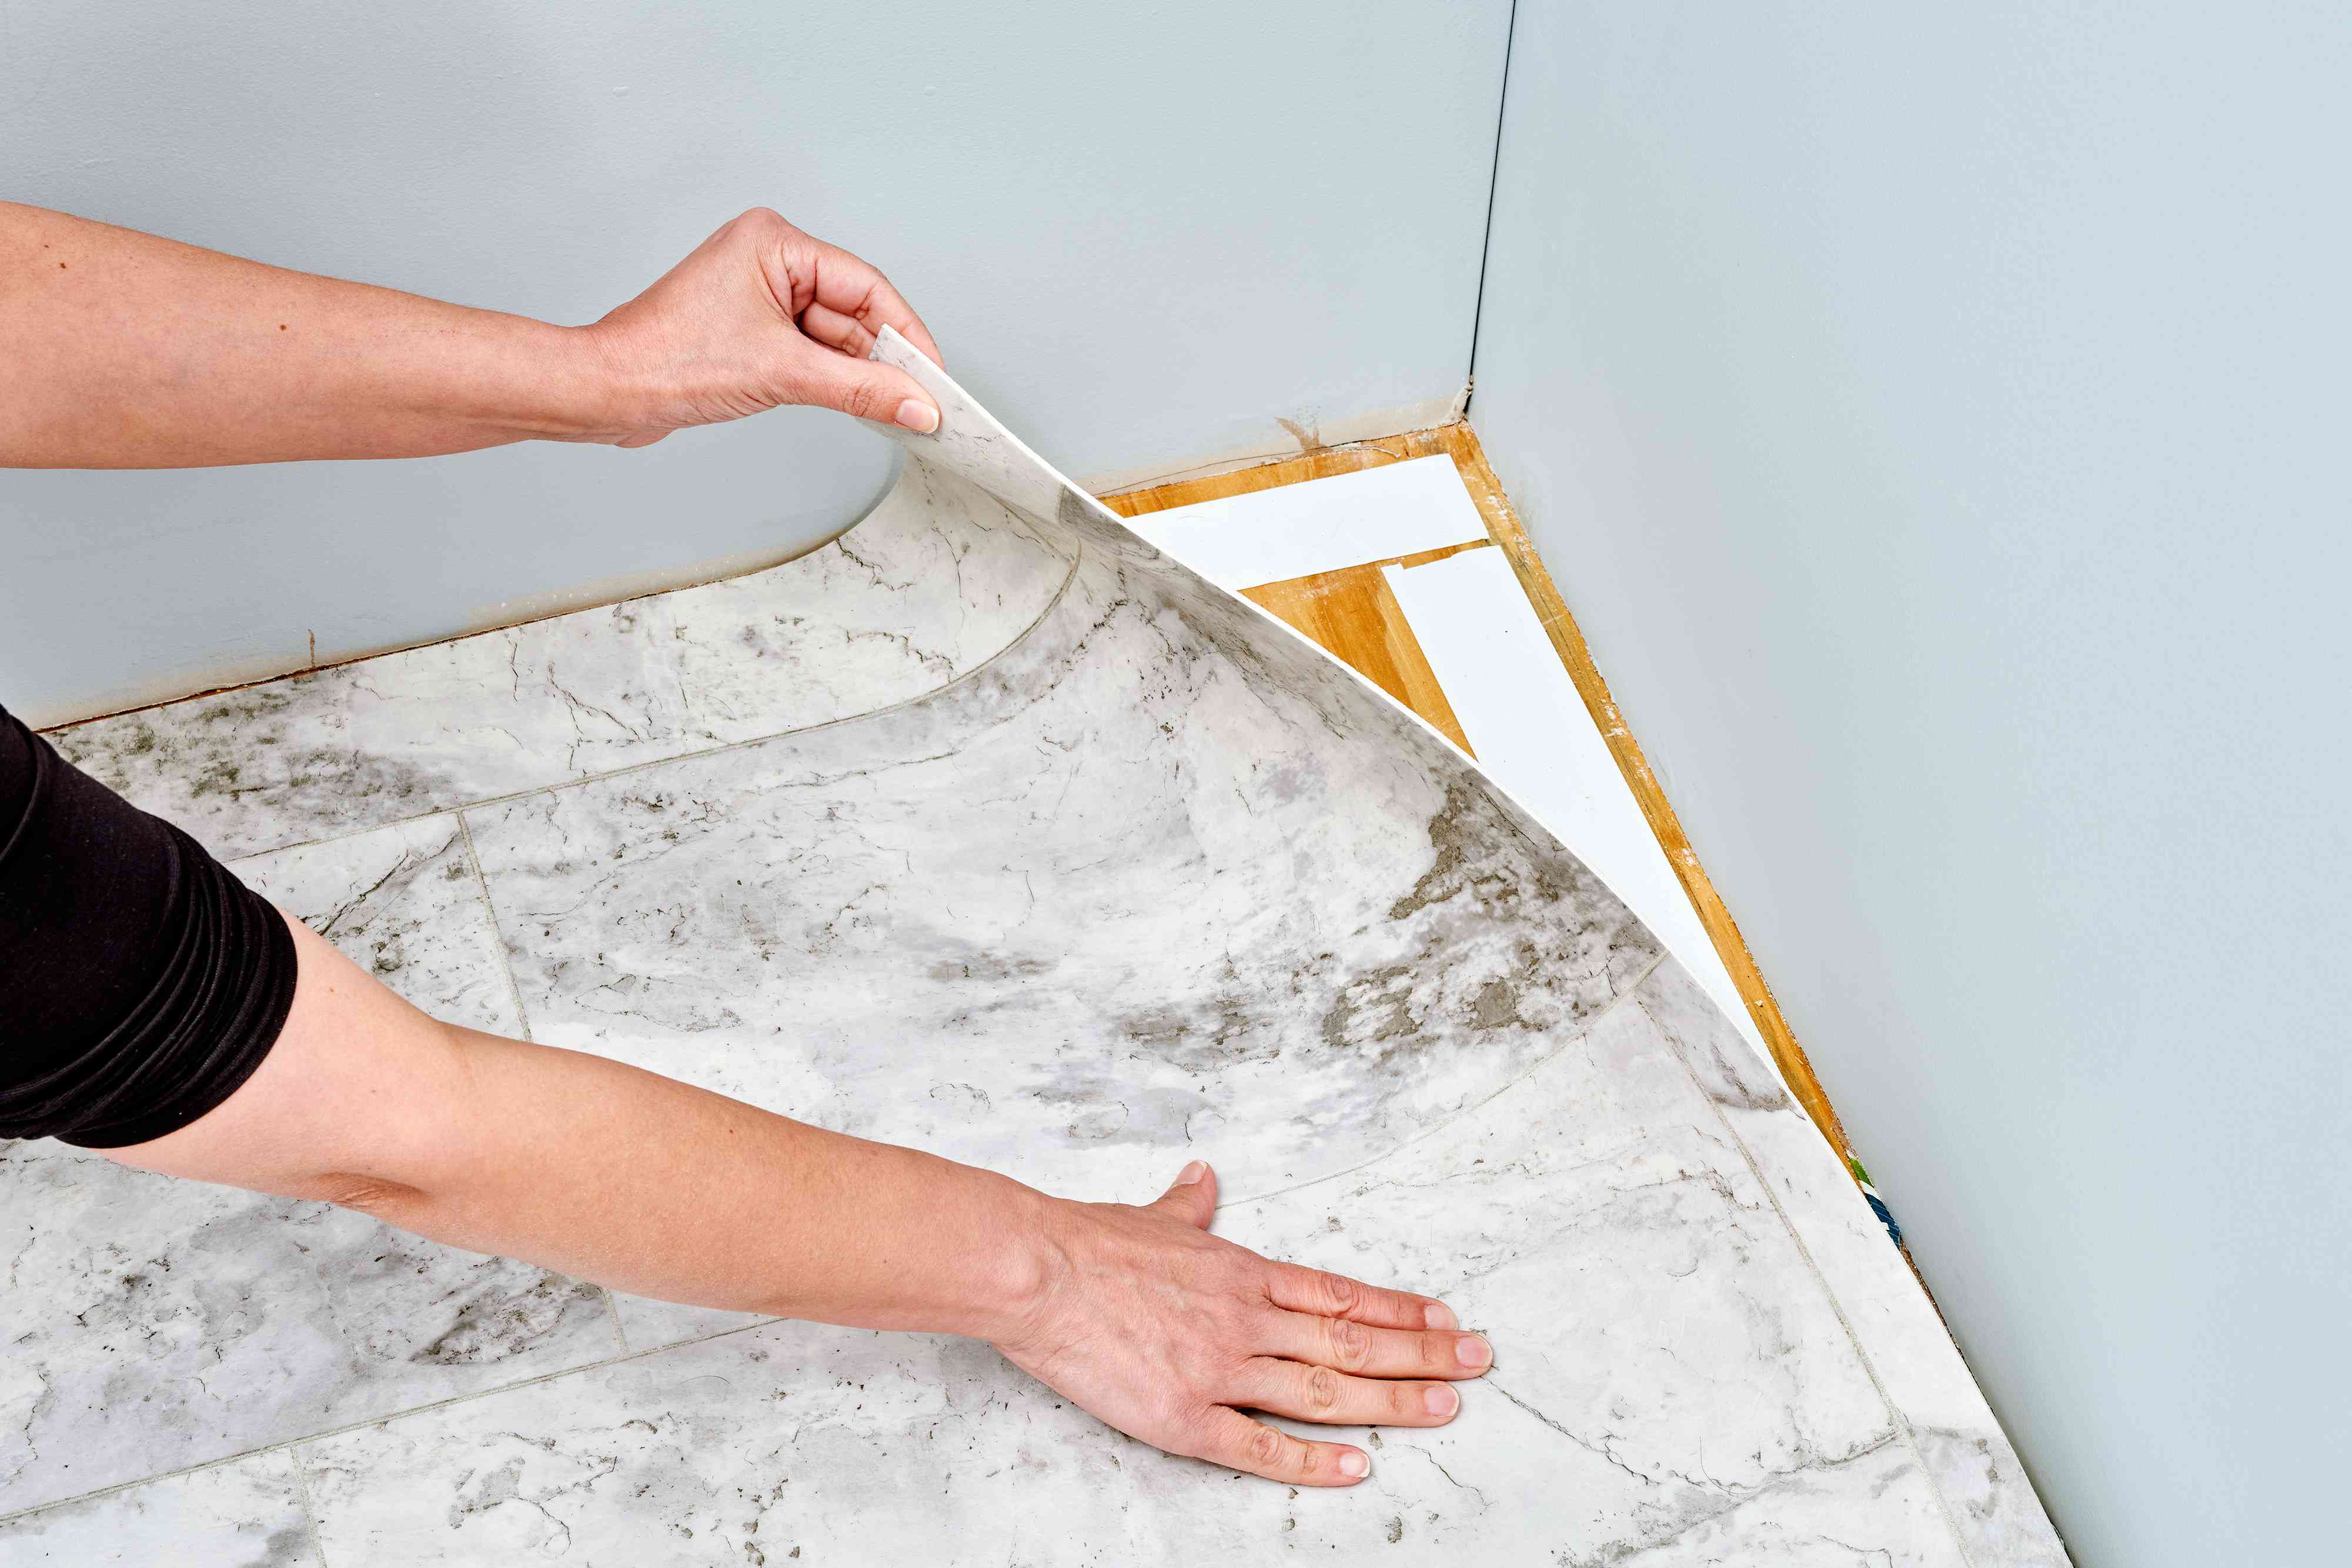
Sheet vinyl flooring does not always get the glamorous home-renovation spotlight. It is not out here trying to be reclaimed oak with a trust fund. But when you want a floor that is water-friendly, budget-smart, comfortable underfoot, and surprisingly stylish, sheet vinyl shows up ready to work. In kitchens, bathrooms, laundry rooms, mudrooms, and even busy family spaces, it remains one of the most practical flooring choices you can install.
The catch is simple: sheet vinyl is forgiving after it is installed, but not especially forgiving while you are installing it. A rushed cut, a bumpy subfloor, or the wrong adhesive can turn a promising DIY upgrade into a giant, floppy lesson in humility. The good news is that installing sheet vinyl flooring is absolutely manageable when you slow down, prep properly, and follow the method your specific product requires.
This guide walks you through the full process of how to install sheet vinyl flooring, from measuring and surface prep to trimming, gluing, rolling, and finishing the edges. Whether you are using a loose-lay product in a small bathroom or a full-spread adhesive installation in a larger room, the goal is the same: a smooth, clean, professional-looking floor that does not bubble, curl, or make you sigh dramatically every time you walk past it.
Why Homeowners Still Love Sheet Vinyl Flooring
Before we get into the how-to, it helps to understand why sheet vinyl flooring still earns its place in American homes. Unlike vinyl plank or tile, sheet vinyl usually covers the floor in one large piece or in very few seams. That is a big win in moisture-prone rooms. Fewer seams mean fewer places for water to sneak in and cause trouble.
It is also softer and warmer underfoot than many hard-surface floors, making it friendly for spaces where people stand for long stretches, like kitchens and laundry rooms. Add in modern patterns that mimic wood, stone, or tile, and sheet vinyl becomes the practical overachiever of flooring. It may not demand applause, but it deserves a solid nod of respect.
Before You Start: Know Which Installation Method You Have
This is the part many DIYers try to skip. Do not. Sheet vinyl is not a one-method-fits-all material. Some products are designed for loose-lay installation, some for perimeter bonding, some for releasable pressure-sensitive adhesive, and others for permanent full-spread adhesive. That means the first rule of sheet vinyl installation is wonderfully unglamorous: read the manufacturer instructions for your exact product.
If you miss that step, you can do everything else right and still end up wrong. One flooring roll may want double-sided tape at thresholds and fixtures. Another may require adhesive across the entire floor. Another may need special seam treatment. In other words, the flooring is the boss here. You are just the highly motivated assistant with a utility knife.
Tools and Materials You May Need
- Sheet vinyl flooring
- Measuring tape
- Graph paper or floor template paper
- Washable marker or pencil
- Straightedge or metal ruler
- Sharp utility knife and extra blades
- Notched trowel, if adhesive is required
- Recommended flooring adhesive or seam sealer
- Double-sided flooring tape, if required
- Floor patch or embossing leveler for subfloor repairs
- Push broom or hand roller
- Floor roller, if required by the product
- Pry bar for removing trim
- Shop vacuum
- Safety gloves and knee pads
Step 1: Measure the Room Carefully
Start by measuring the full floor area, including alcoves, closets, and spaces under movable appliances if the new flooring will run beneath them. Sketch the room on graph paper. If your room is simple and square, you may be able to cut the vinyl oversized and trim it in place. If the room has lots of corners, pipes, door jambs, or quirky architectural decisions made by someone in 1978, make a template.
As a general rule, buy a little extra material so you have room for fitting, trimming, and pattern matching. Sheet vinyl is not the kind of product you want to purchase with exact-to-the-inch optimism. Optimism is lovely. Extra material is lovelier.
Step 2: Remove Trim and Prep the Room
Take out furniture, appliances, and anything else living in the room. Remove base shoe, quarter-round, or baseboards if you want the cleanest finish. In bathrooms, many pros recommend removing the toilet so the flooring can fit underneath for a neater, more water-resistant result. You can cut around it, but that usually looks exactly like what it is: a shortcut.
If you are replacing old flooring, remove it according to safe practices. Be extra careful with older resilient flooring, felt backing, or old cutback adhesive. Some older materials may contain asbestos, and aggressive sanding, grinding, or pulverizing is not a DIY adventure anybody needs. If you suspect older hazardous material, stop and have it evaluated before moving forward.
Step 3: Prepare the Subfloor Like Your Sanity Depends on It
Now for the least exciting and most important part of the project: subfloor preparation. Sheet vinyl is thin enough to telegraph imperfections underneath it. That means every bump, dip, fastener head, cracked patch, ridge, and mystery crumb can show through after installation. If your subfloor looks rough now, your finished floor will not magically become smooth out of gratitude.
Wood Subfloors
Check that the wood subfloor is solid, dry, and securely fastened. Tighten squeaks, reset protruding fasteners, and patch damaged areas. If the surface is rough, use an appropriate underlayment or patching compound approved for resilient flooring. Some products should not be installed directly over certain wood panels or overly soft underlayments, so confirm what your flooring allows.
Concrete Subfloors
Concrete must be clean, dry, and level. Remove paint drips, debris, and old adhesive residue as directed by flooring safety guidelines. Patch cracks and low spots with a compatible floor patch or self-leveling product. Moisture matters here, so follow the product’s instructions for moisture testing and acceptable conditions before installation.
Existing Floors
Some sheet vinyl products can go over existing hard-surface floors if they are well bonded, smooth, and flat. Others cannot go over cushioned vinyl, floating floors, carpet, or damaged surfaces. Again, this is where the product instructions earn their keep.
Step 4: Let the Vinyl Relax and Acclimate
Many sheet vinyl products install better when they have time to adjust to the room’s temperature and humidity. That may mean storing the flooring in the space for a day or two before installation, or unrolling it so it can relax and flatten. Cold, tightly rolled vinyl is much harder to fit cleanly. It behaves like a stubborn sleeping bag and can hold memory from the roll.
Keep the room within the temperature range listed in the product instructions before, during, and after installation. Flooring likes stable conditions. Flooring does not enjoy drama.
Step 5: Make a Template or Rough-Cut the Sheet
Option A: Trim in Place
For easy rooms with simple layouts, you can transfer your room measurements to the vinyl, cut the sheet a few inches oversized, and carry it into the room for final trimming. Lay it in place and let the edges run up the walls slightly. This gives you material to work with while you fit corners and obstacles.
Option B: Use a Template
For trickier rooms, create a paper template. Tape template paper together, keeping a small gap from the wall edge if your product requires one. Push the template under door jambs and around fixtures. Mark pipe locations carefully. Then transfer the template to the back or face of the vinyl as directed, and cut the shape with a sharp knife and straightedge.
This method takes longer, but it often saves more time than it costs. A good template is like having a calm, competent friend in the room. A bad template is how you end up inventing new words.
Step 6: Dry-Fit the Flooring
Once cut, place the sheet vinyl in the room without adhesive first. Slide it under door jambs where possible, and make relief cuts at inside and outside corners so the material can settle without bunching. Fit the flooring carefully around obstacles. Make small cuts, not heroic ones. You can always trim more; you cannot trim less and ask the floor to forgive you.
Where your instructions call for a small perimeter gap, keep it consistent. In many DIY sheet vinyl installations, that gap is around 1/8 inch and later hidden by trim. The idea is to avoid jamming the flooring tight against walls or vertical surfaces.
Step 7: Apply Adhesive or Secure the Floor as Directed
This step depends on the installation type.
Loose-Lay Sheet Vinyl
In smaller rooms or with approved loose-lay products, the sheet may simply be positioned and then secured at edges, thresholds, seams, vents, or around fixtures using double-sided tape or other specified materials. Smooth the floor with a clean push broom to remove air pockets and settle it into place.
Perimeter or Modified Loose-Lay
Some sheet vinyl uses adhesive or tape only around the perimeter and selected stress points. Fold back the edge carefully, apply the recommended product, then press the vinyl into place without stretching it. Work gradually around the room so the sheet stays aligned.
Full-Spread Adhesive
If your flooring calls for full-spread adhesive, position the floor first, then fold back half of the sheet. Use the recommended notched trowel to spread the adhesive evenly. Do not guess on adhesive type or trowel notch size. Those details matter because they control bond strength and reduce the risk of bubbles.
Lay the vinyl into the adhesive carefully, working in manageable sections. Smooth it from the center outward, removing trapped air as you go. Then repeat the process on the other half. If your product requires a floor roller, use it. This is not overkill. It helps seat the flooring properly and improves adhesion, especially along seams and edges.
Step 8: Handle Seams the Right Way
If your room needs more than one sheet, plan seam placement thoughtfully. Keep seams in the least visible and least heavily traveled areas when possible. If you are installing over an existing floor with seams, do not stack your new seam right on top of the old one. Offset it.
Many manufacturers require seams to be adhered directly to the subfloor and sealed with a compatible seam sealer. This is especially important in moisture-prone spaces. A sloppy seam is not just a cosmetic issue. It is a future problem waiting politely in the corner.
Step 9: Final Trimming and Reinstalling Trim
Once the floor is fully positioned, go back and make your final finish cuts. Use a sharp blade and change blades often. Dull blades drag, tear, and create ugly edges. Reinstall baseboards or shoe molding afterward, but fasten the trim to the wall rather than pinning through the flooring itself unless your product instructions specifically say otherwise.
At doorways, install transition strips as needed. Around tubs, toilets, and sinks, follow product guidance for sealing vulnerable edges if appropriate.
Step 10: Let It Cure Before Heavy Use
Just because the floor is down does not mean the job is fully over. Adhesive-backed installations often need curing time before heavy traffic, mopping, or moving appliances back into place. Follow the instructions for wait times. This is not the moment to drag a refrigerator across your fresh floor because you feel unstoppable. You are stoppable. And the floor will prove it.
Common Mistakes to Avoid When Installing Sheet Vinyl Flooring
Skipping subfloor prep
The number one mistake is laying sheet vinyl over a floor that is dirty, uneven, damp, or damaged. If the subfloor is bad, the finished result will be bad with confidence.
Using the wrong adhesive
Do not substitute whatever adhesive is on sale or already sitting in the garage. Use the adhesive recommended for your product and your subfloor.
Cutting too aggressively
Big cuts feel efficient right up until they are not. Sneak up on the fit with small, controlled cuts.
Ignoring room conditions
Temperature and humidity affect how sheet vinyl handles. Trying to install cold, curled flooring in a chilly room is a recipe for frustration.
Trapping the floor under fixed cabinets
Many sheet vinyl products are not meant to have fixed cabinets or other affixed vertical objects installed directly on top of them. Plan your install order accordingly.
How to Keep Your New Sheet Vinyl Floor Looking Good
Once installed, maintenance is refreshingly simple. Sweep or vacuum regularly, wipe up spills quickly, and use a damp mop with a cleaner approved for vinyl flooring. Avoid abrasive scrubbers and harsh chemicals unless the manufacturer says they are safe. Use felt pads under chairs and furniture, and do not drag appliances across the floor without protection.
In other words, treat the floor like it is durable, not immortal. There is a difference.
Real-World Experience: What DIYers Usually Learn After Installing Sheet Vinyl Flooring
If you talk to people who have actually tackled a sheet vinyl flooring install, you start hearing the same practical lessons over and over. First, almost everyone says the prep took longer than expected. Not because the flooring itself was difficult, but because the room needed more patching, scraping, leveling, and cleaning than it appeared to need at first glance. The floor may look “pretty flat” to the eye, but sheet vinyl has a way of exposing tiny flaws like it is holding a grudge against optimism.
Another common experience is discovering that measuring is only half the job. The other half is visualizing how the sheet moves through the room. In a bathroom, for example, the challenge is not just the square footage. It is the door casing, the toilet flange, the vanity edge, the angle by the tub, and that one weird corner that somehow exists for no logical reason. People who use a paper template in these spaces usually end the day much happier than people who decide to “just eyeball it.” Very few successful flooring stories begin with the phrase, “I figured I would wing it.”
DIYers also learn fast that sheet vinyl is easier to manage with patience and a helper. A large sheet can curl, slide, or shift while you are trimming, especially if the room is tight. One person can guide the roll while the other checks alignment, keeps the material from creasing, and reminds everyone to breathe normally. That extra set of hands is not just helpful; it can be the difference between a smooth install and a dramatic living-room monologue.
Patterned sheet vinyl adds another layer of real-world experience. If the design mimics tile or stone, people quickly realize that a slightly crooked layout becomes very obvious. A pattern line that drifts near a wall or threshold can make the whole room feel off, even if the cuts are technically clean. Taking time to position the sheet for the best visual balance matters more than most beginners expect.
Then there is the lesson of blade sharpness. Homeowners often begin with one fresh utility blade and the cheerful belief that it will last the entire project. By the time the flooring starts snagging at edges or dragging through finish cuts, they understand the truth: sharp blades are cheap, ugly cuts are expensive. Swapping blades often is one of those little habits that produces a much more professional result.
Finally, people nearly always mention how satisfying the finished floor feels once the trim is back on and the room is cleaned up. Even a modest bathroom or laundry room can look dramatically fresher with new sheet vinyl. The biggest takeaway from real installations is not that sheet vinyl is hard. It is that success comes from respecting the boring parts: prep, patience, layout, and following instructions. That may not be thrilling advice, but it is the kind that keeps your new floor flat, neat, and worth bragging about.
Conclusion
Learning how to install sheet vinyl flooring is less about brute-force DIY confidence and more about careful planning, accurate cutting, and obsessive devotion to subfloor prep. Once you understand your product’s installation method and give the surface the attention it deserves, the rest of the job becomes much more manageable. The payoff is a floor that looks clean, handles moisture well, and gives high-traffic rooms a durable update without the cost of many other flooring materials.
If you want the best results, remember the simple formula: read the product instructions, prep the floor thoroughly, fit carefully, and do not rush the finish work. Sheet vinyl may be affordable, but a good installation still looks expensive in the ways that count.











