Valentine’s Day decorating usually comes in two flavors: elegant romance or “a glitter heart exploded in aisle seven.” These simple wooden gingerbread houses sit happily in the middle. They are sweet without being sticky, festive without requiring a storage unit, and sturdy enough to survive long after the chocolate has mysteriously disappeared from the pantry.
This project takes the cozy charm of Christmas gingerbread houses and gives it a February makeover with pink paint, white “icing” trim, tiny hearts, soft ribbon, and a little farmhouse-meets-candy-shop personality. Instead of cookies, royal icing, and the emotional crisis of a roof sliding off at midnight, you will use scrap wood, craft paint, glue, and easy decorative details. The result is a reusable Valentine’s Day DIY decoration that looks adorable on a mantel, tiered tray, bookshelf, entry table, kitchen counter, or as a handmade gift.
The best part? You do not need to be a professional woodworker. If you can measure, sand, paint, and politely ask a miter saw to behave, you can make a small village of wooden Valentine gingerbread houses in an afternoon. Even beginners can use pre-cut wood blocks or craft-store wooden houses to skip the cutting step entirely. No judgment. DIY is supposed to be fun, not an audition for a home improvement reality show.
Why Wooden Gingerbread Houses Work So Well for Valentine’s Day
Traditional gingerbread houses are magical, but they are also temporary. They crumble, attract curious pets, and eventually become questionable architecture. Wooden gingerbread houses keep the same nostalgic shape while becoming long-lasting seasonal decor. You can paint them once, store them carefully, and bring them back every February like tiny romantic real estate.
For Valentine’s Day, the gingerbread house shape feels especially charming because it already suggests warmth, home, sweetness, and handmade care. Add hearts, blush tones, candy-inspired trim, and a message like “Love,” “Be Mine,” or “XOXO,” and the design instantly shifts from Christmas village to Valentine cottage.
These wooden houses are also budget-friendly. Scrap 2×4 lumber, thin plywood, MDF, basswood, or small craft blocks can all work. You can use leftover wall paint, acrylic craft paint, wood stain, ribbon scraps, mini beads, buttons, stickers, stencils, paint pens, or faux candy decorations. In other words, this is a great project for that drawer of random craft supplies you keep promising yourself is “organized chaos.”
Supplies You’ll Need
Before starting your simple wooden gingerbread houses for Valentine’s Day DIY, gather your materials. The list below includes options, so you can make the project as basic or as detailed as you like.
Wood and Base Materials
- Scrap 2×4 pine, 1×4 board, MDF, plywood, or craft wood blocks
- Optional: pre-cut wooden house shapes from a craft store
- Small wood scraps for chimneys, doors, signs, or roof accents
- Wood filler for dents, gaps, or rough spots
- Sandpaper in 120-grit and 220-grit
- Tack cloth or a lint-free cloth
Tools
- Pencil and ruler or measuring tape
- Miter saw, jigsaw, hand saw, or craft saw
- Clamps, if gluing extra wooden pieces
- Paintbrushes in several sizes
- Detail brush, paint pen, or white puff paint for icing lines
- Hot glue gun or wood glue
- Safety glasses and dust mask
Paint and Decorative Supplies
- Acrylic craft paint in pink, blush, red, white, cream, tan, and brown
- Primer, especially if using MDF or dark wood
- Clear matte or satin sealer
- White puff paint, dimensional fabric paint, or a paint pen for faux icing
- Mini wooden hearts, beads, buttons, ribbon, lace, twine, or stickers
- Fine glitter, faux snow, or iridescent flakes, optional
- Valentine stencils or letter stickers, optional
Best Wood Choices for DIY Valentine Gingerbread Houses
The easiest option is a 2×4 pine board because it already has a chunky house-like thickness. Cut it into short blocks, add a roof peak, sand it smooth, and you have a sturdy little house. Pine is affordable, lightweight, and easy to paint. It may have knots, but for gingerbread-style decor, knots can look rustic and cozy instead of imperfect.
MDF is another good choice if you want a very smooth painted finish. It is common in craft blanks and seasonal tabletop decor. The downside is that MDF creates fine dust when cut, so wear a mask, work in a ventilated area, and seal the edges before painting. Plywood works well for flat houses or wall-hanging versions, especially if you want to cut several shapes from one sheet.
Basswood and balsa wood are ideal for lightweight crafts, kids’ painting projects, or smaller houses. They are easier to cut with simple craft tools, but they are also more delicate. If your Valentine village will live on a busy coffee table where children, cats, or enthusiastic guests may inspect it, choose pine or MDF for better durability.
Easy Dimensions for a Small Valentine Village
You can make these houses any size, but a charming display usually looks best with varied heights. Try cutting three to five houses in different dimensions so the finished village has movement and personality. A row of identical houses can look neat, but a staggered village looks collected and handmade.
Here are beginner-friendly sizes:
- Small house: 3 inches wide by 4 inches tall
- Medium house: 3.5 inches wide by 5.5 inches tall
- Tall house: 4 inches wide by 7 inches tall
- Mini accent house: 2 inches wide by 3 inches tall
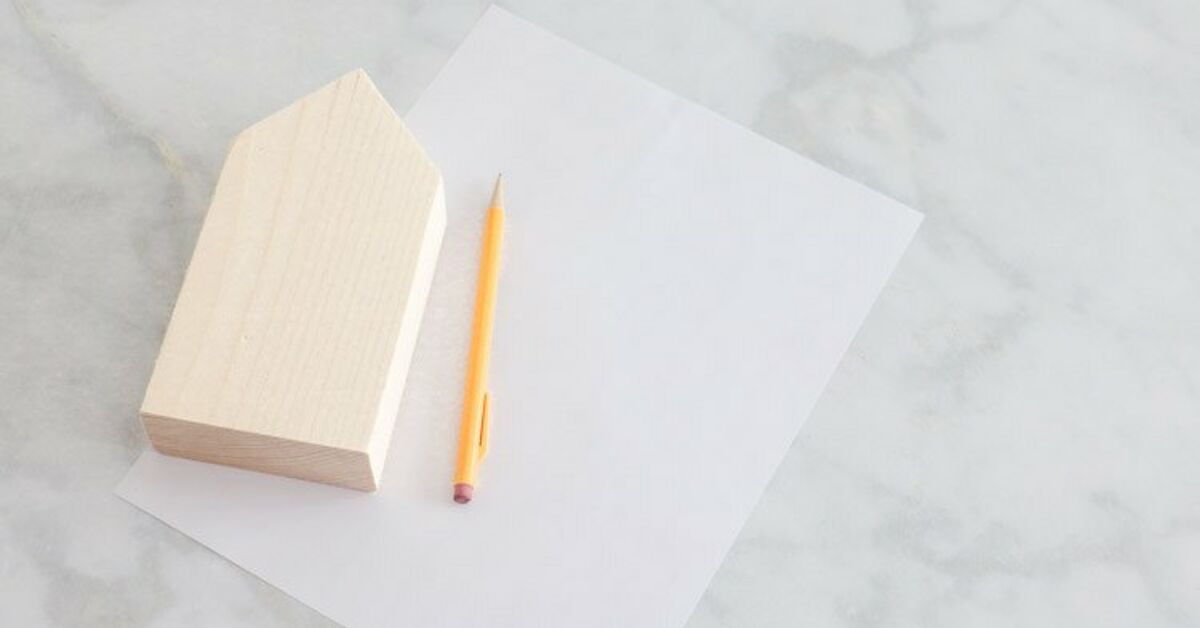
If using a 2×4 board, the actual width is usually about 3.5 inches, which is perfect for a medium house. Mark the height on the board, then mark the roof peak at the center. Draw angled roof lines from the center peak down to each side. Cut the top angles to create a classic gingerbread house silhouette.
Step-by-Step: How to Make Simple Wooden Gingerbread Houses
Step 1: Sketch Your House Shapes
Start with a simple sketch. Decide how many houses you want and what each one will look like. One house can have a scalloped roof, another can have heart windows, and another can have a tiny “Love Shack” sign. Keep the shapes simple at first. The decoration will do most of the storytelling.
Use a pencil to mark each house directly on the wood. For a traditional house shape, mark a rectangle first, then add a triangle roof peak on top. If you want a flatter modern look, use plywood and cut simple house silhouettes. For chunky tabletop houses, use 2×4 blocks.
Step 2: Cut the Wood
Cut along your marked lines using the tool you are most comfortable with. A miter saw is fast for angled roof cuts, while a jigsaw works well for custom shapes. A hand saw can also do the job if you are patient and willing to count the project as arm day.
Always wear safety glasses and keep fingers away from the blade path. If you are making this craft with children, adults should handle all cutting. Kids can help with sanding, painting, and decorating once the pieces are safe and smooth.
Step 3: Sand Every Edge Smooth
Sanding is the difference between “cute handmade decor” and “tiny wooden splinter factory.” Start with 120-grit sandpaper to smooth cut edges, corners, and rough surfaces. Then finish with 220-grit sandpaper for a softer, paint-ready surface. Sand with the grain when possible, and slightly round the edges so the houses look cozy rather than sharp.
After sanding, wipe each house with a tack cloth or lint-free cloth. Dust left on the surface can create bumps in the paint. This is the step that feels boring until you skip it and your paint finish looks like it rolled through a sandbox.
Step 4: Prime or Base Coat the Houses
If your wood is raw pine, you can paint directly with acrylic craft paint, but a thin primer coat helps the color look smoother and more even. Primer is especially useful if the wood has knots, strong grain, or dark marks. MDF should be primed because its edges absorb paint quickly.
For a gingerbread look, paint the main house body in warm brown, cocoa, caramel, blush beige, or soft pink. A tan base with white icing details gives the classic cookie effect. A pink base with red and white details feels more Valentine-specific. A white or cream base with pink trim looks fresh, romantic, and slightly less “dessert-themed,” which may be helpful if your decor style is modern farmhouse or cottagecore.
Step 5: Paint the Roof, Doors, and Windows
Paint the roof first, then add doors and windows. For a candy-cottage look, use white, pink, or red roofs. For a more neutral style, paint the roof warm brown, taupe, or cream and save the bright colors for details.
Simple window ideas include tiny squares, arched windows, heart-shaped windows, or white dots arranged like gumdrops. The door can be a rectangle, rounded arch, or heart-topped shape. Add a small bead or dot of paint for the doorknob. This is tiny work, so do not worry about perfection. Real gingerbread houses are wobbly too, and everyone still calls them charming.
Step 6: Add Faux Icing Details
The “icing” is what makes the houses look like gingerbread. Use white puff paint, dimensional fabric paint, a paint pen, or a fine detail brush with thick white acrylic paint. Add lines along the roof edges, dots around windows, scallops under the roofline, and little swirls around the door.
For the most realistic icing effect, keep your hand slow and steady. Practice on scrap cardboard first. Try dots, dashes, scallops, zigzags, and tiny hearts. If your line gets uneven, congratulations: it now looks handmade and adorable. If it gets extremely uneven, add more dots and call it “whimsical.” That word has saved many craft projects.
Step 7: Decorate With Valentine Details
Now comes the fun part. Add mini wooden hearts, painted candy shapes, tiny bows, lace trim, ribbon, buttons, faux pearls, or glitter. You can glue a small heart above the door, create a garland across the roof, or add a mini sign that says “Be Mine,” “Love,” “Sweet Home,” “XOXO,” or “Hugs.”
For a subtle look, use only blush, cream, and white. For a playful candy-shop style, use red, hot pink, bubblegum pink, and sparkly accents. For rustic farmhouse decor, combine stained wood, white icing lines, jute twine, and muted rose paint. For a kids’ craft version, let each child design a house with stickers and washable paint. The results may be chaotic, but so is love, honestly.
Step 8: Seal the Finished Houses
Once everything is dry, apply a clear sealer to protect the paint. A matte sealer gives a soft, handmade look. Satin adds a little shine without making the houses look plastic. If you used glitter, puff paint, or raised decorations, spray sealer may be easier than brushing, but use it outdoors or in a well-ventilated area.
Let the houses cure fully before packing or displaying them. Paint may feel dry to the touch before it is truly hardened. If you stack pieces too soon, the finish can stick, dent, or smudge. Patience is not the most glamorous craft supply, but it works.
Design Ideas for Valentine’s Day Wooden Gingerbread Houses
Classic Candy Cottage
Paint the body gingerbread brown and the roof white. Add pink and red candy dots, scalloped icing trim, and heart windows. This version looks adorable on a mantel with fairy lights and a red felt garland.
Blush Farmhouse Village
Use muted pink, cream, warm white, and natural wood tones. Add white icing details and tie twine around one house like a tiny present. Place the houses on a wooden tray with eucalyptus, book stacks, or white candles.
Conversation Heart Houses
Paint each house a different conversation-heart color: pale pink, lavender, mint, peach, and yellow. Add short phrases like “LOVE YOU,” “BE MINE,” or “CUTIE” in red paint. This is a cheerful option for a classroom, craft room, or kids’ Valentine display.
Romantic Cottagecore Style
Paint the houses cream or dusty rose, then decorate with tiny floral stickers, lace, pearl beads, and soft white trim. Add miniature roses or dried flowers around the base for a sweet handmade centerpiece.
Minimal Modern Valentine Houses
Paint the houses matte white, blush, or terracotta. Use simple line art: one heart, one door, one window. Keep the details clean and limited. This style works well with modern shelves, neutral interiors, and people who like Valentine’s Day but do not want their living room yelling “Cupid was here.”
Where to Display Your Wooden Valentine Gingerbread Houses
These houses are small but surprisingly versatile. Set them on a mantel with a heart garland and battery-operated candles. Place them on a tiered tray with mugs, faux cupcakes, and mini rolling pins for a kitchen display. Add one to a bookshelf between framed photos and small plants. Use a group as a dining table centerpiece with pink napkins and fresh flowers.
They also make thoughtful handmade gifts. A single wooden gingerbread house with a name painted on it can become a personalized Valentine keepsake. For teachers, neighbors, coworkers, or friends, pair one house with a small bag of candy or a handwritten card. Handmade decor feels more personal than another last-minute box of chocolates, although nobody is saying chocolates are unwelcome.
Common Mistakes and How to Avoid Them
Using Too Much Paint at Once
Thick paint can leave brush marks and take forever to dry. Use two or three thin coats instead of one heavy coat. Thin coats look smoother and reduce drips along the edges.
Skipping Sanding
Raw wood often has rough corners and raised grain. Sanding helps paint adhere and makes the finished houses safer to handle. Even pre-cut craft blanks usually benefit from a quick pass with fine sandpaper.
Decorating Before the Base Coat Dries
If the base coat is damp, details can smear. Let each layer dry before adding the next. This is especially important when using paint pens or puff paint over acrylic paint.
Making Every House Too Busy
A Valentine village looks best when some houses are detailed and others are simple. If every house has glitter, hearts, dots, stripes, lace, words, bows, and a tiny emotional support chimney, the display can feel crowded. Give the eye a place to rest.
Forgetting Storage
Before you glue on oversized decorations, think about how you will store the houses. Flat details and sturdy accents are easier to wrap and pack. Use tissue paper or bubble wrap between pieces so the raised icing lines do not rub off.
Budget-Friendly Tips for This Valentine’s Day DIY
Use scrap wood first. This project is perfect for leftover lumber pieces from other home projects. Ask your local hardware store whether they sell small offcuts, or check your garage before buying new boards. Many wooden gingerbread houses look better when made from imperfect scraps because the finished village feels collected and cozy.
Shop your craft stash before shopping the store. Leftover ribbon, buttons, beads, stickers, wrapping paper, and paint can all become decorations. Even old holiday ornaments can be repurposed. A red mini ornament becomes a gumdrop. A broken garland becomes roof trim. A spare gift tag becomes a tiny sign.
Use paint pens if you are not comfortable with detail brushes. White paint pens are excellent for icing lines, small dots, and lettering. Puff paint creates a raised frosting effect, but it takes longer to dry. For a child-friendly version, use stickers, foam hearts, and washable paint instead of hot glue and small beads.
Experience Notes: What I Learned Making Wooden Gingerbread Houses for Valentine’s Day
The first time you make simple wooden gingerbread houses for Valentine’s Day, you may be tempted to over-plan every detail. I understand the impulse. There is something about tiny houses that makes a person suddenly believe they are responsible for an entire miniature zoning committee. But this project works best when you leave room for improvisation.
One helpful experience is to cut more house blanks than you think you need. A set of three is cute, but a set of five or seven creates a fuller display. The extra pieces also give you freedom to test paint colors and icing patterns. If one house turns out odd, it can become the “quirky neighbor” in the village. Every neighborhood has one.
Another lesson is that color matters more than complexity. A simple blush house with clean white trim can look more expensive than a heavily decorated house covered in every supply from the craft drawer. Before painting, choose a limited palette. For example, use gingerbread brown, white, soft pink, and deep red. Or try cream, dusty rose, mauve, and gold. A controlled palette makes the whole village look intentional, even when each house has different details.
Texture also makes a big difference. Raised puff paint looks like icing and instantly gives the houses a gingerbread personality. Tiny wood hearts add dimension. Matte paint makes the houses feel modern and soft, while satin sealer gives them a polished finish. Glitter can be lovely, but use it with restraint unless your goal is to find sparkle on your socks until Easter.
If you are making these with children, prepare the wood pieces ahead of time. Cut, sand, and prime the houses before the craft session begins. Kids usually want to jump straight into color and decoration, and honestly, they are not wrong. Set out a few paint colors, foam brushes, heart stickers, and paper plates as work surfaces. Keep the designs simple and let the houses dry overnight. The finished pieces make sweet gifts for grandparents, teachers, or anyone who appreciates handmade decor with personality.
For adults, this project is surprisingly relaxing. The repetitive dots, scallops, and roof lines feel almost meditative once you get into a rhythm. It is the kind of craft that pairs nicely with a movie, a cup of tea, or background music. Just be careful with wet paint near snacks. A pink paintbrush and a strawberry wafer should not be stored in the same mental category.
Displaying the houses is half the fun. A narrow mantel looks beautiful with houses arranged in uneven heights, tucked among fairy lights and a simple heart garland. On a dining table, place them on a tray with small candles, faux greenery, and wrapped candies. In a kitchen, they look charming beside a cake stand or coffee station. If your home decor is neutral, use softer colors and natural wood. If your style is cheerful and bold, go full candy cottage with red roofs and bright pink doors.
The biggest takeaway is that these wooden Valentine gingerbread houses do not need to be perfect to be beautiful. In fact, the tiny uneven lines, handmade dots, and slightly crooked hearts are what make them feel warm. They look like something made by real hands for a real home, which is exactly the point of DIY decor. Store them carefully after Valentine’s Day, and next year you can bring them out again with very little effort. Unlike real gingerbread, they will not collapse, stale, or mysteriously lose their candy roof when nobody is looking.
Conclusion
Simple wooden gingerbread houses are a sweet, affordable, and reusable way to decorate for Valentine’s Day. With scrap wood, paint, faux icing details, and a few heart-shaped accents, you can create a charming handmade village that fits your personal style. Keep it rustic, make it romantic, go full candy-shop colorful, or design a soft farmhouse display. The project is flexible enough for beginners, fun enough for families, and pretty enough to become a yearly tradition.
Whether you place them on a mantel, tray, shelf, or dining table, these DIY Valentine gingerbread houses add warmth and whimsy without requiring complicated tools or expensive supplies. And because they are made from wood, they will last much longer than a cookie version. That means more decorating, less crumbling, and absolutely no structural frosting emergencies.