
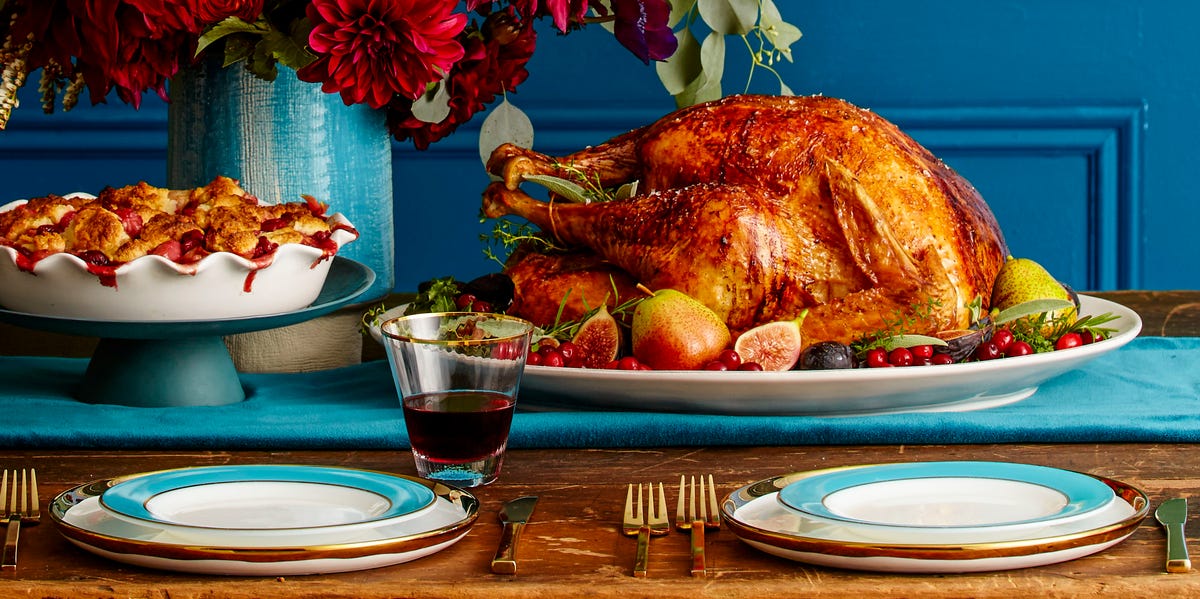
Thanksgiving turkey has a funny way of turning confident home cooks into nervous weather forecasters. Is it thawed enough? Is it seasoned enough? Is that pop-up timer telling the truth, or is it just trying to create family drama? The good news is that preparing a turkey does not require culinary wizardry. It requires a little planning, a reliable thermometer, and the ability to resist doing random things just because your uncle swears his 1987 method is “the only way.”
If you want a turkey that is juicy, flavorful, beautifully bronzed, and actually safe to eat, the process comes down to a few smart decisions: thaw it correctly, season it well, dry the skin, roast it at the right temperature, and trust the thermometer more than the clock. This guide walks you through the entire process, from buying the bird to carving it like someone who definitely meant to look that calm all along.
Why Turkey Prep Matters More Than Fancy Tricks
A great Thanksgiving turkey is built before it ever goes into the oven. Most turkey disasters happen in the preparation stage, not the roasting stage. A bird that is still icy in the center cooks unevenly. A wet skin turns rubbery instead of crisp. A turkey stuffed too early can create food safety issues. And a turkey roasted by vibes alone tends to become the annual reminder that “golden brown” is not the same thing as “done.”
The best turkey roasting tips are surprisingly practical. Dry the bird well. Salt it ahead of time if you can. Roast at a steady oven temperature. Check the internal temperature in multiple places. Then let it rest before carving. That is the sort of advice that actually leads to applause at the table instead of emergency gravy deployment.
Choose the Right Turkey Size
Before you think about roasting, start with the right bird for your group. A smaller gathering may do well with a turkey breast or a bird in the 10- to 12-pound range. A larger Thanksgiving table usually calls for a whole turkey in the 14- to 18-pound zone. If your family treats leftovers like a competitive sport, go a little bigger. Turkey sandwiches, turkey soup, turkey pot pie, and mysterious late-night “just one more slice” moments all count.
Another smart move is to think about your oven and roasting pan before shopping. A giant turkey that barely fits in the oven is not festive. It is engineering. Make sure you have enough room for the bird, the roasting rack, and a little air circulation. Thanksgiving is stressful enough without discovering that the turkey and the oven are in a toxic relationship.
Step 1: Thaw the Turkey the Safe Way
If your turkey is frozen, the thawing schedule matters more than your pie schedule, your playlist, and your decorative pumpkins combined. A partially frozen turkey will roast unevenly, with overcooked outer meat and an undercooked interior. That is not rustic. That is a problem.
Refrigerator Thawing
The easiest and safest method is thawing in the refrigerator. Plan on about one full day of thawing for every 4 to 5 pounds of turkey. That means a 12-pound turkey needs about 3 days, and a 20-pound turkey may need 4 to 5 days. Keep the bird in a tray or pan to catch any drips, because raw turkey juice is not a countertop accessory.
Cold-Water Thawing
Forgot to thaw the turkey in time? Welcome to the club. Cold-water thawing is the faster option. Keep the turkey wrapped, submerge it in cold water, and change the water every 30 minutes. Estimate about 30 minutes per pound. This method works, but it demands commitment. You and that sink are basically in a relationship until the bird is ready.
Do not thaw the turkey on the counter. Room-temperature thawing gives bacteria the kind of opportunity they do not deserve. Thanksgiving dinner should create memories, not medical follow-up questions.
Step 2: Unwrap, Remove the Giblets, and Do Not Wash the Turkey
Once thawed, remove the turkey from its packaging and take out the giblet packet and neck from the cavities. Save them for stock or gravy if that is your thing. If not, simply remove them and move on with your life.
One of the most important turkey roasting tips is also one of the most misunderstood: do not wash the turkey. Rinsing raw turkey can spread bacteria around your sink, counters, utensils, and nearby foods. Water does not “clean” poultry in a useful way; proper cooking does. Instead, pat the turkey dry very thoroughly with paper towels. This helps with both safety and crisp skin, which is a much better use of your energy.
While handling the turkey, wash your hands well and keep raw poultry away from ready-to-eat foods. Use a separate cutting board if needed. Basically, treat raw turkey with respect, not fear. It is dinner, not a haunted object.
Step 3: Season Early for Better Flavor
If you want your Thanksgiving turkey to taste like more than polite beige protein, season it ahead of time. Salt is the simplest way to improve flavor and texture. It helps the meat hold onto moisture and seasons the bird more deeply than a last-minute sprinkle ever could.
Why Dry Brining Works So Well
Dry brining is one of the best ways to prepare a turkey for Thanksgiving because it is effective, simple, and a lot less chaotic than wet brining. Instead of soaking the bird in a giant salty bath, you rub it with kosher salt and optional herbs, then let it rest uncovered in the refrigerator. This helps season the meat and dry the skin at the same time. That combination is exactly what you want for juicy slices and crisp, golden skin.
Dry brining is especially useful for people who do not want to wrestle a sloshing bucket of poultry water into the fridge. That sentence alone has sold many cooks on the method.
Simple Seasoning Ideas
After patting the turkey dry, season it inside and out with kosher salt and black pepper. Add chopped herbs such as thyme, sage, or rosemary if you like a classic Thanksgiving profile. You can also rub softened butter or oil over the skin before roasting for better color and flavor. Just do not go wild with heavy sugar glazes at the beginning of cooking, because they can burn before the turkey is done.
If your turkey is labeled self-basting, pre-brined, or kosher, be careful with extra salt. Those birds may already be seasoned. No one wants to serve a turkey that tastes like it fell into the ocean.
Step 4: Dry the Skin Like You Mean It
If there is one move that makes a turkey look dramatically better, it is drying the skin really well. Moisture is the enemy of crisping and browning. The drier the surface, the easier it is for the skin to turn deep golden and lightly crackly in the oven.
Pat every part of the bird dry, including the cavity. If you dry-brine the turkey uncovered in the fridge for a day or two, even better. That uncovered rest helps the skin dry out further, which means more color and better texture when roasted. It is the culinary equivalent of showing up prepared instead of pretending you “totally read the assignment.”
Step 5: Decide Whether to Stuff the Bird
Traditional? Yes. Convenient? Not really. The safest option is to cook stuffing separately in a casserole dish. It is easier to control, easier to crisp on top, and easier to verify as fully cooked.
If you insist on stuffing the turkey, do it right before roasting, not hours ahead. Pack the stuffing loosely, not tightly, because dense stuffing slows heat penetration. The center of the stuffing must reach 165°F, just like the turkey. That often means the bird needs longer in the oven. In other words, the stuffing and the turkey are on the same team, but they do not always finish the race at the same time.
If you roast stuffing separately, you can still fill the cavity with aromatics like onion, lemon, garlic, celery, sage, thyme, or rosemary. They add fragrance without slowing cooking the way a dense bread stuffing does.
Step 6: Prep the Pan and Oven
Place the turkey breast-side up on a roasting rack in a shallow roasting pan. The rack keeps the bird elevated so hot air can move around it, which helps the skin brown more evenly. Preheat the oven to 325°F. That steady oven temperature is a dependable choice for a whole turkey and gives you enough control to roast without panic.
Tuck the wing tips under the body so they do not burn. Brush the skin once with melted butter, oil, or a butter-and-herb mixture. Then leave it alone. There is no prize for opening the oven every 17 minutes to “check how it feels.”
Step 7: Roast the Turkey and Use Time as a Guide, Not a Guarantee
Roasting times vary by size, oven, pan, and whether the bird is stuffed. That is why the most reliable approach is to use a time range as a planning tool and a thermometer as your final judge.
Approximate roasting times for a whole turkey at 325°F, unstuffed:
- 8 to 12 pounds: about 2 3/4 to 3 hours
- 12 to 14 pounds: about 3 to 3 3/4 hours
- 14 to 18 pounds: about 3 3/4 to 4 1/4 hours
- 18 to 20 pounds: about 4 1/4 to 4 1/2 hours
- 20 to 24 pounds: about 4 1/2 to 5 hours
If the turkey is stuffed, it generally needs more time. Start checking the temperature well before the upper end of the estimated range. Every oven has its own personality, and some of them are a little dramatic.
If the skin browns too quickly before the meat is done, loosely tent the breast area with foil. That helps protect the surface while the interior catches up. It is a rescue move, not a failure.
Step 8: Use a Thermometer in More Than One Spot
This is the biggest difference between a confident turkey cook and a hopeful one. Use a food thermometer and check the bird in multiple places. The turkey is ready when the thickest part of the breast, the thigh area near where it joins the body, and the wing area all hit 165°F. If the turkey is stuffed, the center of the stuffing must also reach 165°F.
A pop-up timer can be helpful, but it should not be your only method. Color can fool you. Juices can fool you. Family members who say, “It looks done to me,” can absolutely fool you. The thermometer is the only one at the table with no agenda.
Step 9: Rest Before Carving
Once the turkey comes out of the oven, let it rest before carving. A resting period of about 20 to 30 minutes helps the juices redistribute and makes carving easier. If you stuffed the bird, waiting also gives the stuffing a little more time to finish safely.
This is the perfect window to make gravy, warm side dishes, and accept compliments for “how organized” you seem. No one needs to know you are mentally replaying the thermometer reading like game footage.
How to Keep Turkey Moist and Skin Crisp
The best balance of juicy meat and crisp skin comes from combining a few simple habits. First, season ahead. Second, dry the turkey thoroughly. Third, roast on a rack in a properly heated oven. Fourth, do not constantly baste. Repeated basting can soften the skin and cool the oven, which is a surprisingly efficient way to make your life harder.
If you want to add flavor while keeping the roasting process simple, slide a little herb butter under the breast skin before cooking, then brush the outside lightly with oil or melted butter once. That is usually enough. You do not need to turn Thanksgiving into a full-contact spa treatment for poultry.
Common Turkey Roasting Mistakes to Avoid
- Starting with a turkey that is still frozen in the center
- Washing the turkey and spreading raw juices around the kitchen
- Skipping seasoning until the last second
- Stuffing the bird too early or too tightly
- Trusting time alone instead of checking temperature
- Opening the oven constantly
- Carving immediately and losing flavorful juices all over the board
- Leaving leftovers out too long after dinner
A Simple Thanksgiving Turkey Timeline
Three to Five Days Before
Start thawing the turkey in the refrigerator if frozen.
One to Three Days Before
Dry-brine the turkey if using that method. Keep it uncovered in the refrigerator.
Thanksgiving Morning
Remove the turkey from the fridge for a short rest, pat dry if needed, season, prep the pan, and preheat the oven.
During Roasting
Roast steadily, tent with foil only if browning too quickly, and begin checking internal temperature early.
After Roasting
Rest the turkey, carve, serve, and refrigerate leftovers within 2 hours.
Kitchen Lessons From Real Thanksgiving Turkey Experiences
One of the funniest things about learning how to prepare a turkey for Thanksgiving is realizing that nearly every confident turkey cook has a backstory involving at least one mildly chaotic holiday. Maybe the turkey was not fully thawed. Maybe the skin came out pale and floppy. Maybe someone trusted the timer instead of the thermometer and dinner ran an hour late while everyone politely attacked the bread basket like it had personally offended them. Those experiences are annoying in the moment, but they usually teach the lessons that stick.
A common first-time mistake is underestimating thawing time. Plenty of people buy a big frozen bird, tuck it into the refrigerator, and assume that “a day or two” sounds reasonable. Then Thanksgiving morning arrives, and the center is still icy. That experience teaches one of the most important truths about turkey roasting: the calendar matters. Once a cook has dealt with a half-frozen turkey exactly one time, that person becomes the household thawing evangelist forever.
Another classic experience is overcomplicating the seasoning. New cooks sometimes pile on butter, oil, marinades, citrus, spices, broth, and half the herb garden because they are afraid the turkey will be bland. Then they learn that the biggest improvements usually come from simpler habits: salt the bird ahead of time, dry the skin well, and roast carefully. A turkey does not need seventeen competing flavors. It needs balance. Thanksgiving dinner is not a talent show for paprika.
Then there is the great basting myth. Many cooks grow up believing that if you are not opening the oven every half hour and spooning juices over the turkey like a Victorian housekeeper, you are somehow neglecting the bird. But after enough holiday meals, people notice something important: the best turkeys are often the ones that were seasoned properly, left alone, and checked with a thermometer. Experience has a way of humbling the baster.
Carving teaches its own lessons too. The first attempt can feel like a live performance with knives. But after a few Thanksgivings, cooks learn that resting the bird makes everything easier. The juices settle, the meat slices more cleanly, and the whole process becomes less slippery and dramatic. That small waiting period often feels endless when everyone is hungry, yet it makes the final presentation far better.
And finally, leftovers teach one last Thanksgiving truth: success is not just about the moment the turkey hits the table. It is also about what happens afterward. The cooks who portion leftovers quickly, refrigerate them on time, and turn them into sandwiches, soups, and casseroles the next day are usually the same people who have learned from past holidays. Experience turns turkey from a stressful one-day event into a relaxed, delicious long weekend. That might be the best turkey roasting tip of all.
Conclusion
Preparing a Thanksgiving turkey does not have to feel intimidating. When you break it down, the process is straightforward: thaw safely, do not wash the bird, season early, dry the skin, roast at a steady temperature, and use a food thermometer to know exactly when it is done. Add a proper rest before carving, and you are already ahead of a surprising number of holiday disasters.
The real secret is that a great turkey is usually not the result of a flashy trick. It is the result of calm preparation and a few reliable turkey roasting tips repeated well. So this Thanksgiving, skip the panic, trust the process, and let the thermometer be your holiday co-pilot. Your turkey will come out juicy, your skin will look beautifully golden, and your guests will assume you have always had this completely under control.














