
Hardwood floors are wonderfully forgiving. They can survive muddy shoes, energetic dogs, rearranged furniture, and that one chair everyone insists on dragging instead of lifting. Eing less “historic charm” and more “airport terminal after a holiday weekend.”
Refinishing hardwood floors removes the worn finish and a very thin layer of wood before adding fresh stain, sealer, and protective topcoanse and waste of replacing it. Done carelessly, it can produce sanding grooves, blotchy stain, peeling polyurethane, and several new words you cannot repeat around children.
This in-depth guide explains how to refinish hardwood floors successfully, including preparation, sanding techniques, stain selection, finish application, curing, and common mistakes. The exact products and drying times will vary, so always follow the flooring and finish manufacturers’ instructions.
Should You Refinish, Recoat, or Replace the Floor?
Before renting a machine that weighs roughly as much as a well-fed refrigerator, determine what your floor actually needs.
Choose a simple recoat when:
- The existing finish looks dull but remains intact.
- Scratches are limited to the protective topcoat.
- No areas of bare or gray wood are visible.
- You want to refresh the sheen without changing the stain color.
Choose a full hardwood floor refinishing when:
- Traffic lanes have worn through the finish.
- Scratches, stains, or discoloration reach the wood.
- The floor has uneven color from sunlight or previous repairs.
- You want to change the stain color substantially.
Consider repair or replacement when:
- Boards are severely warped, rotten, split, or water-damaged.
- Large sections have exposed tongues or nail heads.
- An engineered floor has a very thin wear layer.
- The floor has already been sanded too many times.
Solid hardwood can usually tolerate multiple refinishing cycles because the boards are wood from top to bottom. Engineered hardwood is different: Only its upper veneer is real hardwood, and that layer may be too thin for aggressive sanding. Inspect an exposed edge near a floor vent, doorway, or transition strip. When the remaining wood above the tongue is uncertain, ask a flooring professional to measure it.
Tools and Materials You May Need
- Drum, belt, or random-orbital floor sander
- Floor edger and finishing buffer
- Floor scraper and random-orbit hand sander
- Several compatible sandpaper grits
- HEPA-capable shop vacuum or dust-extraction system
- Plastic sheeting and painter’s tape
- Hammer, nail set, pry bar, and wood filler
- Safety glasses, hearing protection, gloves, and knee pads
- A properly selected particulate respirator
- Stain, sealer, and floor-rated protective finish
- Brushes, applicator pads, rollers, and clean lint-free cloths
Purchase more abrasives and applicator supplies than your optimistic inner accountant thinks you need. A clogged sanding belt at 8:30 p.m. is not a character-building experience; it is simply annoying.
How to Refinish Hardwood Floors: 10 Pro Tips
1. Confirm the Floor Can Safely Be Sanded
The first professional habit is knowing when not to begin. Identify whether the flooring is solid hardwood, engineered hardwood, laminate, or wood-look vinyl. Laminate and vinyl cannot be sanded like natural wood. Some engineered products can be refinished once or twice, while others should only be screened and recoated.
Inspect the boards for excessive movement, deep pet stains, cupping, missing sections, exposed fasteners, and structural damage. A few damaged boards can often be replaced before refinishing, but widespread moisture damage deserves professional evaluation. Sanding a compromised floor does not repair its underlying problem; it merely gives the problem a smoother surface.
2. Empty, Isolate, and Inspect the Room
Remove every piece of furniture, every rug, and every object stored on the floor. Take down curtains if they are close to the work area. Remove shoe molding or quarter-round carefully so it can be reinstalled later. Number the trim pieces on the back to avoid creating a confusing wooden jigsaw puzzle.
Seal doorways, vents, cabinets, and adjacent areas with plastic sheeting and painter’s tape. Sanding equipment with dust collection reduces the mess, but “dustless” does not mean “a single particle will never escape.” Fine wood dust possesses the determination of glitter at a birthday party.
Walk the entire room and set protruding nail heads below the surface. Remove carpet staples, screws, and forgotten metal fasteners. Metal can tear sandpaper, damage the machine, or create sparks. Repair loose boards and address squeaks while the room is empty.
3. Choose a Sander That Matches Your Skill Level
A professional drum or belt sander removes old coatings quickly, but it is aggressive. Pausing in one spot can cut a depression into the floor within seconds. Experienced operators lower the sanding drum while the machine is moving and lift it before stopping or changing direction.
DIYers working on a relatively flat floor may prefer a large random-orbital floor sander. It removes finish more slowly but is generally easier to control and less likely to carve deep grooves. The trade-off is time, especially when removing a thick finish or dark stain.
Ask the rental center to demonstrate loading the abrasive, adjusting the machine, emptying the dust bag, and starting each pass. Practice in a low-visibility area before entering the center of the room like a contestant on a home-renovation game show.
4. Use a Logical Sandpaper Progression
Floor sanding normally requires multiple passes, progressing from coarse abrasives to finer ones. The correct starting grit depends on the hardness of the wood, condition of the finish, board flatness, and depth of damage.
A heavily worn floor may require an initial pass around 36 or 40 grit, followed by approximately 60 grit and then 80 or 100 grit. A floor with a thinner coating and limited damage may begin with a less aggressive grit. The goal of the first pass is to remove the old finish and level defectsnot to excavate the living room.
Do not jump directly from very coarse paper to a finishing grit. Each abrasive removes scratches left by the previous grit. Skipping stages may leave swirl marks and long sanding lines that become dramatically more visible after stain is applied.
5. Keep Every Sanding Pass Controlled and Consistent
Begin along a wall and work in manageable rows. Overlap each pass slightly so narrow strips of old finish are not left behind. On traditional straight-laid floors, sanding with the grain is generally safest. Uneven, cupped, diagonal, or parquet floors may require specialized sanding patterns, which is one reason complicated floors are often better left to professionals.
Move at a steady walking speed. Moving too quickly leaves finish behind; moving too slowly removes unnecessary wood. Empty the dust bag before it becomes overfilled, and never leave collected sanding dust near heat, flames, pilot lights, or ignition sources. Fine dust suspended in air or concentrated in a bag can present a fire hazard.
After each grit, inspect the floor under strong light from several angles. Pencil marks drawn lightly across problem spots can help confirm that the next pass sands the area evenly.
6. Blend the Edges Instead of Treating Them as a Separate Floor
The main floor sander cannot reach tight against walls, under radiators, or into corners. Use a floor edger with the same general grit progression used in the center. Keep the edger moving in controlled, overlapping motions. Resting it on one side can produce crescent-shaped gouges known as edger marks.
Use a scraper or small detail sander for corners and other inaccessible areas. Hand-sand with the grain to blend those spots into the surrounding surface. Finish by screening or buffing the entire floor so the center and perimeter share a consistent scratch pattern.
Run your hand over the transition between the edge and field. If you can feel a ridge, the stain will not politely ignore it.
7. Make Dust Removal Part of the Finishing Process
Vacuum after every sanding stage, including baseboards, windowsills, vents, door trim, and equipment hoses. Once the final sanding is complete, allow airborne dust to settle and vacuum again. Use a clean microfiber cloth or another method approved by the finish manufacturer for the final wipe.
Avoid flooding bare wood with water. Excess moisture can raise the grain, cause uneven absorption, or contribute to movement between boards. Some professionals intentionally dampen wood before staining through a controlled technique called water popping, but this should only be done evenly and when compatible with the selected stain system.
Change dusty clothing before applying finish. Otherwise, you may carefully clean the room and then reintroduce a portable cloud from your shirt. The floor notices everything.
8. Test the Stain on the Actual Floor
Staining is optional. A clear finish can highlight the natural color of oak, maple, pine, or another wood species without adding pigment. When you do want color, create test patches in a closet, beneath a future cabinet, or on several inconspicuous boards.
The same stain can look completely different on red oak, white oak, maple, and pine. Sanding grit, wood density, age, previous treatments, and application time also affect the result. Soft or tight-grained species may absorb stain unevenly and may require a conditioner or specialized system.
Mix enough stain for the entire area, especially when combining colors. Stir thoroughly and periodically so pigments remain distributed. Work in manageable sections, maintain a wet edge, and remove excess stain according to the product directions. Begin at the farthest corner and work toward the exit. Accidentally staining yourself into a corner is funny only when it happens to someone else.
9. Match the Protective Finish to the Household
The finish protects the wood from abrasion, spills, dirt, and ordinary traffic. Floor-rated water-based and oil-based polyurethane products are common choices, although professional systems may also use hard-wax oils, moisture-cured finishes, or other specialized coatings.
Water-based finishes generally preserve a clearer, lighter wood tone, produce less lingering odor, and allow faster recoating. Because they dry quickly, however, the applicator must work efficiently and maintain a wet edge. Oil-based polyurethane typically provides more working time and adds a warm amber tone, but it dries more slowly, smells stronger, and may deepen in color over time.
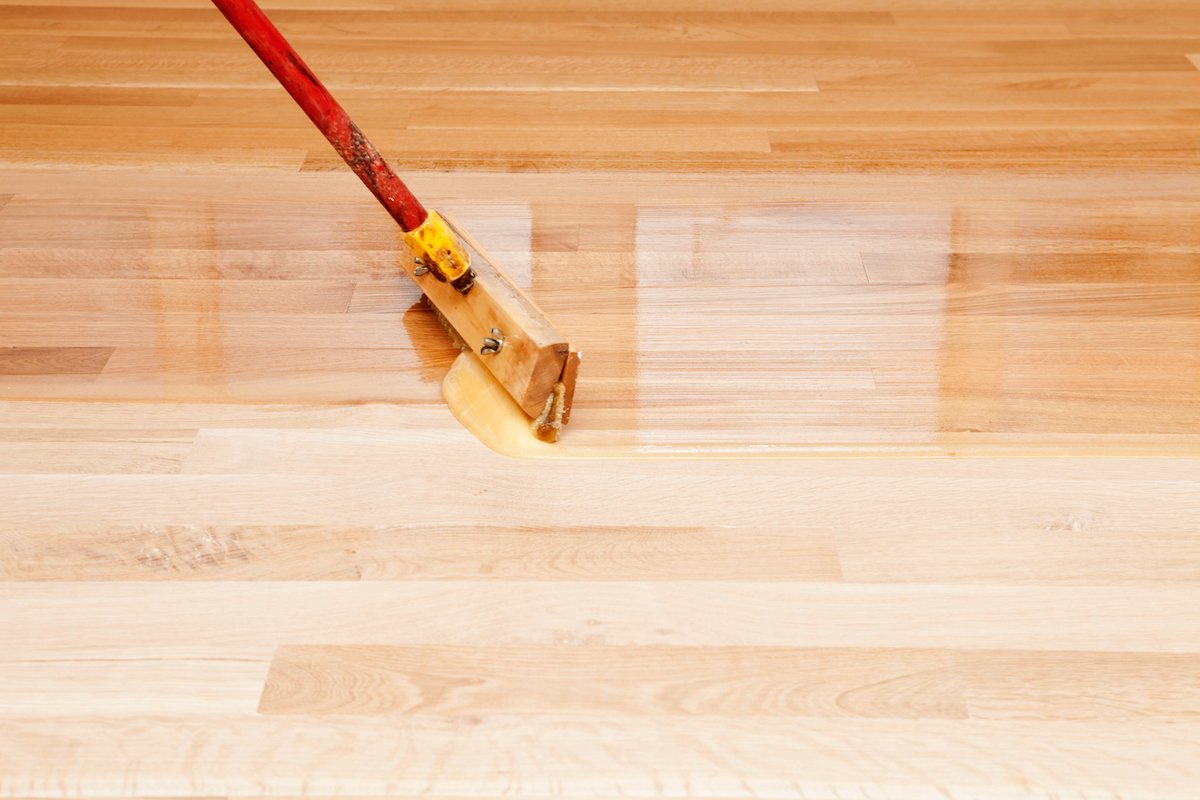
Select sheen with real life in mind. Gloss reflects the most light but highlights dust and scratches. Satin and matte finishes tend to disguise normal wear, making them popular in busy homes. Apply thin, even coats with the recommended brush, roller, T-bar, or applicator pad. Avoid shaking the container, overworking partially dried finish, or creating puddles between boards.
10. Respect Drying and Curing Times
A finish can feel dry before it is fully cured. Drying means the surface is no longer wet; curing means the coating has developed its intended hardness and durability. Temperature, humidity, ventilation, coat thickness, and product chemistry all influence the timeline.
Follow the label for recoating, intermediate abrasion, light foot traffic, furniture replacement, cleaning, and rug placement. Some finishes permit careful sock traffic relatively quickly but require several days before heavy furniture or rugs return. Rugs placed too soon can trap solvents, interfere with curing, or create a visible difference in sheen.
Lift furniture instead of dragging it, add clean felt pads beneath every leg, and avoid rolling heavy appliances across the new finish. Keep pets’ nails trimmed and delay wet cleaning until permitted. After investing days in the project, the floor deserves more than twelve peaceful minutes before the sofa attacks it.
Common Hardwood Floor Refinishing Mistakes
- Sanding an unsuitable engineered floor: The veneer may be thinner than expected.
- Starting too aggressively: Extra-coarse paper removes valuable wood and can create deep scratches.
- Skipping grits: Fine paper may polish coarse scratches instead of removing them.
- Stopping the sander while it is engaged: This creates divots and drum marks.
- Ignoring perimeter sanding: Dark borders and visible ridges remain after finishing.
- Leaving dust behind: Particles become permanent bumps in the topcoat.
- Applying thick coats: Heavy finish dries slowly and may wrinkle, bubble, or cure unevenly.
- Rushing stain or finish: Trapped solvent can cause adhesion and appearance problems.
- Returning rugs too early: The finish may cure unevenly beneath covered areas.
- Mixing incompatible products: Stain, sealer, and finish should be approved for use together.
Real-World Refinishing Experiences: Lessons the Instructions Rarely Emphasize
Hardwood floor refinishing looks orderly when reduced to a checklist: sand, vacuum, stain, finish, admire. In an actual room, the process feels more like managing a small construction site while trying not to damage the most visible surface in the house. The following field-tested experiences explain what homeowners and first-time DIYers commonly discover.
The Preparation Usually Takes Longer Than Expected
New refinishers often imagine that most of the project will involve operating the big sanding machine. In reality, emptying rooms, removing trim, setting nails, pulling staples, covering openings, repairing boards, and finding compatible supplies can consume an entire day. This preparation is not wasted time. Every staple removed before sanding is one less torn belt, and every doorway sealed properly is one less bedroom filled with mysterious beige dust.
A useful approach is to finish all repairs before renting equipment. Rental clocks are extremely motivational, but they are not especially relaxing. Preparing first allows the sanding stage to proceed without stopping every ten minutes to search for a hammer or remove a forgotten tack.
The First Sanding Pass Looks Worse Before It Looks Better
The initial pass often produces a floor with several colors, visible machine paths, and patches of remaining finish. This can be alarming. It does not necessarily mean the project has failed; it usually means the floor still needs systematic passes with the correct abrasive.
The temptation is to chase every dark spot immediately with the machine. That is how shallow depressions are created. Professionals focus on consistent coverage, then inspect the entire floor before deciding whether another pass is necessary. Patience removes more imperfections than panic does, and it removes considerably less wood.
Stain Tests Save More Than Money
Small stain samples prevent large emotional events. A color that appears neutral brown on a display board may reveal red, orange, gray, or nearly black undertones on the actual floor. Even neighboring boards can absorb pigment differently.
Test several colors and inspect them in morning light, afternoon light, and artificial light. Include the planned topcoat over the samples because a clear finish can deepen or warm the final appearance. It is far easier to dislike a six-inch test patch than a 400-square-foot room.
The Last Coat Demands the Cleanest Conditions
By the final coat, fatigue becomes a bigger threat than the sanding equipment. This is when people stop checking their applicator, forget to close a dusty doorway, or decide that one tiny hair in the finish is “probably fine.” Unfortunately, overhead lighting can turn that tiny hair into the room’s main decorative feature.
Before the last application, clean the room again, inspect the applicator for loose fibers, control airflow, and put on fresh, lint-free clothing. Work calmly and resist brushing back into finish that has already started setting. A small imperfection is often less noticeable than the large lap mark created while trying to correct it.
Curing Requires a Household Plan
The most overlooked experience occurs after the tools are gone. People still need to walk through the house, children still need entertainment, and pets continue to believe every closed doorway represents a personal injustice.
Plan traffic routes, sleeping arrangements, food preparation, and pet containment before coating the floor. Keep essential items outside the work zone. Waiting for the finish to cure is far easier when nobody discovers that their phone charger, work shoes, or entire wardrobe is trapped on the opposite side of a freshly coated hallway.
The larger lesson is simple: Successful refinishing depends less on heroic speed than on sequencing. Prepare completely, sand consistently, clean obsessively, test visibly, coat patiently, and let the finish cure according to its own schedule rather than yours.
How to Protect Newly Refinished Hardwood Floors
Place felt pads beneath furniture and replace them when they collect grit. Use breathable mats at exterior doors, but wait until the finish manufacturer permits rug placement. Sweep or vacuum regularly with a hard-floor attachment, and avoid beater bars that can scratch the surface.
Clean spills promptly with a soft cloth. For routine cleaning, use a pH-neutral product approved for the floor’s finish and apply it with a lightly damp microfiber pad. Avoid steam cleaners, excessive water, harsh alkaline products, and improvised cleaning mixtures that may dull or weaken the coating.
Control indoor humidity to reduce seasonal gaps, cupping, and excessive board movement. Trim pet nails, lift furniture when rearranging the room, and consider runners in heavily traveled areas. A maintenance coat applied before wear reaches bare wood may delay the need for another complete sanding.
Conclusion
Learning how to refinish hardwood floors is largely an exercise in restraint. Remove enough material to create a clean, uniform surfacebut no more. Apply enough finish to protect the woodbut not so much that it pools. Move efficientlybut never so quickly that preparation, dust removal, or curing gets rushed.
For a straightforward solid-hardwood floor, a careful DIYer can achieve excellent results with the right rental equipment and several uninterrupted days. Engineered flooring, historic boards, severe stains, complicated patterns, and floors with limited remaining thickness are better candidates for an experienced hardwood flooring professional.
Note: Abrasive sequences, application tools, ventilation requirements, drying times, and cure schedules vary among products. Follow the instructions supplied with the sanding equipment, stain, sealer, and floor finish. When the floor type or remaining wear-layer thickness is uncertain, obtain a professional inspection before sanding.














