
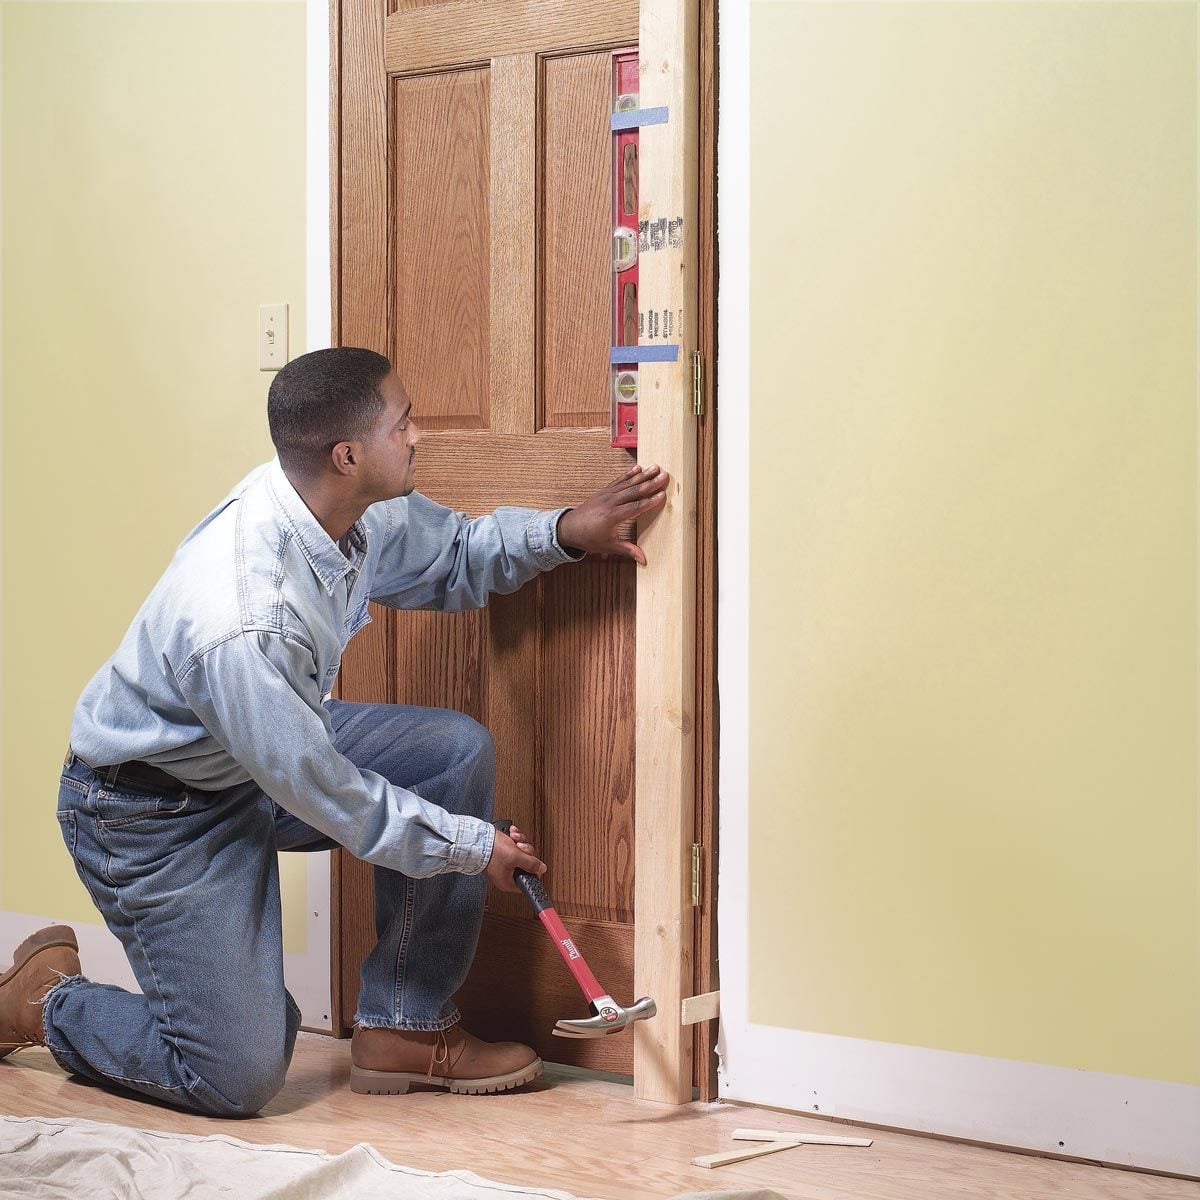
Replacing an interior door sounds simple until the new door swings open by itself, scrapes the carpet like it is auditioning for a horror movie, or refuses to latch unless you shoulder-check it like a linebacker. The good news? A prehung interior door makes the job much easier than installing a bare slab door, because the door already comes attached to its own jamb with hinges in place.
This DIY guide explains how to replace an interior door with a prehung door, from measuring and removing the old frame to shimming, fastening, trimming, and troubleshooting. Whether you are updating a bedroom, bathroom, hallway, closet, laundry room, or home office, the goal is the same: a door that looks clean, closes smoothly, has even gaps, and does not make your house feel like a funhouse.
The main secret is not strength. It is patience. A prehung door replacement is basically a game of tiny adjustments. Shim here, check the reveal there, fasten slowly, and resist the urge to blast screws into the jamb before the door is aligned. Your drill may be powerful, but gravity and crooked framing are undefeated unless you measure carefully.
What Is a Prehung Interior Door?
A prehung door is a door slab already mounted inside a three-sided frame called a jamb. The hinges are installed, the door is aligned at the factory, and the unit is designed to fit into a rough opening in your wall. In many cases, the door may also come with the bore hole for the knob and latch already cut.
This is different from a slab door, which is just the door itself. A slab door can be a good choice when your existing frame is square, solid, and attractive. But if the old frame is damaged, twisted, heavily painted, out of square, or simply not worth saving, a prehung interior door is usually the cleaner and more predictable option.
When Should You Replace an Interior Door With a Prehung Door?
Choose a prehung door replacement when the problem is bigger than the door slab. For example, if the jamb is cracked, the latch no longer lines up, the casing is outdated, or the frame was installed badly in the first place, replacing only the slab may not solve the issue. It can even create new problems because the new slab must match the old hinge mortises, lockset location, and frame geometry.
A prehung interior door is also helpful when you want a faster visual upgrade. Hollow-core doors, flat panel doors, builder-grade doors, and old stained doors can make a hallway feel tired. A fresh two-panel, shaker, molded, solid-core, or modern flush prehung door can instantly make the room look cleaner and more intentional.
Tools and Materials You Will Need
Gather everything before you begin. Door work is one of those projects where the missing tool is always in the garage, behind three bicycles and a box labeled “random cords.”
- Prehung interior door
- Tape measure
- Level, preferably 4 feet long
- Hammer or nailer
- Drill and driver bits
- Finish nails or trim screws
- Wood shims
- Utility knife
- Flat pry bar
- Putty knife
- Reciprocating saw or handsaw, if needed
- Wood filler
- Caulk and caulk gun
- Paint or stain supplies
- Door knob or lever set
- Safety glasses, gloves, and hearing protection when cutting
Before You Buy: Measure the Door Opening Correctly
Measuring is where a good door installation begins. Do not measure only the old door slab and call it a day. A prehung door must fit the rough opening, wall thickness, floor height, and desired swing direction.
Measure the Rough Opening
Remove or pull back enough trim to measure the framed opening from stud to stud. Measure the width at the top, middle, and bottom. Then measure the height from the floor to the underside of the header. Use the smallest measurements as your guide. A typical rough opening is slightly larger than the door unit, leaving room for shims and adjustments.
Check the Wall Thickness
Interior walls are often framed with 2×4 studs and covered with drywall on both sides, creating a common jamb width around 4 9/16 inches. Older homes, plaster walls, tile walls, or unusual framing may require a wider jamb or extension jambs. If the jamb is too narrow, the casing will not sit right. If it is too wide, the jamb may stick proud of the wall like it is trying to leave the room.
Confirm Door Swing
Stand on the side of the door where you pull it toward you. If the hinges are on the left, it is a left-hand door. If the hinges are on the right, it is a right-hand door. Also decide whether the door should swing into the room or outward. Most bedroom and bathroom doors swing inward, while closets vary depending on space.
Plan for Floor Clearance
Flooring matters. A door that clears vinyl plank may not clear thick carpet. A bathroom door may need enough undercut for air movement. Before installation, test the prehung unit in the opening and mark whether the jamb legs need to be trimmed. Cut carefully and evenly, especially if the floor is not level.
How to Replace an Interior Door: Step-by-Step
Step 1: Remove the Old Door
Start by taking the old door off its hinges. Tap the hinge pins upward with a screwdriver and hammer, then lift the door away. If the pins are painted in place, score around them with a utility knife first. Set the old slab aside where it cannot fall over and scare the dog.
Step 2: Remove the Casing Trim
Use a utility knife to score the caulk line between the casing and wall. Slide a putty knife behind the trim to protect the drywall, then use a flat pry bar to work the casing loose. Go slowly if you plan to reuse the trim. Old casing can split easily, especially if it has been painted more times than a rental apartment.
Step 3: Remove the Old Jamb
Once the casing is off, you can see how the old jamb is attached. Remove visible nails or screws if possible. If the jamb is nailed through shims, use a reciprocating saw with a metal-cutting blade to cut through fasteners between the jamb and studs. Pull out the old frame pieces and remove leftover shims, nails, and debris.
Step 4: Inspect the Rough Opening
Check the framing before installing the new door. Look for loose studs, cracked wood, protruding nails, damaged drywall edges, or flooring that prevents the jamb from sitting correctly. Use a level to check whether the hinge-side stud is plumb. If the opening is wildly out of square, you can still install the door, but you will need more careful shimming.
Step 5: Test-Fit the Prehung Door
Keep the door closed and latched with its shipping plug or temporary stop if included. Place the prehung door into the rough opening. Center it left to right and align the jamb so it is flush with the finished wall surface. Check that the door swings the correct way before fastening anything. This is the perfect moment to catch a wrong-hand door, not after the trim is nailed and your confidence has left the building.
Step 6: Shim the Hinge Side First
The hinge side is the backbone of the installation. Place shims behind each hinge location between the jamb and the framing. Add shims near the top and bottom as needed. Use your level to make the hinge jamb plumb in both directions: front to back and side to side. The jamb should not bow inward or outward.
Drive one screw through the hinge-side jamb near the top hinge area, ideally where it will be hidden by the weathered look of life or by the hinge leaf if you remove a hinge screw and replace it with a longer screw. Do not fully tighten every fastener yet. You want the door secure enough to stay put but adjustable enough to fine-tune.
Step 7: Check the Reveal Around the Door
The reveal is the narrow gap between the door slab and the jamb. A good reveal is even along the top and both sides. Close the door and study the gap. If it is tight at the top on one side, the frame may be twisted or out of square. Adjust the shims until the reveal looks consistent.
This step separates a professional-looking interior door replacement from a “good enough until guests come over” installation. Take your time. The door should not rub, bind, or swing open on its own.
Step 8: Shim and Fasten the Latch Side
Move to the latch side of the jamb. Add shims near the strike plate area, top, and bottom. Adjust until the gap between the latch side of the door and jamb is even. Close the door gently several times to confirm the latch side is not too tight.
Drive finish nails or screws through the jamb and shims into the framing. If using screws, predrill when needed to avoid splitting the jamb. Keep checking the door operation as you fasten. If tightening one screw changes the reveal, loosen it and adjust the shims. Door installation is not a race; it is a negotiation with wood.
Step 9: Secure the Head Jamb
The top horizontal jamb, or head jamb, should be level and should maintain an even gap above the door. Add shims if necessary, but avoid forcing the head jamb downward. Fasten it lightly once the reveal is correct. The casing will help cover the gap between the jamb and wall, but it will not fix a crooked door.
Step 10: Trim the Shims
Once the frame is secure and the door works properly, score the exposed shims with a utility knife and snap them flush with the wall. You can also cut them with a flush-cut saw. Do not hammer them aggressively, because you may shift the jamb you just spent all that time aligning.
Step 11: Install the Door Hardware
Install the latch, knob, lever, or privacy lock according to the hardware instructions. Test the latch with the door open first, then close the door and check alignment with the strike plate. If the latch misses the strike plate slightly, you may need to adjust the strike, deepen the mortise, or shift the plate a small amount.
Step 12: Reinstall or Replace the Casing
Measure and cut casing for both sides of the door. Most casing corners are cut at 45 degrees, though square modern trim can use butt joints. Leave a small reveal around the jamb edge, usually about 1/8 to 1/4 inch, rather than setting casing flush with the inside edge. Nail the casing into the jamb and wall framing, then fill nail holes.
Step 13: Caulk, Paint, and Finish
Caulk the gap where casing meets the wall if the trim will be painted. Fill nail holes with wood filler, sand smooth, and paint or stain as needed. Many interior doors are sold primed but not finish-painted. Do not forget the top and bottom edges if the manufacturer recommends sealing all sides. Moisture changes can encourage warping, and nobody wants a door that learns yoga after installation.
Common Prehung Door Replacement Problems and Fixes
| Problem | Likely Cause | DIY Fix |
|---|---|---|
| Door rubs at the top corner | Jamb is out of square or hinge side is not plumb | Adjust hinge-side shims and check the reveal again |
| Door swings open by itself | Frame is not plumb | Recheck the hinge jamb with a level and reposition shims |
| Latch does not catch | Strike plate is misaligned | Move or file the strike plate opening slightly |
| Door scrapes the floor | Jamb legs are too long or flooring is uneven | Trim jamb legs or undercut the door if appropriate |
| Trim will not sit flat | Jamb is not flush with wall surface | Adjust jamb position or use extension jambs if needed |
Pro Tips for a Better DIY Door Installation
Use Long Screws at the Hinges
Replacing one short hinge screw in the top hinge with a longer screw that reaches the wall framing can help prevent sagging over time. This is especially useful with solid-core doors, which are heavier than hollow-core doors.
Do Not Over-Shim
Shims are helpful, but too many can bow the jamb. Add shims where support is needed: behind hinges, near the strike plate, and at key points along the jamb. The frame should be supported without being squeezed out of shape.
Keep Checking the Door
Open and close the door after every major adjustment. If you wait until all fasteners are installed, you may discover the door is beautifully secured in the wrong position.
Protect Finished Floors
Put down cardboard, drop cloths, or rosin paper before removing the old door. Prehung units can be awkward, and one dropped jamb corner can leave a mark you will remember forever.
How Long Does It Take to Replace a Prehung Interior Door?
An experienced installer may replace a straightforward interior prehung door in a couple of hours. For a DIYer, plan for half a day, especially if you are removing old trim carefully, painting afterward, or dealing with an out-of-square opening. The first door usually takes the longest. By the second one, you will have developed the calm, focused expression of someone who now owns a level and trusts it more than most people.
Is Replacing an Interior Door Worth It?
Yes, replacing an interior door can be worth it for both function and style. A new prehung door can fix sticking, rattling, damaged frames, poor privacy, dated design, and inconsistent hallway appearance. Solid-core doors can also make bedrooms, bathrooms, offices, and laundry rooms feel quieter and more private.
The upgrade is especially noticeable when several doors in the same hallway are replaced together. Matching door styles, fresh casing, and clean paint lines can make a home feel more finished without a full remodel.
Conclusion
Learning how to replace an interior door with a prehung door is one of the most satisfying DIY projects because the result is visible every single day. The work is not complicated, but it is precise. Measure the rough opening, choose the correct swing, remove the old jamb carefully, set the new prehung door flush with the wall, shim the hinge side first, check the reveal constantly, and fasten only when the door opens and closes smoothly.
The biggest mistake is rushing. A door does not care that you are tired, hungry, or already imagining the victory snack. It only cares whether the jamb is plumb, the frame is square, and the gaps are even. Give the installation the time it deserves, and your new interior door will close with that soft, satisfying click that says, “Yes, this house has its act together.”
Real-World Experience: What Replacing a Prehung Interior Door Teaches You
The first thing you learn during a prehung door replacement is that houses are not as square as they look. A wall can appear perfectly normal until you place a level against the stud and realize the framing has been quietly leaning since the last century. This is why experienced DIYers do not panic when the rough opening is imperfect. They expect it. The job is not to make the house perfect; the job is to install the door so it behaves perfectly inside an imperfect house.
One practical experience that comes up often is the importance of dry-fitting the door before committing. Many beginners want to open the package, stand the door in place, and start fastening. That is understandable, because a prehung door looks almost ready to go. But a test fit can reveal several things: the jamb legs may be too long for the finished floor, the casing may interfere with nearby trim, or the door may swing into a light switch, towel bar, or furniture path. Five minutes of testing can prevent an hour of undoing.
Another common lesson is that the hinge side deserves most of your attention. If the hinge jamb is plumb and solid, the rest of the installation becomes easier. If the hinge side is wrong, every other adjustment feels like chasing a squirrel through the attic. Shimming behind the hinges creates a firm load path from the door into the framing. This matters even more with solid-core doors, which feel wonderful and reduce noise but weigh more than hollow-core doors.
Many DIYers also discover that trim removal is an art form. If you rush with a pry bar, the casing splits, the drywall tears, and suddenly your “simple door replacement” includes wall repair. Scoring caulk lines and using a putty knife behind the pry bar makes a big difference. Even if you plan to install new casing, careful removal protects the wall surface and saves finishing time.
There is also a surprising emotional moment when the door finally latches correctly. After all the measuring, shimming, checking, loosening, tapping, and rechecking, that clean click feels like applause. It is a small sound, but it tells you the reveal is right, the strike plate is aligned, and the door is doing exactly what it was hired to do.
The final lesson is simple: do not judge the project before the finish work. During installation, the opening may look rough. Shims are sticking out, nail holes are visible, and the wall edge may look messy. Once the shims are trimmed, casing is installed, caulk is smoothed, and paint is applied, the entire project transforms. A well-installed prehung interior door can make a room feel newer, cleaner, quieter, and more polished. It is not just a door replacement; it is a small renovation with a daily payoff.













