
A low cost oscilloscope is a little like a budget hatchback with a manual transmission: it may not look glamorous, it may rattle when you ask too much from it, and it definitely will not impress the perused motorcycle. But in the right hands, it can still teach, troubleshoot, and reveal electrical mysteries that would otherwise remain invisible.
The interesting part is that cheap oscilloscopes do not always need expensive upgrades. Sometimes the smartest improvement is not a shiny new display or a bigger badge on the front panel. It may be a better probe, a careful calibration routine, cleaner grounding, smarter software filtering, or even a tiny capacitor that costs less than the snack you forgot in your desk drawer. The phrase “low cost oscilloscope gets low cost upgrades” captures a very real idea in electronics: before replacing a tool, understand its weak points and improve the parts that matter most.
This guide explores how budget oscilloscopes can be upgraded in practical, affordable ways. We will look at signal noise, probe compensation, anti-aliasing filters, digital post-processing, bandwidth limits, sample rate, memory depth, grounding, safe measurement habits, and real-world examples such as improving a DIY DSO138-style oscilloscope. The goal is not to pretend a $40 scope magically becomes a $4,000 instrument. That would be like putting racing stripes on a toaster. The goal is to make an inexpensive oscilloscope more useful, more accurate, and less likely to lie to you with a perfectly confident squiggly line.
Why Low Cost Oscilloscopes Are Worth Improving
Oscilloscopes are among the most important tools in electronics because they show how voltage changes over time. A multimeter can tell you that a signal is 3.3 volts. An oscilloscope can show whether that 3.3-volt signal is clean, noisy, delayed, ringing like a tiny electrical bell, or collapsing under load like a folding chair at a barbecue.
For students, hobbyists, repair technicians, makers, and small workshops, a low cost oscilloscope can be the first serious step into real debugging. Entry-level models are useful for audio circuits, microcontroller projects, PWM signals, sensor outputs, power supply ripple, and basic waveform observation. They are also less intimidating. Nobody wants to learn probing techniques for the first time on a premium instrument while sweating over the thought of turning one expensive front end into smoke-flavored regret.
However, the cheapest oscilloscopes usually have compromises. Common limitations include low analog bandwidth, limited sample rate, short memory depth, noisy analog front ends, poor triggering, low display resolution, basic probes, weak input protection, and firmware that sometimes feels like it was translated from another planet by a sleepy calculator.
That is why inexpensive upgrades matter. They improve the measurement chain around the oscilloscope, not just the box itself. A budget scope with a compensated 10X probe, clean grounding, proper settings, and sensible filtering can be far more useful than a more expensive scope used carelessly.
The Main Problems With Budget Oscilloscopes
1. Noise Makes Small Signals Hard to Trust
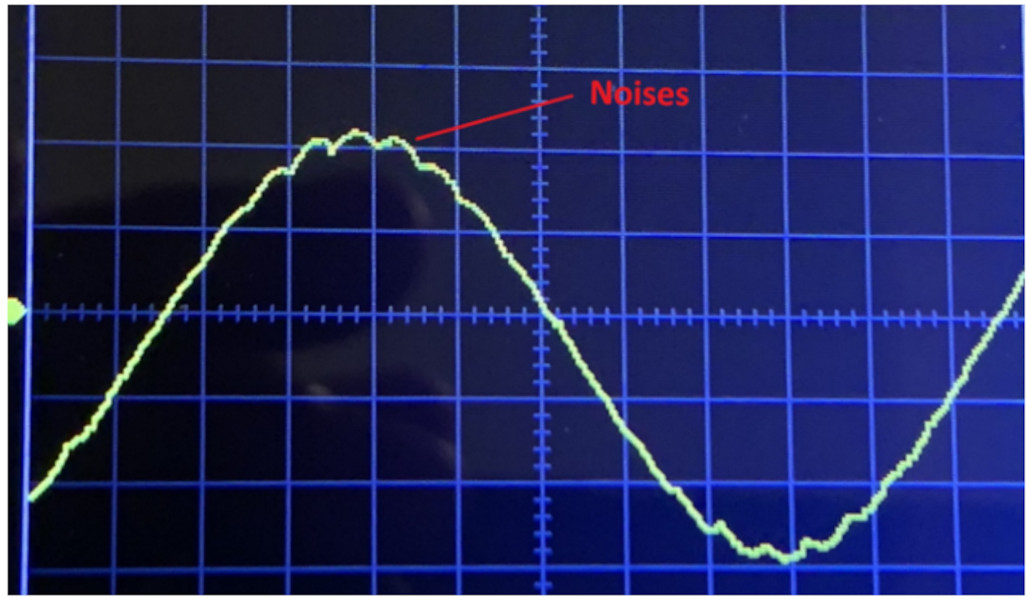
Noise is one of the biggest enemies of low cost oscilloscopes. Even if the analog-to-digital converter inside the scope has a 12-bit rating, the real-world effective resolution may be lower because of power supply noise, reference voltage instability, PCB layout limitations, digital switching noise, and weak filtering. In plain English: the scope may claim it has fine vision, but it may be looking through a dusty window.
On small signals, a few millivolts of noise can blur the difference between a real waveform feature and random junk. If you are measuring audio signals, sensor outputs, or microcontroller analog readings, this matters. A noisy display may still show the general shape, but precision measurements become questionable.
2. Aliasing Can Create Fake Waveforms
Aliasing happens when high-frequency content enters the oscilloscope but the sampling system cannot capture it correctly. The result is that unwanted high-frequency noise can fold back into the visible frequency range and appear as a false low-frequency artifact. It is the oscilloscope version of hearing the wrong lyrics and confidently singing them anyway.
Budget DIY oscilloscopes often lack strong anti-aliasing filters. If the input front end allows too much high-frequency noise through, the ADC may sample it incorrectly. The displayed trace can look messy, distorted, or misleading, especially when measuring signals that should be relatively clean.
3. Cheap Probes Can Distort Measurements
A probe is not just a wire with ambition. It is part of the measurement system. A poor probe, an uncompensated probe, or a long ground lead can distort waveforms, add ringing, load the circuit, or turn fast edges into abstract art. Many low cost oscilloscopes include basic probes that are acceptable for learning but not always ideal for precision work.
One of the cheapest and most effective upgrades is simply learning how to use a 10X probe correctly. A 10X probe reduces circuit loading and usually improves bandwidth compared with 1X mode. The tradeoff is reduced signal amplitude at the scope input, but the instrument can compensate for that when the probe setting is matched in the menu.
Low Cost Upgrade #1: Compensate the Probe
Probe compensation should be the first upgrade because it costs nothing and can immediately improve accuracy. Most oscilloscopes include a square-wave calibration output on the front panel. Connect the probe to the compensation terminal, set the probe to 10X, match the oscilloscope channel setting to 10X, and adjust the small trimmer capacitor on the probe until the square wave has a flat top and clean corners.
If the waveform is rounded, the probe is under-compensated. If the waveform has sharp overshoot or a raised corner, it is over-compensated. A properly compensated probe displays a square wave that looks square, not like it is trying to become a ski slope.
This is especially important when measuring pulse trains, microcontroller clocks, PWM motor control signals, serial communication lines, and switching power supplies. Even a modest 100 MHz passive probe can perform surprisingly well when it is properly compensated and used with a short ground connection.
Low Cost Upgrade #2: Use Better Grounding
Grounding is where many oscilloscope mistakes begin. Long ground clips act like little antennas and inductors. They can create ringing and noise that are not really present in the circuit. For low-frequency measurements, the standard alligator ground clip may be fine. For faster edges, use a ground spring, short ground adapter, coaxial connection, or test point layout designed for probing.
Better grounding costs very little. Many probe kits include a small spring ground attachment. If yours does not, inexpensive replacements are available. You can also add dedicated ground loops or header pins to your circuit boards. The improvement can be dramatic: a waveform that looked like an angry porcupine may suddenly become clean enough to interpret.
Safety note: never connect a standard grounded oscilloscope probe ground clip to a live mains node unless you know exactly what you are doing and have the proper isolation equipment. The probe ground is usually connected to earth ground through the oscilloscope. Mistreating it can create a short circuit, damage equipment, or cause injury. For mains and high-energy circuits, use proper differential probes, isolation methods, and safe procedures.
Low Cost Upgrade #3: Add an Anti-Aliasing Low-Pass Filter
One of the smartest hardware upgrades for a simple DIY oscilloscope is an analog low-pass filter. The purpose is to reduce high-frequency components before they reach the ADC. This is especially useful for low-cost scopes intended for DC, audio, sensor, and basic microcontroller work.
A practical example is the DSO138-mini style oscilloscope. In a documented upgrade project, the base unit used an STM32 microcontroller with a built-in ADC and a maximum real-time sampling rate around 1 MSPS. The original analog front end allowed too much high-frequency content through for some measurement conditions. By adding a small capacitor in the second amplifier stage, the circuit gained a first-order low-pass filter with a cutoff around 100 kHz. That simple change reduced out-of-band noise before it could alias into the sampled waveform.
The beauty of this upgrade is the cost. A ceramic capacitor can cost far less than a dollar, yet it may make a budget oscilloscope noticeably cleaner for audio-band and low-frequency measurement tasks. It does not turn a 100 kHz DIY scope into a high-bandwidth lab instrument, but it makes the instrument more honest within its intended range.
Low Cost Upgrade #4: Use Digital Filtering Carefully
Digital filtering is another affordable upgrade because it can often be done in firmware or PC software. A first-order IIR filter, for example, can smooth high-frequency noise in captured data. When used properly, it can improve the effective resolution of measurements by reducing random ripple and ADC-related noise.
The tradeoff is bandwidth. More filtering means smoother traces, but it can also soften fast edges and hide real high-frequency behavior. That is why digital filtering should be adjustable. For measuring slow sensor outputs, audio signals, or power supply trends, stronger filtering may be helpful. For debugging fast digital edges, SPI clocks, or switching transients, too much filtering can become a polite little liar.
A good workflow is to capture the raw signal first, then compare it with filtered data. If the filtered waveform reveals the underlying trend without hiding relevant details, it is useful. If it removes the very feature you are trying to diagnose, turn it down or turn it off.
Low Cost Upgrade #5: Improve the Power Supply
Power supply noise can creep into low cost oscilloscopes, especially USB-powered devices or DIY kits. If the scope is powered from a noisy computer USB port, a cheap charger, or a breadboard supply that has seen better decades, the measurement floor may suffer.
Simple improvements include using a clean USB power source, adding ferrite beads to cables, keeping digital noise away from analog input wiring, and avoiding ground loops. For DIY oscilloscopes, local decoupling capacitors near the ADC reference and analog front end may help, although hardware modifications should be done only with a schematic, steady hands, and the emotional maturity to admit when the soldering iron is winning.
Low Cost Upgrade #6: Add Useful Accessories
Not every upgrade requires opening the oscilloscope. In many cases, accessories provide the biggest return. Consider these practical additions:
- Quality 10X probes: Better probes improve signal fidelity and reduce circuit loading.
- BNC adapters: Useful for connecting signal generators, coaxial test leads, and RF-style fixtures.
- Short ground springs: Essential for cleaner fast-edge measurements.
- Mini grabbers and hook clips: Helpful for hands-free probing on small boards.
- 50-ohm feed-through terminator: Useful when working with signal generators and coaxial sources.
- USB isolation or differential probing tools: Important for certain floating or noisy measurement setups.
- Protective case or stand: Not glamorous, but dropping a scope is a very efficient way to reduce its bandwidth to zero.
Understanding Bandwidth, Sample Rate, and Memory Depth
Before upgrading a low cost oscilloscope, it helps to understand three specifications: bandwidth, sample rate, and memory depth.
Bandwidth describes the frequency range the analog front end can measure with acceptable attenuation. A 100 MHz oscilloscope does not mean every 100 MHz signal will look perfect. It generally means a sine wave at that frequency may be attenuated to the specified -3 dB point. Fast digital edges contain harmonics far above the clock frequency, so a low-bandwidth scope can make edges look slower than they really are.
Sample rate describes how often the oscilloscope samples the input signal. For accurate real-time waveform capture, the sample rate should be comfortably higher than the highest frequency content of interest. The basic Nyquist rule says at least twice the highest frequency, but real-world oscilloscope selection often benefits from three to five times or more, especially for time-domain signals.
Memory depth determines how much captured data the oscilloscope can store. More memory allows longer captures at higher sample rates. A scope with shallow memory may advertise a high sample rate but only maintain it at fast timebase settings. When you slow the timebase to capture a longer event, the effective sample rate may drop.
For a budget oscilloscope, these specs define realistic expectations. A 100 kHz DIY scope is great for learning, audio, slow sensors, PWM visualization, and basic waveform observation. It is not the tool for serious RF work, high-speed USB analysis, or modern memory bus debugging. Asking it to do that is like asking a bicycle to tow a boat: charming confidence, poor outcome.
What Upgrades Cannot Fix
Low cost upgrades can improve a budget oscilloscope, but they cannot rewrite physics. You cannot add a capacitor and suddenly gain gigahertz bandwidth. You cannot software-filter your way into seeing fast transients that were never captured correctly. You cannot compensate for a front end with poor input protection by hoping nothing dramatic happens.
Upgrades are most effective when they target the intended use of the instrument. If your work involves Arduino projects, audio amplifiers, power supply ripple, slow analog sensors, battery circuits, and educational demonstrations, a low cost scope with smart upgrades can be excellent. If your work involves high-voltage power electronics, RF design, automotive ignition systems, or high-speed digital buses, saving for a more capable instrument may be the safer and cheaper long-term decision.
Practical Example: Making a Cheap Scope Better for Audio-Band Work
Imagine a student electronics lab with limited funds. The class needs to observe sine waves, square waves, sensor outputs, and simple amplifier behavior. A professional oscilloscope for every bench is unrealistic. A batch of DIY oscilloscopes, however, is affordable.
Out of the box, the scopes show waveforms, but small signals look noisy. The students can see the general shape, yet precision measurements are rough. Instead of throwing the scopes into the “educational disappointment” drawer, the lab improves them step by step.
First, every probe is compensated. Second, the students learn to use 10X mode and short grounds. Third, a basic low-pass anti-aliasing filter is added to the analog front end. Fourth, captured waveform data is sent to a PC, where adjustable IIR filtering is applied for analysis. Fifth, the students compare raw and filtered results so they understand both the benefit and the tradeoff.
The result is not a perfect oscilloscope. It is something better for education: a tool that teaches measurement limitations, filtering, sampling theory, noise, and practical engineering judgment. Students learn that instruments are not magic truth machines. They are systems with strengths, weaknesses, and settings that matter.
How to Choose the Best Low Cost Upgrades
The best upgrade depends on what annoys you most. If your waveforms are distorted, compensate the probe. If fast edges look noisy, shorten the ground. If low-level signals swim in ripple, improve grounding, power, and filtering. If the display is too cramped, use PC capture software when available. If triggering is unreliable, spend time learning trigger modes before blaming the hardware. Sometimes the cheapest upgrade is knowledge, which is wonderful because it fits in every toolbox and does not require shipping.
For most beginners, the upgrade order should be simple: learn the scope, compensate the probe, improve grounding, use better probes, add useful adapters, clean up power, then consider hardware or software filtering. Modifying the analog front end should come after you understand the circuit and accept the risk of changing calibration or bandwidth.
Real-World Experiences With Low Cost Oscilloscope Upgrades
The first time you use a low cost oscilloscope, it can feel slightly magical and slightly suspicious. You connect the probe, touch a signal pin, and suddenly the invisible world of voltage starts dancing on the screen. Then the practical questions arrive. Why is the square wave rounded? Why is the ground clip bigger than the entire circuit board? Why does the signal look different when you move the cable? Why does the waveform become cleaner when you stop breathing near the breadboard? Welcome to real electronics, where measurement is part science, part technique, and occasionally part comedy.
One common experience is discovering that the probe matters more than expected. Many beginners blame the oscilloscope when the real problem is an uncompensated probe or a long ground lead. A square wave from a microcontroller may appear to have overshoot, ringing, or soft edges. After switching to 10X mode, matching the channel setting, adjusting compensation, and replacing the long ground clip with a spring ground, the waveform often improves immediately. That moment is satisfying because nothing expensive changed. The user simply stopped asking the probe to behave like a perfect piece of wire, which it never was.
Another experience involves measuring power supply ripple. On a budget scope, ripple measurements can be tricky because noise from the probe loop, USB power, or nearby switching circuits may appear on the trace. A useful trick is to remove the long probe ground and measure with a short ground spring directly across the output capacitor. Set the scope to AC coupling when appropriate, limit bandwidth if the scope offers that option, and compare readings at different time scales. The ripple may shrink from terrifying to reasonable. The circuit did not magically improve; the measurement did.
Software filtering also teaches humility. When you apply smoothing to a noisy signal, the trace can look beautifully clean. It is tempting to celebrate and declare victory. But then you measure a fast pulse and realize the filter has softened the edge. This is a valuable lesson: clean-looking data is not always more truthful data. A good habit is to save both raw and filtered captures. Use filtering to reveal trends, not to erase inconvenient reality.
For DIY oscilloscope kits, small hardware upgrades can be rewarding. Adding a carefully selected capacitor to create a low-pass anti-aliasing filter may reduce high-frequency junk and make audio-band signals easier to measure. But the best results come when the upgrade matches the scope’s purpose. A 100 kHz instrument can be excellent for learning and low-frequency analysis. It should not be bullied into pretending it is a high-speed digital scope. Respecting limits is not defeat; it is engineering with fewer sparks.
The most useful experience, however, is learning when to upgrade and when to stop. If a cheap oscilloscope helps you understand PWM, debug an amplifier, check a sensor, or find a missing clock signal, it has already earned its place. If you spend more time fighting the tool than solving the project, it may be time to buy a better instrument. Low cost upgrades are not about worshiping cheap gear. They are about extracting maximum learning and practical value before spending more money. In that sense, a budget oscilloscope is not just a tool. It is a teacher with a small screen, a noisy front end, and a surprisingly good sense of timing.
Conclusion
A low cost oscilloscope can become much more capable with thoughtful, inexpensive upgrades. Probe compensation, better grounding, quality 10X probes, anti-aliasing filters, cleaner power, PC-based analysis, and adjustable digital filtering can all improve real-world measurements. The key is to understand the measurement chain rather than assuming the oscilloscope alone is responsible for every ugly waveform.
Budget instruments have limits, and those limits matter. Still, improving a cheap oscilloscope is one of the best ways to learn signal integrity, sampling, filtering, noise reduction, and practical troubleshooting. You may not end up with a premium lab scope, but you can end up with a better tool, a sharper eye, and fewer mysterious squiggles on the screen. That is a pretty good upgrade for the price of a few accessories, a little patience, and maybe one tiny capacitor with a heroic résumé.
Note: This article was written as original web-ready content and synthesized from real-world oscilloscope upgrade practices, electronics education guidance, test-and-measurement fundamentals, and documented low-cost DSO138-style improvement projects. No source-link elements or unnecessary citation placeholders are included in the HTML.











