A closet is usually treated like the backstage area of a home: useful, crowded, and not expectedw-cost makeover. With colorful duct tape, a few clean pop cans, and an afternoon of cutting and folding, you can turn a plain door or empty wall into custom metallic decor.
Duct tape supplies color, flexibility, and a way to cover edges, while aluminum cans add shine and structure without much weight. Together, they can become rosettes, geometric tiles, nameplates, garlands, or shelf labelsplus an excuse to buy tape loud enough to embarrass a peacock.
Why Duct Tape and Pop Cans Work So Well for Closet Decor
Closet decorations should be lightweight, slim, and durable enough for swinging doors, moving hangers, and the occasional sweater avalanche. Thin can aluminum is easy to shape, while duct tape bends around curves and creates a finished border. The decor adds personality without evicting your shoes.
Closet-design guides consistently recommend using vertical surfaces, wall hooks, labels, and the backs of doors to make small spaces more functional. A flat decorative panel or a set of labeled medallions follows the same principle: it uses overlooked space instead of crowding rods and shelves. project also gives clean cans one more useful life before recycling. The U.S. Environmental Protection Agency notes that recycling conserves resources and energy, and its current guidance says beverage cans should generally remain uncrushed in single-stream programs because flattened cans can be harder for sorting equipment to identify. Use only the cans needed for the craft, then place the scraps in your local recycling stream according to community rules. n>
Choose a Design Before You Start Cutting
The easiest version is a collection of metallic flowers or starburst medallions mounted on lightweight backing. Arrange them on the inside of a door, above a shelf, or along ribbon as a garland. Smaller matching pieces can label baskets for scarves, belts, socks, or seasonal accessories.
Good Beginner Designs
- Rosettes: Layer round or petal-shaped pieces for a flower-like effect.
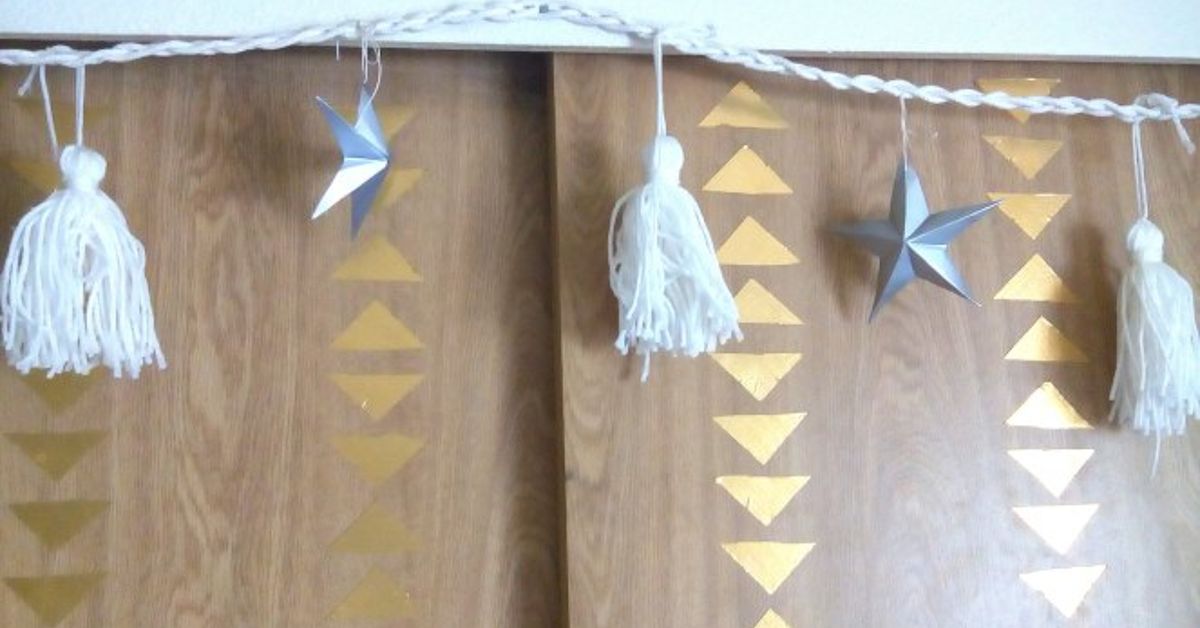
- Geometric tiles: Cut triangles, diamonds, or hexagons and arrange them like a mosaic.
- Initials or signs: Form a letter or add words such as “Shoes,” “Scarves,” or “Laundry” to flat panels.
- Metallic garland: Join small circles or stars with ribbon.
For a polished look, limit the palette to two duct-tape colors plus the natural silver of the cans. For a playful closet, mix stripes, florals, neon, or metallic tape. The cans can face silver-side out for a clean modern finish or printed-side out for a pop-art effect.
Materials and Tools
- Four to eight empty aluminum beverage cans
- Two or three rolls of decorative duct tape
- Cut-resistant work gloves
- Safety glasses
- Utility scissors or tin snips reserved for craft use
- Permanent marker
- Ruler and paper templates
- Cardboard, foam board, or a thin wooden plaque for backing
- Ribbon, removable hanging strips, or low-profile hooks
- Metal file or fine-grit sanding block
- Craft mat or scrap board
Do not use your best sewing scissors. Thin aluminum can nick blades, and nothing creates household drama quite like returning fabric scissors with the cutting personality of a butter knife.
Safety First: Prepare the Pop Cans Correctly
Cut aluminum is sharp. Adults should handle every cutting, trimming, and filing step. Wear gloves and safety glasses, work on a stable surface, and keep children and pets away from scraps. Metalworking and upcycling guidance emphasizes gloves, careful cutting, and smoothing or covering exposed edges. tep 1: Rinse and Dry
Wash each empty can with warm, soapy water. Rinse thoroughly and allow it to dry completely. Moisture, syrup, grease, and dust can weaken the bond between tape and metal. Tape manufacturers likewise recommend applying adhesive products to clean, dry, well-prepared surfaces. tep 2: Open the Can
On a craft mat, carefully pierce the side near the top with utility scissors, cut around the upper shoulder, continue down the side, and remove the bottom. Trim jagged strips immediately and place every scrap in a rigid container.
Step 3: Flatten the Aluminum
Gently roll the sheet in the opposite direction of its natural curve. Press it between two pieces of cardboard under a stack of books for several minutes. It does not need to become perfectly flat; a slight curve can add dimension to petals and leaves.
Step 4: Smooth and Seal Every Edge
File rough spots and round all sharp corners. After cutting each final shape, wrap its perimeter with narrow strips of duct tape. Fold half the tape over the front and half over the back, pressing firmly. No raw cut edge should remain exposed. This border is both a safety feature and the decorative “frame” that makes the project look intentional.
How to Make a Duct-Tape and Pop-Can Closet Medallion
Step 1: Create Paper Templates
Draw and cut three paper templates: a 4-inch circle, a 3-inch flower or starburst, and a 1.5-inch center. Templates keep the layers consistent and prevent the arrangement from looking as though it was designed during a minor earthquake.
Step 2: Trace and Cut the Metal Shapes
Trace the templates onto flattened cans. Cut slowly, turn the metal instead of your wrist, and round every corner. Make one large base, one middle shape, and one center per medallion. Repeat for an odd-numbered grouping such as three or five.
Step 3: Add Duct-Tape Borders
Cut duct tape into strips about 1/2 inch wide and overlap them slightly around curves. Small pieces are easier to control than one long strip. Press them firmly with the back of a spoon to improve contact and smooth bubbles. Duck Brand’s crafting guidance likewise uses layered tape, scissors, and a protected work surface for controlled decorative work. tep 4: Add Texture
Use a capped pen, blunt stylus, or the handle of a paintbrush to press lines into the aluminum while it rests on a folded towel. Make radiating lines, dots, leaf veins, or simple chevrons. Use light pressure. The goal is embossing, not accidentally inventing a new hole-punching technique.
Step 5: Layer the Pieces
Place small folded loops of duct tape between the metal layers. Press firmly so the pieces hold together. For extra security, add a small square of strong double-sided mounting tape at the center, following the product’s weight and surface instructions. Keep the medallions lightweight; they are decor, not emergency load-bearing architecture.
Step 6: Build the Backing
Cover a narrow piece of cardboard or foam board with overlapping tape. Arrange the medallions in a vertical row or loose vine, then secure them with folded tape loops.
Step 7: Add Useful Labels
Write category names on small duct-tape rectangles and place them beneath the medallions or on matching bins. Labels prevent a quick search for a scarf from becoming a full archaeological dig.
Step 8: Hang the Finished Decor
Use removable strips or low-profile hooks rated for the finished weight. Clean and dry the mounting area, test adhesive on an inconspicuous spot, and avoid hinges, lights, vents, sliding-door tracks, and hanger traffic.
Creative Variations for Different Closet Styles
For a Kids’ Closet
Use bright tape to create animals, rockets, rainbows, or oversized initials. Keep all finished pieces securely mounted and completely edge-wrapped. Children can help choose colors, arrange safe pre-cut shapes, and decorate the backing, but adults should prepare every metal component. Do not use small removable embellishments in a young child’s room.
For a Minimalist Closet
Turn the silver side outward and use white, gray, or matte-black tape only on the edges. Repeat one geometric form in a precise grid. The restrained palette allows the texture to do the talking, which is fortunate because aluminum is very shiny and has never been known for whispering.
For a Glam Closet
Combine metallic gold duct tape with embossed silver can pieces. Add faceted shapes, fan-folded petals, and a narrow mirrored-looking border. Keep the shine concentrated on one area so the closet feels curated rather than prepared for a disco emergency.
For an Organized Utility Closet
Make large labels for cleaning cloths, bulbs, tools, and supplies. Mount them above hooks or on bins. Function comes first, but the mop section can still have excellent typography.
Common Mistakes and Easy Fixes
The Tape Keeps Peeling
Clean and dry the surface, use smaller tape pieces around curves, and press along the entire bond. In hot or humid closets, choose tape intended for that environment.
The Aluminum Will Not Stay Flat
Reverse-roll the sheet, press it under weight, or use the curve for petals. For flat labels, attach the aluminum to a cardboard core rather than forcing it into submission through optimism.
The Edges Look Messy
Trim the shape cleanly before adding tape. Use short, narrow strips around curves and overlap them consistently. On straight edges, apply one long strip and fold it over with a ruler for a crisp line.
The Design Looks Too Busy
Remove one pattern, increase spacing, or repeat one shape. Choose one star, one supporting color, and one quiet backgroundnot twelve stars auditioning for the lead.
The Decor Interferes With Storage
Move it to the back of the door, above the top shelf, or onto a narrow wall. Closet decor should improve the space, not make it harder to reach a jacket. Before mounting, open and close the door and move the hangers through their full range.
Care, Removal, and Recycling
Dust with a dry microfiber cloth. If a border lifts, trim the loose section and patch it with fresh tape. Avoid soaking the piece because moisture can loosen layered edges.
When you are ready for a new design, remove mounting strips according to their instructions and pull slowly at the recommended angle. Separate clean aluminum pieces from cardboard and tape where practical. Recycling rules differ by location, so check your community program before placing craft scraps in the bin. Very small or tape-covered pieces may not be accepted and may need to go in household trash inside a puncture-resistant container.
My Experience Making Closet Decor From Duct Tape and Pop Cans
The first lesson from this project is that preparation takes longer than decoration. At the beginning, it is tempting to cut open a can, slap on some tape, and declare victory before lunch. That approach produces curled metal, sticky fingerprints, crooked borders, and one mysterious scrap that will wait on the floor for the exact moment you remove your shoes. Washing, drying, flattening, and templating the cans feels less exciting, but it makes every later step easier.
I found that simple shapes looked better than complicated ones. My first ambitious template had twelve narrow petals, tiny interior cuts, and the confidence of a project that had never met real scissors. The points bent, the tape bunched, and the finished flower looked like it had survived a lawn mower. A six-petal design, by contrast, was easy to cut, easy to wrap, and much more attractive. The best shape is not the one that looks impressive on paper; it is the one you can reproduce cleanly several times.
Short tape strips were another breakthrough. I initially tried wrapping a curved medallion with one heroic piece of duct tape. It wrinkled around the first turn, folded onto itself at the second, and became a sticky abstract sculpture by the third. Cutting the tape into small sections made the border smoother and gave me control over the color pattern. Slight overlaps were nearly invisible once the medallions were mounted.
The natural curve of the can also became an advantage. Flattening every piece completely made the design look stiff. Leaving the middle petals gently arched created shadows and made the arrangement appear more dimensional. Because the metal is so light, the layers did not need heavy glue or hardware. Folded duct-tape loops held the sample pieces well, while the backing provided a stable surface for mounting.
Placement mattered more than expected. I first positioned the panel at eye level inside the closet door, where it looked great with the door open. Then I closed the door and heard the unmistakable crunch of decor meeting a row of handbags. Moving the panel upward solved the problem and made better use of empty space. Testing the swing of the door, the reach of hangers, and the depth of stored items should happen before the adhesive liner comes off, not during the dramatic aftermath.
The finished project was most successful when it combined decoration with a small practical job. Adding matching labels to storage baskets made the closet feel coordinated and helped keep categories from drifting together. The labels also provided a reason to repeat the same colors throughout the space. Instead of looking like a random craft attached to a door, the medallions became part of a simple organization system.
Most importantly, the project proved that inexpensive materials do not have to produce a temporary-looking result. Careful trimming, covered edges, limited colors, and thoughtful spacing made the biggest difference. The cans supplied the sparkle, the duct tape supplied the personality, and the closet finally stopped looking like the room where style went to take a nap.
Conclusion
Making closet decor from duct tape and pop cans is a clever way to add color, texture, and organization without buying bulky accessories. The safest and most attractive results come from thoroughly cleaning the cans, cutting them with protective gear, smoothing and covering every edge, and keeping the finished pieces light. Start with a simple medallion or label set, repeat a controlled color palette, and mount the design where it will not interfere with doors or clothing.
This is the kind of DIY project that rewards experimentation. A small change in tape pattern can move the look from playful to modern, while a different arrangement can turn the same materials into flowers, initials, signs, or a metallic mosaic. Best of all, your closet gains a little personality without losing a single inch of useful shelf space.