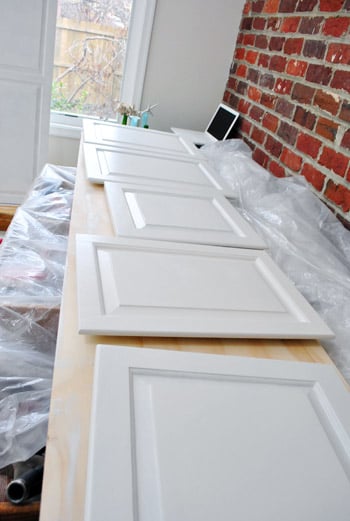
Painting wood cabinets is one of those home projects that sounds charming in theory and slightly chaotic in practice. You imagine a peaceful weekend, a cute playlist, and cabinets that magically become magazine-worthy by Sunday night. Then reality walks in wearing sanding dust, holding a screwdriver, and asking, “Did you label the hinges?”
Still, painting our wood cabinets Cloud Cover by Benjamin Moore is the kind of update that can completely change the mood of a kitchen without the drama of a full remodel. Cloud Cover OC-25 is a soft off-white with a subtle gray influence, giving it a cleaner, calmer personality than creamy whites and a warmer attitude than stark whites. It is not the blinding white of a dentist’s office. It is more like a fresh white linen shirt that has never met spaghetti sauce.
If you have wood cabinets that feel too orange, too dark, too heavy, or simply too “early 2000s maple called and wants its kitchen back,” Cloud Cover can be a beautiful solution. But the color is only half the story. The real secret is prep, primer, paint choice, drying time, and the emotional strength to not slam cabinet doors while the finish is curing.
Why Choose Cloud Cover by Benjamin Moore for Wood Cabinets?
Cloud Cover OC-25 belongs to Benjamin Moore’s Off White Collection and has a Light Reflectance Value, or LRV, of 80.28. In normal human terms, that means it reflects a generous amount of light while still having enough depth to avoid looking flat or icy. On cabinets, that balance matters. Kitchen cabinets cover a lot of visual real estate, so a white that is too bright can glare, while a white that is too yellow can make the room feel dated.
Cloud Cover sits in that useful middle zone. It reads as a soft white, but the gentle gray shading gives it a refined look. On wood cabinets, especially oak, maple, birch, or cherry, the color can reduce visual heaviness and make the room feel more open. It pairs well with many common kitchen materials: marble-look quartz, soapstone, butcher block, warm wood floors, brushed nickel, matte black, and unlacquered brass.
Cloud Cover Is Not a Pure White
This is important. If you want a crisp, gallery-white cabinet color, Cloud Cover may feel too soft. It has a muted, slightly warm off-white quality. That is exactly why many homeowners love it. It gives cabinets a painted-furniture softness instead of a cold appliance-like finish. The result is fresh but not sterile, updated but not trendy in a “please replace me in three years” way.
How It Changes in Different Light
Like most off-whites, Cloud Cover shifts throughout the day. In bright natural light, it can look clean and airy. In dimmer rooms, it may show more of its gray-beige softness. Under warm bulbs, it can feel cozier. Under cool LED bulbs, it may look slightly grayer. This is why painting a sample board is not optional unless your hobby is regret.
Test Cloud Cover on a primed sample board and move it around the kitchen. Hold it beside the countertop, backsplash, flooring, trim, and appliances. Look at it in the morning, afternoon, and evening. A color that looks perfect at 10 a.m. can develop a mysterious personality after dinner.
Best Paint Finish for Cloud Cover Cabinets
For cabinets, durability is the boss. Walls mostly stand there looking pretty. Cabinets get touched, bumped, opened, splattered, wiped, and occasionally attacked by a rogue spaghetti spoon. That means the paint must be formulated for trim, doors, or cabinetry.
Benjamin Moore Advance Interior Paint is a popular choice for cabinets because it is a waterborne alkyd formula designed to flow and level more like traditional oil paint while cleaning up with soap and water. For a Cloud Cover cabinet project, satin and semi-gloss are the most practical finish options.
Satin Finish
Satin gives cabinets a smooth, understated glow. It hides minor imperfections better than higher-sheen finishes and feels elegant in kitchens that lean traditional, transitional, cottage, or modern organic. If your wood cabinets have visible grain, satin is often forgiving.
Semi-Gloss Finish
Semi-gloss is more reflective and easier to wipe clean. It can look crisp and polished, especially in brighter kitchens. However, it also highlights surface flaws more readily. If you want semi-gloss, be extra serious about sanding, filling, priming, and applying thin coats. Semi-gloss has no patience for sloppy prep.
What You Need Before Painting Wood Cabinets Cloud Cover
Cabinet painting is not difficult in the same way rocket science is difficult. It is difficult in the way folding a fitted sheet is difficult: technically possible, but it tests your character. Having the right supplies makes everything less dramatic.
Recommended Supplies
- Benjamin Moore Cloud Cover OC-25 paint, ideally in a cabinet-friendly formula
- High-quality primer suitable for wood cabinets
- Degreasing cleaner or TSP substitute
- Painter’s tape and drop cloths
- Screwdriver or drill for removing doors and hardware
- Plastic bags and labels for hinges, screws, and pulls
- Wood filler for dents, old hardware holes, or cracks
- Medium-grit and fine-grit sandpaper, such as 150, 180, and 220 grit
- Tack cloth or microfiber cloths
- Angled brush for corners and trim details
- High-density foam roller or microfiber mini roller
- Paint trays, stir sticks, and cabinet door drying racks or risers
Step-by-Step: Painting Wood Cabinets Cloud Cover by Benjamin Moore
Step 1: Photograph and Label Everything
Before removing a single hinge, take photos of your cabinets. Then label every door and drawer. Use painter’s tape inside the hinge cup or on the back of each piece. Put screws and hardware in labeled bags. This may feel excessive for the first ten minutes. Three days later, when every door looks like every other door, you will want to send your past self a thank-you card.
Step 2: Remove Doors, Drawers, and Hardware
Remove cabinet doors, drawer fronts, knobs, pulls, and hinges if possible. Painting around hardware creates messy edges and trapped paint ridges. Taking everything apart gives you better access and a cleaner finish. Set up a painting station in a garage, basement, spare room, or covered work area with ventilation and enough space for pieces to dry without touching each other.
Step 3: Clean and Degrease the Wood
Kitchen cabinets collect grease even when they look clean. That invisible film is the enemy of adhesion. Use a degreasing cleaner or TSP substitute and wipe every surface, especially areas around handles, stove-adjacent doors, and lower cabinets. Rinse or wipe according to the cleaner’s directions and let everything dry completely.
Do not paint over grease. Paint does not bond well to kitchen grime. It simply sits there pretending everything is fine until it chips, peels, or scratches off during the first real-life wipe-down.
Step 4: Repair Dents, Holes, and Grain Issues
Fill dents, cracks, and unwanted hardware holes with wood filler. If you are switching from knobs to pulls, measure carefully before filling and drilling. Let filler dry fully, then sand it smooth. For open-grain wood like oak, decide whether you want the grain to show. Cloud Cover can look charming over subtle grain, but if you want a glass-smooth finish, consider using grain filler before primer.
Step 5: Sand for Adhesion
You do not need to sand cabinets down to bare wood unless the existing finish is failing. Usually, the goal is to dull the surface so primer can grip. Sand glossy areas with medium-grit paper, then smooth with finer grit. Be gentle on edges and profiles so you do not round over details or burn through veneer.
After sanding, vacuum every surface and wipe with a tack cloth or clean microfiber cloth. Dust is tiny, sneaky, and rude. If left behind, it will show up in your painted finish like confetti at the wrong party.
Step 6: Prime the Cabinets
Primer creates a bond between the old wood finish and the new paint. It also helps block stains and prevents tannins from bleeding through, which is especially important when painting darker wood cabinets a light color like Cloud Cover. Choose a primer compatible with your paint system and cabinet material.
Apply primer in thin, even coats. Use a brush for corners and profiles, then a mini roller for flat areas. Let the primer dry according to the manufacturer’s instructions. Once dry, lightly sand with fine-grit sandpaper to knock down dust nibs, drips, or raised grain. Wipe clean before painting.
Step 7: Apply the First Coat of Cloud Cover
Stir the paint well. Start with the cabinet frames, then move to doors and drawer fronts. Brush into corners, grooves, and decorative profiles. Roll larger flat surfaces with smooth, even pressure. Avoid overloading the brush or roller. Thick coats may feel efficient, but they dry slower, level poorly, and chip more easily.
Cloud Cover usually covers well over a properly primed surface, but the first coat may look slightly uneven. Do not panic. The first coat is not the final outfit. It is the base layer.
Step 8: Sand Lightly Between Coats
After the first coat dries fully, sand lightly with very fine sandpaper. This step makes a bigger difference than most beginners expect. It smooths texture, removes tiny bumps, and helps the next coat look more professional. Wipe away all dust before continuing.
Step 9: Apply the Second Coat
Apply a second thin coat of Cloud Cover. Work carefully and watch for drips along edges, corners, and recessed panels. If your cabinets are dark wood or have heavy grain, you may need a third coat in select areas. Resist the urge to keep touching the paint as it starts to set. Overworking semi-dry paint causes drag marks, which are basically brushstroke fossils.
Step 10: Let the Finish Cure
Dry-to-touch is not the same as fully cured. Cabinet paint needs time to harden. Reinstall doors only when the finish is dry enough to handle, and be gentle for the first week. Avoid heavy scrubbing, slamming, or stacking freshly painted doors. Use felt bumpers to prevent painted surfaces from sticking together or chipping at contact points.
Design Ideas for Cloud Cover Cabinets
Cloud Cover is flexible, but it still needs the right supporting cast. Think of it as the calm lead actor. It performs beautifully when the rest of the kitchen does not shout over it.
Countertops
Cloud Cover pairs well with quartz or marble-look counters that have soft gray, taupe, or warm veining. It can also work with butcher block if you want a cozy cottage feel. With very cool white countertops, sample carefully; Cloud Cover may look warmer by comparison.
Backsplash
Classic white subway tile, handmade zellige-style tile, pale gray ceramic, marble mosaic, or warm neutral stone can all work. If your backsplash is bright white, compare it directly with Cloud Cover before painting. Two whites that are close but not quite related can make each other look awkward, like strangers forced into matching outfits.
Hardware
Matte black hardware gives Cloud Cover cabinets a crisp modern edge. Brass adds warmth and charm. Polished nickel feels timeless and clean. Brushed nickel is practical and easy to blend with stainless steel appliances. If your kitchen has warm wood floors, brass or aged bronze can make the space feel grounded.
Walls and Trim
If the cabinets are Cloud Cover, consider whether your trim should be brighter, softer, or intentionally contrasting. A very similar white on trim can sometimes look slightly off unless the undertones coordinate. For walls, soft greige, pale gray-green, warm taupe, muted blue-gray, or a barely-there beige can complement Cloud Cover nicely.
Common Mistakes to Avoid
Skipping the Sample Test
Cloud Cover is beautiful, but no paint color is universally perfect. Test it in your actual kitchen. Your lighting, flooring, countertops, and backsplash will influence how it reads.
Painting Over Dirty Cabinets
Even beautiful paint cannot defeat bacon grease. Clean first, paint later. This is the cabinet-painting commandment.
Using Wall Paint Instead of Cabinet Paint
Cabinets need a tougher finish than walls. Choose paint designed for trim, doors, cabinetry, or furniture. It should resist handling, wiping, and everyday wear.
Applying Thick Coats
Multiple thin coats are stronger and smoother than one heavy coat. Thick paint can sag, wrinkle, and cure poorly.
Reinstalling Too Soon
Fresh paint may feel dry but still be soft underneath. Give it time. The kitchen can survive a few extra days without doors. Your patience will be rewarded with fewer chips.
How to Maintain Cloud Cover Painted Cabinets
Once the cabinets are cured, maintenance is simple. Wipe spills quickly with a soft cloth. For regular cleaning, use warm water with a few drops of mild dish soap. For stubborn grease, use a gentle diluted vinegar solution only after testing in a hidden spot. Avoid abrasive pads, harsh solvents, and aggressive scrubbing.
White and off-white cabinets show fingerprints faster than dark cabinets, but Cloud Cover is forgiving because it is not a stark white. A quick weekly wipe around handles, drawer pulls, and stove-adjacent doors keeps the finish looking fresh. Add clear bumpers to doors and drawers so painted surfaces do not hit painted frames every time someone searches for snacks.
Our Experience Painting Wood Cabinets Cloud Cover by Benjamin Moore
Painting wood cabinets Cloud Cover by Benjamin Moore felt, at first, like a small design decision. Pick a pretty white, buy the paint, transform the kitchen, accept compliments, become a person who casually says things like “the undertone really works with the quartz.” Easy. Then we removed the first cabinet door and discovered the true size of the project: not difficult, exactly, but definitely not a one-coffee situation.
The biggest surprise was how much the original wood tone affected our expectations. Before painting, the cabinets had a warm golden cast that made the kitchen feel darker than it actually was. The room had decent natural light, but the wood absorbed it. Once the first primed doors went up next to the old finish, the difference was immediate. Even before Cloud Cover was applied, the kitchen looked calmer and cleaner. After the first coat of Cloud Cover, the room started to feel wider, as if someone had opened an invisible window.
Cloud Cover did not look like plain white in our space. During the day, it leaned soft and fresh. At night, under warm bulbs, it became warmer and more relaxed. That shift was one reason we liked it. A brighter white might have made the kitchen look newer, but Cloud Cover made it feel lived-in in a good way. It had the quiet confidence of a color that does not need to shout, “Look, I’m renovated!”
The prep work mattered more than the painting. Cleaning around the old handles was mildly horrifying. Apparently, cabinets keep a secret diary of every cooking session, every fingerprint, and every time someone opened a drawer while making grilled cheese. Degreasing took longer than expected, but it made the sanding and priming feel more reliable. Once the cabinets were clean and dull, the primer grabbed better and the paint went on more smoothly.
The second lesson was that thin coats win. On one drawer front, we got impatient and rolled too much paint. It looked fine for about two minutes, then a tiny sag appeared near the edge like the cabinet was crying one elegant Cloud Cover tear. We sanded it back after it dried and repainted with a lighter hand. After that, we treated the paint like frosting on a fancy cake: smooth, controlled, and absolutely not applied with panic.
We also learned to respect cure time. The cabinets looked finished before they were ready for real life. That is a dangerous stage because your brain says, “Great, put everything back!” while the paint whispers, “Please do not touch me with a cereal bowl yet.” We waited, used bumpers, and avoided scrubbing for the first week. That patience helped the finish settle into a harder, more durable surface.
Design-wise, Cloud Cover made the biggest impact next to hardware. With the old knobs, the cabinets looked nice but slightly unfinished. Once new brass pulls went on, the color warmed up beautifully. The brass brought out the soft side of Cloud Cover, while the gray undertone kept the cabinets from looking yellow. Against the countertop, the color felt intentional rather than generic.
Would we choose Cloud Cover again? Yes, especially for a kitchen where pure white feels too sharp and cream feels too traditional. It is a great cabinet color for homeowners who want lightness, softness, and flexibility. It does require sampling, because all off-whites are sensitive to surrounding finishes. But when it works, it really works. The room feels fresher, the wood grain becomes quieter, and the whole kitchen gets that “we made a responsible adult design choice” glow. Which is lovely, even if the adults involved still eat dinner over the sink sometimes.
Final Thoughts
Painting our wood cabinets Cloud Cover by Benjamin Moore is a smart way to refresh a kitchen without replacing perfectly functional cabinetry. The color is soft, versatile, and refined, with enough gray influence to feel current and enough warmth to avoid looking cold. It works especially well for homeowners who want an off-white cabinet color that feels elegant rather than stark.
The project succeeds when the process is respected. Clean thoroughly, sand lightly, prime properly, use a cabinet-appropriate paint, apply thin coats, and allow the finish to cure. Cloud Cover can make old wood cabinets look brighter, calmer, and more custom, but the beauty comes from both the color and the craftsmanship. In other words, the paint gets the applause, but the prep work wrote the speech.