
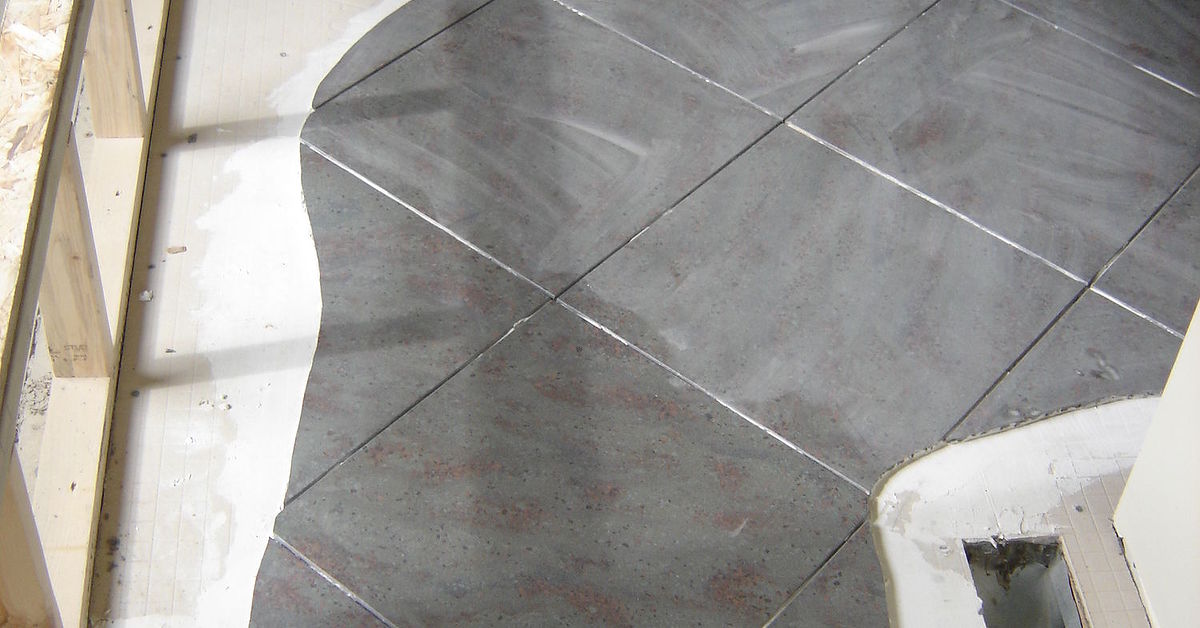
There is something wonderfully dramatic about walking into a bathroom and seeing what looks like a small river winding across the floor. No, not the “call-a-plumber-immediately” kind of river. We are talking about a carefully planned faux river tile design: a flowing strip of pebble, mosaic, glass, or stone-look tile that curves through the bathroom floor like a streambed. Done well, it feels spa-like, organic, and custom. Done poorly, it can look like someone spilled a bag of aquarium gravel and called it design.
Tiling a faux river look on a bathroom floor is part art project, part construction project, and part patience test. The goal is to create movement without chaos, texture without toe-stubbing, and visual interest without creating a cleaning nightmare. Because bathrooms are wet, humid, and occasionally treated like splash parks by children, pets, or enthusiastic adults, this project needs more than pretty tile. It needs smart materials, proper waterproofing, slip-conscious choices, careful layout, and grout that is ready for battle.
This guide walks through the design decisions, installation logic, material options, common mistakes, and real-world lessons behind creating a faux river bathroom floor that looks intentional, performs well, and does not make future-you mutter unkind things while scrubbing grout lines.
What Is a Faux River Bathroom Floor?
A faux river bathroom floor is a tile design that mimics the shape, color, and movement of a natural river or stream. Instead of covering the entire floor with one tile, you create a flowing “river” feature using contrasting materials. The river might run from the bathroom door to the vanity, curve around a freestanding tub, frame a shower entrance, or drift diagonally across the room.
The look is usually created with one of these materials:
- Flat pebble mosaic tile for a river-rock effect
- Blue, green, gray, or clear glass mosaic for a water-inspired look
- Natural stone mosaics in mixed earth tones
- Porcelain mosaic tile that imitates stone or water
- Small hexagon, penny, or irregular mosaic tile arranged in a flowing band
The surrounding bathroom floor tile acts like the “riverbank.” Popular pairings include large-format porcelain tile, stone-look ceramic tile, warm beige tiles, concrete-look porcelain, or wood-look plank tile. The contrast is what makes the design pop. A charcoal pebble river through a sand-colored porcelain floor feels grounded and natural. A blue glass mosaic river through matte white tile feels brighter and more playful. A mixed gray stone river through a concrete-look floor feels modern, moody, and slightly fancy without requiring a butler.
Why This Look Works So Well in Bathrooms
Bathrooms are smaller than living rooms, kitchens, and bedrooms, which makes them ideal for bold flooring ideas. A faux river feature can turn a compact bathroom into a destination instead of a purely functional space. It also helps guide the eye. In a narrow bathroom, a river strip can visually lengthen the room. In a square bathroom, a curved river can soften all the straight lines from cabinets, tubs, mirrors, and tile edges.
The faux river look also works because it adds texture. Bathrooms can easily become flat and sterile when every surface is glossy, white, and rectangular. Pebbles, mosaics, and organic shapes add a natural rhythm. They make the room feel less like a showroom and more like a retreat. Your toothbrush may still be sitting on the counter, but at least the floor is giving boutique hotel energy.
Plan the River Before Buying Tile
The biggest mistake homeowners make with a faux river floor is buying tile first and planning later. Tile is not wallpaper. You cannot just “vibe it out” and hope the curves behave. Before purchasing materials, sketch the bathroom floor to scale. Mark the toilet, vanity, shower, tub, door swing, heating vents, floor drain, and any transitions into other rooms.
Choose the River Path
The best faux river designs look like they belong to the room. A river can travel from the doorway toward the shower, curve around the tub, or flow from one side of the vanity area to the other. Avoid placing the most textured part directly where someone stands for long periods, such as in front of the sink, unless the tile is flat and comfortable underfoot. Pebble tile may feel spa-like for thirty seconds, but it can become less charming during a long skincare routine.
For most bathroom floors, a river band between 8 and 18 inches wide feels balanced. In a powder room, a narrow stream may be enough. In a larger primary bathroom, a wider meandering feature can work beautifully. The curves should be gentle, not frantic. If the outline looks like a snake that just drank espresso, simplify it.
Dry-Lay Everything
A dry layout is essential. Place the field tile and river tile on the floor before mortar enters the chat. This step helps you see how the tile edges meet, where cuts will fall, and whether the river shape feels natural. For pebble mosaics, rotate sheets and remove individual stones where sheet seams are obvious. Many pebble mosaics come on mesh backing, but the human eye can still detect repeating sheet outlines if you simply place them like square stickers.
Choose the Right Tile for a Bathroom Floor
Bathroom floor tile needs to do more than look pretty on a sample board under store lighting. It must handle water, bare feet, cleaning products, and daily traffic. Porcelain tile is a popular choice for the surrounding floor because it is dense, durable, and water resistant. Ceramic tile can also work in many bathrooms, but porcelain generally offers stronger moisture performance and durability.
For the faux river section, flat pebble mosaics are usually more practical than raised rounded pebbles. Flat-cut pebbles still deliver the river-rock look, but they are easier to walk on, easier to grout evenly, and easier to clean. Raised pebbles create more grout valleys, which can hold soap residue, minerals, and grime. That does not mean they are forbidden; it just means they demand more maintenance and better installation.
Think About Slip Resistance
Bathroom floors get wet. A tile that looks stunning but turns into an ice rink after a shower is not a win. For interior level areas expected to be walked on when wet, tile industry guidance commonly references wet DCOF values, and many manufacturers identify whether a tile is suitable for bathroom floors or shower floors. The important takeaway is simple: check the tile’s intended use, choose floor-rated material, and avoid overly glossy surfaces in wet walking zones.
Small mosaics often provide better traction because the grout joints add grip. This is one reason pebble, penny, and small-format tiles are frequently used on shower floors. However, no tile is truly “slip-proof,” so design should combine proper tile selection with good bath mats, ventilation, and regular cleaning.
Waterproofing: The Part You Do Not See but Absolutely Need
A faux river floor is only as good as the assembly beneath it. Bathrooms are wet areas, and tile itself is not a complete waterproofing system. Grout can absorb moisture, natural stone can be porous, and tiny cracks can become tiny problems with big invoices. Proper substrate preparation and waterproofing are what separate a long-lasting installation from a future demolition story.
Start with a stable subfloor. Tile does not enjoy movement. If the floor flexes, grout can crack and tiles can loosen. Many bathroom tile floors are built over cement backer board, uncoupling membrane, or other approved tile underlayment. The surface should be clean, flat, and appropriate for tile installation. Large-format field tiles require especially flat surfaces because unevenness can create lippage, where one tile edge sits higher than the next.
Waterproofing membranes are commonly used in wet areas and at vulnerable seams, corners, and transitions. For bathroom floors outside a shower, the level of waterproofing depends on the room, local code, product system, and risk level. Around showers, tubs, toilets, and vanities, it is smart to think carefully about seams, floor-to-wall junctions, and penetrations. Follow the membrane manufacturer’s instructions exactly. Waterproofing is not the place to freestyle. It is less jazz solo, more recipe from a very strict baker.
Designing the Riverbank: Field Tile Choices
The tile surrounding the faux river matters just as much as the river itself. If the field tile is too busy, the river disappears. If it is too plain, the river may look pasted on. Aim for contrast in texture, color, or shape, but not all three at maximum volume.
Popular Pairings
- Sand-colored porcelain with gray pebble river: natural, calm, beachy.
- Matte white tile with blue glass mosaic river: fresh, bright, spa-inspired.
- Concrete-look porcelain with black river stones: modern and dramatic.
- Wood-look porcelain with mixed stone mosaic: warm, organic, cabin-meets-spa.
- Large slate-look tile with lighter pebble ribbon: earthy and grounded.
Pay attention to thickness. Your field tile and river tile should finish at the same height. Pebble mosaics and glass mosaics may be thinner or thicker than surrounding tile. An installer may need to adjust the mortar bed or use an appropriate setting method to avoid a ridge where the two materials meet. A faux river should flow visually, not create a miniature curb for unsuspecting toes.
How to Tile a Faux River Look on a Bathroom Floor
The exact installation steps depend on the tile, substrate, waterproofing system, and room conditions, but the overall process follows a clear sequence.
1. Prepare the Bathroom Floor
Remove old flooring, adhesive residue, dust, and loose material. Inspect the subfloor for damage, moisture issues, squeaks, or movement. Install the chosen tile underlayment according to manufacturer instructions. Tape and treat seams where required. If using a waterproofing membrane, apply it only as directed, including proper overlaps, seam treatment, drying time, and compatible mortar.
2. Mark the Layout
Snap reference lines for the main field tile. Then draw the river shape directly on the prepared floor using a pencil or marker compatible with the substrate. Keep curves smooth. If you are nervous, use flexible painter’s tape to test the shape first. Stand at the bathroom entrance and look at the layout from normal viewing angles. The design should feel intentional from the doorway, not only from directly overhead.
3. Cut the Field Tile Around the River
Installers often set the field tile first, cutting it to follow the river outline, or they may set the river first and cut the field tile to it. Either method can work, but the cuts must be clean and planned. Curved cuts in porcelain may require a wet saw, angle grinder with a diamond blade, tile nippers, and patience. This is where the project becomes less “weekend makeover montage” and more “measure twice, breathe once, cut carefully.”
4. Set the River Tile
Use the thin-set mortar recommended for your tile type and substrate. Spread only as much mortar as you can cover before it skins over. For mosaics, use the correct trowel notch so mortar supports the tile without oozing excessively through the joints. Press sheets into place with a grout float or beating block to keep the surface even.
For pebble mosaics, avoid visible sheet lines. Pull some stones from the mesh and place them individually along seams and curves. Around edges, use loose stones to create a more natural outline. A real river does not have repeating 12-by-12-inch mesh-sheet geometry, and your faux river should not either.
5. Grout With Care
Grout color dramatically changes the final look. A grout close to the pebble color creates a soft, blended streambed. A contrasting grout highlights each stone, which can look beautiful or busy depending on the tile. For river-rock designs, medium gray, warm taupe, sandy beige, and soft charcoal are common choices.
Pebble tile usually has wider and irregular joints, so the grout must be compatible with those joint widths. Some installations benefit from high-performance cement grout or epoxy grout, especially in wet areas, but product compatibility matters. Natural stone may need sealing before grouting to reduce staining and grout haze. Always follow the tile and grout manufacturer’s instructions, especially for mixing, working time, cleanup, and curing.
6. Seal Where Needed
Glazed ceramic and porcelain tile usually do not need sealing, but cement-based grout and natural stone often do. Natural stone pebble floors may need sealing before and after grouting, depending on the product. Grout sealers help reduce staining and moisture absorption, but they are not magic force fields. They must be applied correctly and refreshed over time.
Maintenance: Keeping the River Pretty Instead of Swampy
A faux river floor can stay beautiful for years, but textured tile and extra grout lines require honest maintenance. Sweep or vacuum regularly to remove grit. Mop with a cleaner suitable for your tile type. Avoid acidic cleaners on natural stone because they can etch or damage the surface. In bathrooms with showers, ventilation is your friend. Run the fan, open the door when possible, and let the floor dry.
Grout is the maintenance headline. Pebble tile has more grout than large-format tile, which means more places for soap residue and hard-water minerals to settle. Choose grout color wisely. Bright white grout around pebble tile may look crisp on day one and emotionally complicated by month twelve. Mid-tone grout is often more forgiving.
Common Mistakes to Avoid
Using Wall Tile on the Floor
Not every tile belongs underfoot. Wall tile may be too slippery, too fragile, or not rated for floor use. Always confirm the tile is appropriate for bathroom floors.
Skipping the Dry Layout
The faux river look depends on flow. Without dry-laying the pattern, the river may end up too wide, too narrow, awkwardly placed, or full of visible mesh seams.
Ignoring Tile Thickness
If the river tile and field tile finish at different heights, the floor can feel uneven and look amateur. Plan transitions before installation.
Choosing the Wrong Grout
Irregular pebble joints require grout that can handle variable widths. Using the wrong grout can lead to cracking, scratching, staining, or weak joints.
Forgetting Maintenance
A pebble river is not a zero-maintenance design. It is beautiful, but it asks for regular cleaning, drying, and occasional resealing. Think of it as a houseplant you can walk on.
Best Places to Use a Faux River Floor
This design is especially effective in primary bathrooms, guest bathrooms, powder rooms, and spa-style remodels. It can also work near a walk-in shower, beside a freestanding tub, or across a long narrow bathroom floor. In small bathrooms, keep the river simple and narrow. In large bathrooms, you can be more expressive with curves and material contrast.
If the bathroom already has a lot going on, such as patterned wallpaper, colorful cabinets, statement lighting, and dramatic shower tile, use a quieter river design. If the bathroom is minimal, the river can be the star. Design is a conversation. Not every surface needs to shout at once.
Cost Factors to Consider
A faux river tile floor can cost more than a standard tile installation because it involves extra layout time, specialty cuts, more grout work, and potentially mixed materials. Pebble mosaics, glass mosaics, natural stone, waterproofing membranes, premium grout, and sealers can all add to the budget. Labor may also increase because curved layouts and mosaic blending take time.
However, the design does not have to cover the entire floor to make an impact. A narrow river feature through affordable porcelain field tile can look custom without requiring every square inch to be premium material. The smartest budget move is to spend on the parts that affect performance: substrate prep, waterproofing, proper mortar, suitable grout, and skilled installation.
Experience-Based Tips for Tiling a Faux River Look on a Bathroom Floor
After looking at what makes these floors succeed in real homes, the biggest lesson is this: the faux river should be designed like a feature, not improvised like a craft project after too much coffee. The most convincing floors have a clear beginning, a natural path, and a balanced relationship with the rest of the bathroom. When the river starts randomly in the middle of the room, stops abruptly at a toilet, or wiggles too aggressively, it can feel confusing. When it follows the room’s movement from entrance to shower, vanity to tub, or wall to wall, it feels intentional.
Another practical experience is to choose flatter texture than you think you need. In photos, rounded pebble tile looks charming and massage-like. In daily life, it can feel bumpy, especially in places where people stand still. Flat-cut pebble mosaics usually give the best compromise: organic beauty, easier cleaning, and better comfort. If you love the look of raised stones, consider using them as a narrower accent strip rather than across a major standing zone.
Grout color deserves serious attention. Many homeowners automatically reach for white grout because it feels clean. On pebble and river-rock floors, white grout often creates high contrast and shows dirt quickly. A warm gray, stone gray, beige, or mushroom tone usually looks more natural and ages more gracefully. The goal is to make the floor look like a riverbed, not a spreadsheet of tiny stones.
Sheet seams are another real-world giveaway. Pebble mosaics are sold in sheets, and even interlocking sheets can leave visible outlines if installed straight from the box. A good approach is to open several boxes, mix sheets, rotate them, and remove individual pebbles along the edges. Fill gaps by hand. This takes extra time, but it is the difference between “custom spa floor” and “I can see every square from aisle seven.”
Lighting also changes everything. Glossy glass mosaics may sparkle beautifully under warm vanity lights but look harsh under cool overhead lighting. Natural stone may look rich when sealed but dull when dry and dusty. Always view samples in the actual bathroom if possible. Morning light, evening light, and artificial light can make the same tile look like three different personalities.
Cleaning habits should influence the design. If the bathroom belongs to someone who loves weekly detailing, a pebble river with natural stone can be a joy. If the bathroom belongs to a busy household where the floor gets cleaned whenever someone remembers that floors exist, choose porcelain mosaics, darker grout, and simpler textures. Good design should match real life, not an imaginary version of life where everyone owns a tiny grout brush and endless free time.
Finally, do not underestimate professional installation for complex layouts. A straight grid of tile is one thing; a curved mosaic feature with waterproofing, height transitions, and irregular grout joints is another. Experienced tile installers understand substrate movement, mortar coverage, membrane compatibility, expansion gaps, and grout behavior. Those details are not glamorous, but they are why the floor still looks good years later.
Conclusion
Tiling a faux river look on a bathroom floor is one of those projects that can make a bathroom feel truly memorable. It adds movement, texture, and personality in a space that is often dominated by straight lines and hard surfaces. The secret is balance. Choose floor-rated, wet-area-appropriate tile. Plan the river path carefully. Keep the substrate stable and waterproofed where needed. Blend pebble sheets so the pattern looks natural. Select grout that supports both the design and daily maintenance. Then seal and clean the floor according to the materials you choose.
A faux river floor should feel calm, not chaotic; custom, not crafty; natural, not neglected. With the right planning, it can turn an ordinary bathroom into a small retreat where the floor quietly says, “Yes, I am the interesting one in this room.” And honestly, some bathrooms need that kind of confidence.













