
Note: This article is based on current RealSense SDK, librealsense, Linux, macOS, ROS, OpenCV, Open3D, and Python package documentation, rewritten in original editorial language for web publication.
Intel RealSense cameras occupy a fun little corner of the hardware world: they look like ordinary webcams, but they see distance, shape, motion, and space in a way that makes robots, scanners, interactive installations, and computer vision projects feel slightly less like science fiction and slightly more like a weekend project that will definitely take three weekends. If you are trying to use RealSense cameras with OS X and Linux, the good news is that both platforms can work. The more realistic news is that Linux is usually the smoother ride, while macOS is more like a scenic mountain road: beautiful, capable, and occasionally full of surprising turns.
The main keyword here is simple: Using RealSense Cameras With OS X And Linux. But the real story is about choosing the right operating system, installing the RealSense SDK, understanding the limits of macOS support, and building practical workflows for depth sensing, RGB-D capture, robotics, 3D scanning, and computer vision.
What Are RealSense Cameras?
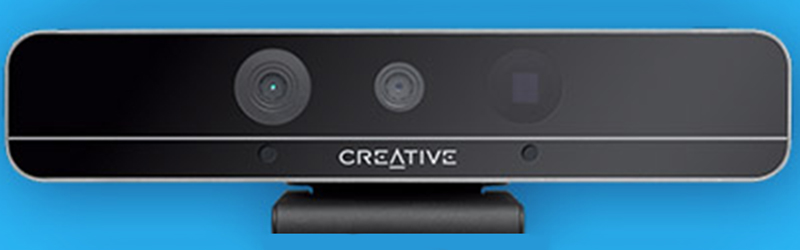
RealSense cameras are depth-sensing cameras originally developed by Intel. Popular models such as the D415, D435, D435i, and D455 use stereo vision to estimate depth. Instead of merely capturing a flat color image, they provide depth frames that tell your software how far surfaces are from the camera. That extra dimension is what makes them useful for robotics, object detection, gesture interfaces, 3D mapping, measurement tools, and spatial experiments.
A typical RealSense depth camera may provide a color stream, infrared streams, depth data, camera calibration information, and, on some models, motion data from an IMU. The camera connects by USB, and your application communicates with it through the RealSense SDK, commonly known as librealsense. Think of librealsense as the translator between your camera and your code. Without it, the camera is just an expensive rectangle with trust issues.
RealSense SDK: The Core Tool You Need
The RealSense SDK 2.0 is the main software layer for modern RealSense cameras. It provides APIs for C++, Python, and other integrations, allowing developers to stream depth and color, read calibration data, align depth to color, generate point clouds, record sessions, and tune camera options.
On Linux, the SDK is especially useful because it integrates well with development tools used in robotics and machine vision. Ubuntu is the most common target because many RealSense installation packages, kernel patches, ROS wrappers, and examples are built around Ubuntu LTS releases. If you are building a robot, a scanning station, or a research prototype, Linux should usually be your first choice.
On macOS, the SDK can still be useful, especially for lightweight development, experiments, and applications that only need basic depth and color streaming. However, some features are limited compared with Linux and Windows. The RealSense Viewer, for example, has not always been supported on current macOS releases, and motion sensor support may be restricted depending on the SDK version and camera model.
Using RealSense Cameras on Linux
Why Linux Is the Preferred Platform
Linux is the closest thing to a natural habitat for RealSense development. That does not mean everything is automatic, but it does mean the ecosystem is mature. Ubuntu LTS releases are widely supported, ROS development is common, and most tutorials assume you are using a terminal with sudo privileges and at least mild emotional resilience.
For projects involving robotics, autonomous navigation, SLAM, point cloud processing, or AI pipelines, Linux offers the most complete toolchain. You can combine RealSense cameras with ROS2, OpenCV, Open3D, Python, C++, Docker, and NVIDIA Jetson boards. This makes Linux ideal for serious development where the camera is not just a toy, but part of a larger sensing system.
Typical Linux Setup Workflow
A common Linux workflow starts with installing librealsense packages or building the SDK from source. Package installation is easier and faster, while building from source gives more control over options, examples, wrappers, and kernel behavior.
Developers usually begin by updating the system, installing dependencies, adding RealSense package repositories where appropriate, installing the SDK libraries and development headers, and then testing the camera with a viewer or sample program. If the camera appears, streams depth, and does not immediately turn your terminal into a wall of red text, congratulations: you are officially in business.
USB matters. Many RealSense depth cameras perform best over USB 3.0. Some devices may operate with reduced capabilities over USB 2.0, but lower bandwidth can reduce resolution, frame rate, or stream combinations. If your depth stream looks unstable, the first troubleshooting step is often not deep philosophy; it is checking the cable, port, and power.
Linux and ROS
RealSense cameras are widely used with ROS and ROS2. The RealSense ROS wrapper lets developers publish camera streams, depth images, point clouds, camera info, and transform data into the ROS ecosystem. This is especially useful for mobile robots, robotic arms, mapping systems, and perception pipelines.
For example, a small robot using a RealSense D435i can stream depth data into ROS2, convert the stream into a point cloud, and use that information for obstacle avoidance or mapping. Add wheel odometry and an IMU, and suddenly your robot has opinions about the furniture.
ROS support is one of the strongest reasons to choose Linux over macOS for RealSense development. While macOS can be used for general coding, Linux is where ROS integration tends to be better documented, better tested, and easier to reproduce.
Using RealSense Cameras on OS X and macOS
OS X vs. macOS: A Naming Note
Many older tutorials refer to “OS X,” while newer documentation uses “macOS.” In practical terms, most developers today are working with modern macOS versions, not the older OS X releases. The phrase Using RealSense Cameras With OS X And Linux still appears in older maker and hardware communities, but the actual setup process depends heavily on your current macOS version, CPU architecture, SDK version, and camera model.
What Works on macOS
macOS can work for RealSense development when your goals are modest and API-focused. You may be able to install librealsense through package managers such as Homebrew or build it from source. For Python users, there are community package options, although compatibility can vary by Python version and system architecture.
Good macOS use cases include experimenting with camera streams, learning the SDK, prototyping a desktop tool, recording simple RGB-D data, or writing cross-platform code that will later run on Linux. If you are building a quick Open3D demo or testing depth alignment, macOS can be perfectly reasonable.
macOS Limitations to Know Before You Start
The main issue is feature completeness. macOS support for RealSense has historically lagged behind Linux and Windows. Depending on the SDK release, the RealSense Viewer may not be available, and IMU access may be disabled or limited. That can matter a lot if you are using a D435i and expect acceleration or gyroscope data.
Another challenge is Python packaging. On Linux, installing pyrealsense2 is often straightforward when versions match. On macOS, developers may run into missing wheels, architecture differences, build errors, or package compatibility issues. Apple Silicon Macs add another layer of complexity because not every native dependency behaves exactly like its Intel Mac ancestor.
In short: macOS is good for exploration, but Linux is better for production-grade RealSense work. The Mac is the elegant notebook on the desk; Linux is the workbench with screws, cables, and a robot that may or may not respect boundaries.
RealSense With Python, OpenCV, and Open3D
Python and pyrealsense2
Python is one of the easiest ways to start using RealSense cameras. With pyrealsense2, a developer can create a pipeline, start streaming, wait for frames, access depth and color data, and convert frames into NumPy arrays for analysis. This makes Python great for prototypes, machine learning experiments, computer vision demos, and classroom projects.
A basic example might start a camera stream, grab synchronized depth and color frames, convert them into arrays, and display them. From there, you can measure distance at a pixel, segment objects by depth, create a point cloud, or feed the image into an AI model.
OpenCV Integration
OpenCV is a natural partner for RealSense. It handles image display, filtering, edge detection, object tracking, camera calibration utilities, and countless computer vision tasks. A common beginner project is showing a colorized depth image in an OpenCV window. It sounds simple, but it confirms that the camera, SDK, frame conversion, and display stack are all working.
Once OpenCV is connected, you can build more interesting applications. For example, a depth-aware object detector can ignore background clutter by filtering out everything farther than a chosen distance. A gesture interface can track hands within a depth range. A measurement tool can estimate object size when calibrated properly. This is where RealSense stops being a camera and starts acting like a spatial sensor.
Open3D for Point Clouds and 3D Work
Open3D is useful when you want to work with point clouds, RGB-D images, and 3D reconstruction. It supports RealSense workflows and can capture frames, record data, and process 3D geometry. For developers interested in scanning objects, mapping rooms, or visualizing depth data in three dimensions, Open3D is often easier than writing everything from scratch.
A practical example is capturing a sequence of RGB-D frames, converting them into point clouds, and merging them into a rough 3D model. The result may not rival a professional laser scanner, but it can be surprisingly useful for robotics experiments, object modeling, and research prototypes.
Choosing Between OS X and Linux for RealSense Projects
Choose Linux If You Need Reliability
Use Linux if your RealSense camera is part of a serious workflow. That includes robotics, ROS2, field testing, Jetson development, machine vision, industrial prototypes, and long-running capture systems. Linux gives you better access to the full SDK ecosystem, stronger community examples, and more predictable deployment options.
Ubuntu LTS is usually the safest starting point. It is well documented, widely used in robotics, and commonly referenced in RealSense installation instructions. If your project involves multiple sensors, synchronized capture, or background services, Linux will save you time.
Choose macOS If You Need Convenience
Use macOS if you are experimenting, learning, or writing cross-platform code from a Mac laptop. It can be convenient for software developers who already use macOS as their daily machine. You can prototype algorithms, test basic streaming, and prepare code that later runs on Linux.
However, avoid assuming that every Linux RealSense tutorial will translate perfectly to macOS. Package names, build flags, permissions, and supported tools may differ. When something breaks, the answer may be “wrong SDK version,” “wrong Python version,” “wrong architecture,” or “because computers enjoy drama.”
Common Problems and Practical Fixes
The Camera Is Not Detected
Start with the basics. Check the USB cable, use a USB 3.0 port, avoid low-quality hubs, and confirm the device appears at the operating system level. On Linux, tools such as lsusb can help verify detection. On macOS, system information can show whether the USB device is visible.
The Stream Freezes or Drops Frames
This is often a bandwidth issue. Lower the resolution, reduce the frame rate, disable unnecessary streams, or switch to a better cable. RealSense cameras can move a lot of data. If your USB cable came free with a gadget from a drawer of mystery, replace it before blaming the SDK.
Python Cannot Import pyrealsense2
This usually means the Python package does not match your system, architecture, or Python version. On Linux, check whether you installed the right package for your distribution and Python environment. On macOS, consider whether the available package supports your Mac model and Python version. Virtual environments help keep dependencies organized.
Depth Looks Noisy
Depth sensing depends on lighting, distance, surface texture, reflective materials, and camera settings. Shiny, transparent, black, or thin objects can be difficult for stereo depth cameras. Improve lighting, avoid reflective surfaces, test different presets, and stay within the recommended operating range of your model.
Best Practices for RealSense Development
First, test the camera with the simplest possible example before building your full application. If a basic depth stream does not work, your advanced robot navigation stack will not magically fix it. Second, pin your SDK version once the project works. Updating dependencies right before a demo is a traditional way to meet your inner gremlin.
Third, document your setup. Record the camera model, firmware version, SDK version, operating system version, kernel version, Python version, and USB hardware. This information is incredibly useful when troubleshooting. Fourth, design for failure. Cameras disconnect, frames drop, lighting changes, and users do weird things like standing directly in front of the robot while asking whether it can see them.
Finally, choose the platform based on the job. Linux is the best default for complete RealSense camera development. macOS is useful for learning, prototyping, and lighter workflows. Both can be part of a productive development process if you understand their strengths and limits.
Experience Notes: Using RealSense Cameras With OS X And Linux
In real-world use, the difference between RealSense on Linux and RealSense on macOS feels less like a battle and more like choosing between a workshop and a studio. Linux is where the bolts are labeled, the tools are greasy, and the robot is already plugged in. macOS is cleaner, quieter, and pleasant for writing code, but you may occasionally discover that one important tool is missing right when you reach for it.
The most practical experience is this: start on Linux when the camera is central to the project. If you are building a robot, doing ROS2 work, recording long sessions, or managing depth streams with strict performance expectations, Linux will usually get you from idea to working prototype faster. Ubuntu LTS is especially helpful because most examples, issue reports, and community fixes assume that environment. When something goes wrong, you can search the error message and find someone who already fought the same dragon.
With Linux, the biggest lessons are about discipline. Use a known supported Ubuntu version. Do not randomly upgrade kernels in the middle of a project. Keep your firmware and SDK versions documented. Test with a short cable before using a long cable. Avoid cheap USB hubs unless your hobby is debugging ghosts. When performance matters, reduce streams to only what you need. A 1280-by-720 depth stream at high frame rate sounds wonderful until your bus bandwidth starts sweating.
On macOS, the experience is more mixed but still useful. A Mac is excellent for writing application logic, experimenting with Python notebooks, testing Open3D workflows, and building interface prototypes. It is also convenient for developers who live in Xcode, VS Code, Homebrew, and terminal tabs. But macOS RealSense development requires patience. Python packages may not install the way they do on Linux. Some SDK features may be unavailable. Viewer support may be limited. If your project depends on IMU data, advanced device controls, or exact parity with Linux behavior, test early instead of assuming it will work later.
A good hybrid workflow is to develop algorithms on macOS when convenient, then validate hardware behavior on Linux. For example, you might write a depth filtering script on a Mac using recorded data, then run the live camera pipeline on an Ubuntu machine attached to the robot. This keeps daily coding comfortable while preserving deployment reliability.
Another lesson is that RealSense cameras reward simple milestones. First, detect the camera. Then stream depth. Then stream color. Then align depth to color. Then save frames. Then create a point cloud. Only after that should you add robotics middleware, neural networks, or custom user interfaces. Skipping those steps is like assembling furniture without reading the manual: possible, heroic, and likely to end with one mysterious screw.
The final experience-based advice is to treat RealSense as a sensor, not just a webcam. Depth data has quirks. Reflective surfaces lie. Glass confuses the camera. Lighting changes results. Distance matters. Calibration matters. Once you respect those limits, RealSense cameras become powerful tools for Linux and macOS developers alike.
Conclusion
Using RealSense cameras with OS X and Linux is absolutely possible, but the best platform depends on your goal. Linux, especially Ubuntu LTS, is the stronger choice for robotics, ROS, production prototypes, and full SDK workflows. macOS is useful for learning, lightweight experiments, and cross-platform development, but it may involve limitations around tooling, Python packages, and certain device features.
If you want the shortest path to serious results, use Linux. If you want a convenient place to experiment and write code, macOS can still earn a place on your desk. Either way, the winning formula is the same: pick the right camera, use a good USB connection, install the correct SDK version, start with simple examples, and build your project one verified stream at a time.














