
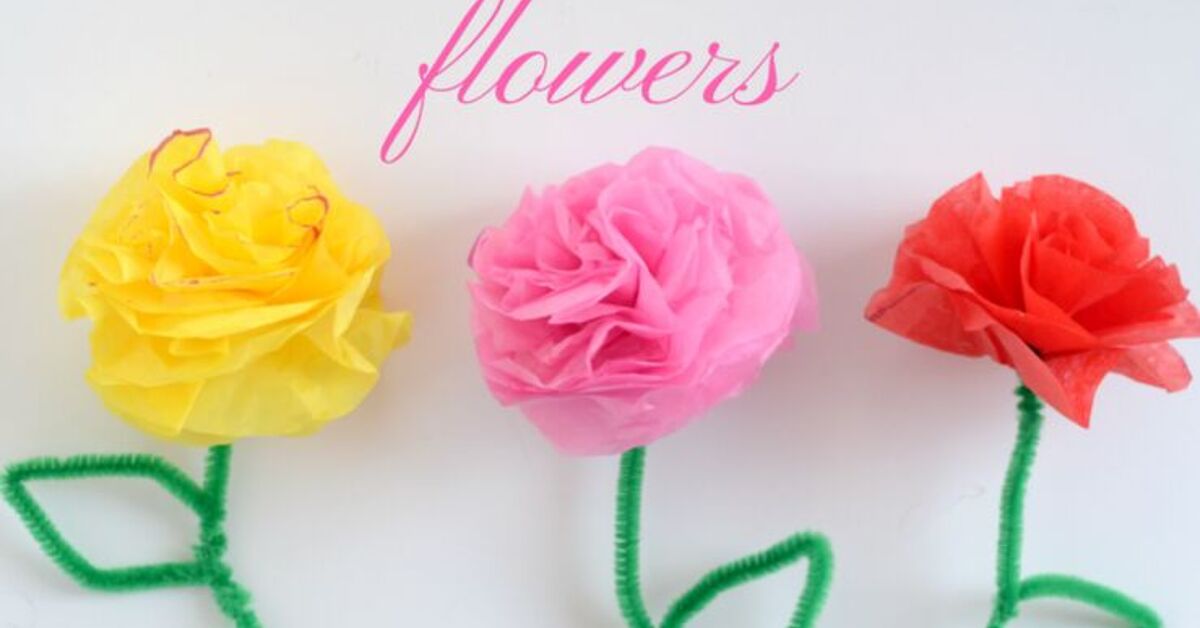
Some gifts whisper, “I thought of you.” Others shout it from the kitchen table while leaving tiny confetti scraps on the floor. Tissue paper flowers do both beautifully. They are cheerful, affordable, beginner-friendly, and wonderfully dramatic for something made from a material that usually lives inside gift bags. Best of all, they do not wilt, complain about tap water, or require anyone to remember where the vase is hiding.
If you are looking for an easy DIY flower craft for Mother’s Day, birthdays, Valentine’s Day, classroom projects, party decorations, thank-you gifts, or a random Tuesday rescue mission, tissue paper flowers are a sweet answer. With a few sheets of tissue paper, scissors, and pipe cleaners or floral wire, you can create a bouquet that feels personal without needing professional florist skills. In other words, no botanical degree required.
This guide walks you through how to make tissue paper flowers step by step, plus color ideas, creative uses, troubleshooting tips, and heartfelt ways to give them to someone special. Whether you are crafting with kids, decorating a party, or making a handmade bouquet for a friend who needs a smile, these easy paper flowers bring a bright pop of joy with very little fuss.
Why Tissue Paper Flowers Make Such a Thoughtful Gift
Fresh flowers are lovely, but tissue paper flowers have their own superpower: they last. A handmade paper flower bouquet can sit on a desk, nightstand, classroom shelf, or windowsill long after real petals would have given up and become compost with opinions. They are lightweight, customizable, and easy to match to someone’s favorite colors.
They also carry the charm of effort. You do not have to make them perfect. In fact, slightly uneven petals often make them look more natural. A crease here, a fluff there, one petal behaving like it had too much coffeethese little quirks are part of the handmade magic.
Tissue paper flowers are also budget-friendly. A single pack of tissue paper can produce several blooms, and you can often reuse leftover paper from gift bags. That makes this craft ideal for families, teachers, party planners, and anyone who wants something beautiful without watching their wallet quietly faint.
Supplies You Need for Easy Tissue Paper Flowers
You do not need a giant craft room or a drawer labeled “mysterious adhesives.” For basic tissue paper flowers, gather the following materials:
- Tissue paper in your chosen colors
- Green pipe cleaners, floral wire, or paper straws for stems
- Scissors
- Floral tape or washi tape, optional
- Ribbon, small pom-poms, stickers, or sequins, optional
- A ruler, optional but helpful for consistent flowers
For fuller flowers, use six to twelve layers of tissue paper. Fewer layers create a lighter, more delicate bloom, while more layers create a big, fluffy flower that looks ready to headline a spring parade. If you want smaller blossoms, cut smaller rectangles. For oversized party flowers, use larger sheets.
How to Make Tissue Paper Flowers Step by Step
Step 1: Stack and Cut the Tissue Paper
Choose six to ten sheets of tissue paper and stack them neatly. For a medium flower, cut the stack into rectangles around 8 by 12 inches. The exact size does not have to be perfect. Tissue paper is forgiving, which is nice because rulers somehow disappear the moment crafts begin.
Try layering colors for a more interesting look. Place yellow tissue in the center for a sunflower effect, pink and white for a soft peony style, or rainbow colors for a cheerful party bloom. The color order matters because the top and center layers will become the inner petals.
Step 2: Accordion Fold the Stack
Starting from one short side, fold the tissue paper back and forth like a fan. Each fold can be about one inch wide. Continue folding until the entire stack looks like a long, narrow accordion. Press gently along the folds so the paper keeps its shape.
This is the step where the flower starts pretending it knows what it is doing. Do not worry if the folds are not perfectly even. Once the petals are fluffed, tiny differences disappear into the bloom.
Step 3: Secure the Center
Find the middle of the folded strip and wrap a pipe cleaner or floral wire around it. Twist it tightly enough to hold the paper, but not so tightly that it tears. The remaining length of pipe cleaner becomes the stem.
If you are making flowers for a bouquet, green pipe cleaners are quick and kid-friendly. Floral wire creates a cleaner, more elegant stem for decorations or centerpieces. Paper straws also work well if you want a sturdier handle.
Step 4: Shape the Petal Ends
Use scissors to trim both ends of the folded tissue paper. Rounded ends create soft, classic petals. Pointed ends make a dahlia or chrysanthemum-style bloom. Fringe cuts create a fun, fuzzy center. Scalloped edges look fancy, even if you made them while standing over the kitchen trash can.
Sharp scissors help prevent ragged edges. Younger children may need help with this part because the folded stack can be thick.
Step 5: Open the Flower Carefully
Fan out both sides of the folded tissue paper. Then gently separate one layer at a time, pulling it upward toward the center. Tissue paper tears easily, so move slowly. If a small rip happens, do not panic. Once the flower is fluffed, most little tears hide inside the petals.
Continue separating and lifting each layer until the flower looks full. Rotate the bloom as you work so it opens evenly. This step is where flat paper becomes a flower, and yes, it is completely acceptable to feel a tiny bit powerful.
Step 6: Add Leaves or Stem Details
For a finished look, cut leaf shapes from green tissue paper or construction paper. Attach them with floral tape, glue dots, or a small twist of pipe cleaner. You can also wrap the stem with green washi tape for extra color and stability.
If the flowers are going into a vase, make stems of different lengths. This gives the bouquet a more natural shape and prevents every bloom from crowding the top like people trying to get into an elevator.
Creative Tissue Paper Flower Variations
Classic Fluffy Pom-Pom Flowers
For a big, round bloom, use more layers of tissue paper and fluff both sides fully. These flowers work well for party backdrops, baby showers, birthday tables, classroom bulletin boards, and bedroom decorations. Make several in different sizes for a garden-wall effect.
Two-Tone Flowers
Stack one color in the middle and another color on the outside. Yellow centers with white outer petals resemble daisies. Dark pink centers with pale pink outer petals create a romantic, rose-like look. Blue and purple combinations feel playful and modern.
Mini Bouquet Flowers
Use smaller tissue rectangles, about 4 by 6 inches, to create mini flowers. These are perfect for gift toppers, cards, place settings, napkin rings, or tiny desk bouquets. A group of mini flowers tied with ribbon makes an adorable “just because” gift.
Giant Party Flowers
Use full-size tissue sheets for oversized flowers. Secure the center with floral wire instead of a pipe cleaner for better support. Giant tissue paper flowers make great photo booth decorations, spring party backdrops, and cheerful wall art.
Best Color Ideas for Tissue Paper Flowers
Color can change the whole personality of your paper flower bouquet. Soft pastels feel sweet and gentle, while bright colors feel festive. Red, pink, and white are perfect for Valentine’s Day. Yellow, coral, and lavender feel sunny for spring. Orange, burgundy, and gold create a warm fall bouquet.
For someone who loves calm decor, try ivory, blush, sage green, and pale blue. For someone who loves bold style, go with hot pink, turquoise, purple, and bright yellow. If you are making flowers for a teacher, mix cheerful classroom colors. If you are making them for a grandparent, choose nostalgic garden shades like rose, cream, lilac, and butter yellow.
You can also personalize flowers by writing tiny notes on the tissue before folding. Use a light hand and a marker that does not bleed too much. Add words like “thank you,” “you matter,” “smile,” or “best aunt ever.” It turns a simple craft into a message bouquet.
Ways to Use Tissue Paper Flowers
Make a Handmade Bouquet
Gather several tissue paper flowers and tie the stems with ribbon. Wrap the bouquet in brown kraft paper or leftover gift wrap. Add a small tag with a handwritten note. This makes an easy handmade gift for Mother’s Day, birthdays, teacher appreciation, hospital visits, or cheering up a friend.
Decorate a Gift Bag
Instead of stuffing tissue paper inside a gift bag, turn it into a flower on the outside. Attach a mini bloom to the handle with ribbon. It makes even a simple present look thoughtful and festive.
Create a Party Backdrop
Make large tissue paper flowers and tape them to a wall in clusters. Mix sizes for a fuller look. This works beautifully for birthday parties, bridal showers, baby showers, graduation celebrations, and spring brunches.
Brighten a Desk or Bedroom
Place flowers in a jar, mug, or recycled bottle. They add color to a workspace without needing sunlight. That is excellent news for anyone whose desk plant has entered witness protection.
Use Them in Classroom Crafts
Tissue paper flowers are great for school projects because the materials are simple and the results are cheerful. Kids can practice folding, cutting, color planning, and fine motor skills while making something giftable.
Helpful Tips for Better Tissue Paper Flowers
Use fresh tissue paper if you want crisp, polished flowers. Use recycled tissue paper if you want a softer, more textured look. Both can be beautiful. Avoid glitter-heavy tissue paper for young children because it can shed everywhere and somehow appear in places no glitter should legally visit.
When separating layers, start from the top and pull slowly. If the paper resists, loosen the folds with your fingers before lifting. For fuller flowers, separate every layer. For flatter flowers that can be attached to cards or walls, fluff only one side and leave the back more level.
If your flower looks lopsided, trim the edges or gently rearrange the petals. If the stem feels weak, tape a straw or wooden craft stick to it. If the center looks empty, glue a small pom-pom, button, or crumpled tissue ball in the middle.
Common Mistakes to Avoid
The first mistake is using too few tissue layers. Two or three layers may look thin unless you are making very delicate flowers. Aim for at least six layers for a satisfying bloom.
The second mistake is pulling the tissue too quickly. Tissue paper is delicate. Treat it like a tiny paper cloud with trust issues. Slow, gentle movements make better petals.
The third mistake is forgetting to shape the ends before fluffing. The end cuts define the petal style, so trim while the paper is still folded. Rounded, pointed, fringed, and scalloped cuts each create a different flower personality.
The fourth mistake is making every flower the same size. Real bouquets look more interesting when blooms vary. Mix large, medium, and mini flowers for a fuller arrangement.
How to Make Tissue Paper Flowers Feel More Personal
A handmade flower becomes even sweeter when it reflects the person receiving it. Use their favorite colors. Add a small charm, tag, or inside joke. Create one flower for every reason you appreciate them. For example, a bouquet of ten flowers could include ten tiny notes, each naming something you love about that person.
For a get-well gift, choose sunny yellow and orange flowers with a note that says, “No watering required, just smiling.” For a teacher, make a bouquet in school colors. For a friend moving into a new home, place the flowers in a painted jar. For a birthday, add one sparkly flower in the center like the bouquet’s dramatic lead singer.
Experience: What Making These Flowers Teaches You
Making tissue paper flowers sounds simple, and it is, but the experience has a surprisingly sweet rhythm. The first few minutes are practical: stack the paper, line up the edges, fold, fold again, and try not to sneeze directly into your future bouquet. Then the craft begins to slow you down in the best way. You have to pay attention. You have to be gentle. You have to separate each layer with patience, which is not always easy in a world where we expect everything to load instantly.
One of the nicest parts of this project is how quickly it turns ordinary materials into something meaningful. A sheet of tissue paper by itself is not impressive. It is thin, floppy, and usually associated with wrapping a candle you bought at the last minute. But stack a few sheets, fold them carefully, tie the center, and fluff the layers, and suddenly you have a flower. It is a small transformation, but it feels satisfying every time.
This craft is also a great reminder that handmade gifts do not need to be expensive to feel valuable. When you give someone tissue paper flowers, you are giving them time. You are giving them color you chose on purpose. You are giving them something that says, “I made this with you in mind,” which is often more touching than a perfectly polished store-bought item.
Crafting these flowers with kids can be especially fun because children do not worry about perfection the way adults do. A child might choose purple, neon green, and red for one flower and declare it “a rainbow volcano rose.” Honestly, that confidence deserves respect. Kids often remind us that creativity is not about matching a catalog photo. It is about making something joyful and being proud enough to hand it to someone with both hands.
Adults benefit from the process too. Folding and fluffing paper flowers can feel calming after a long day. It gives your hands something simple to do while your mind settles. You can make them while listening to music, chatting with a friend, or preparing decorations for a celebration. By the end, you have a visible result: a table covered in bright blooms that did not exist an hour earlier.
There is also something charming about the imperfections. One flower may be rounder than the others. One may have a petal that sticks out like it is asking a question. Another might tear slightly, then hide the evidence under a fluffier layer. Instead of ruining the bouquet, these little differences make it feel alive. Handmade flowers should not look like they came from a machine. They should look like someone cared enough to make them.
When you finally give the bouquet away, the reaction is usually the best part. People smile at handmade flowers because they are unexpected. They are colorful, lighthearted, and a little nostalgic. They remind people of classrooms, parties, spring days, and homemade cards. They say, “Here is a bit of brightness,” without needing a grand speech.
That is the real beauty of easy tissue paper flowers. They are not just decorations. They are tiny messengers. They can say thank you, congratulations, I miss you, feel better, happy birthday, or simply, “You deserve something cheerful today.” And if a few scraps of tissue paper end up on the floor, consider them proof that joy happened nearby.
Conclusion
Tissue paper flowers are easy, affordable, and full of personality. With simple supplies and a few beginner-friendly steps, you can create colorful handmade flowers for gifts, parties, classrooms, home decor, or heartfelt surprises. They are perfect for crafters of all ages because they do not demand perfection. A little folding, a little trimming, a little fluffing, and suddenly you have a bouquet that never wilts.
Whether you make one bright bloom or an entire paper garden, this DIY tissue paper flower craft is a lovely way to brighten someone special’s day. It proves that meaningful gifts do not have to be complicated. Sometimes, happiness is just a few sheets of tissue paper, a pipe cleaner, and the willingness to make something with your own two hands.














