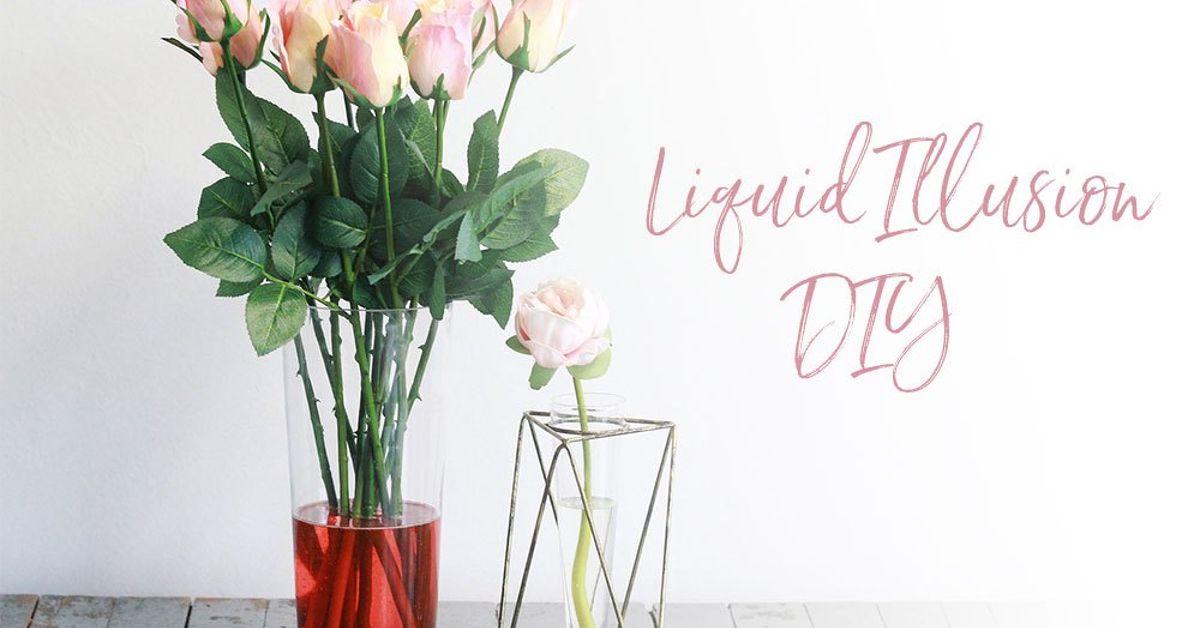
There is something almost magical about a flower arrangement that looks freshly placed in waterbut never wilts, never sheds petals onto the table, and never develops that mysterious “swamp in a vase” smell. That is the charm of a DIY acrylic water flower arrangement. It gives faux flowers a polished, realistic, boutique-style finish while saving you from the weekly drama of trimming stems, changing water, and apologizing to dead tulips.
Acrylic water, also called faux water, artificial water, craft water, or floral casting resin, is a clear liquid product that cures into a solid, glassy base inside a vase. Once set, it holds silk flowers, real-touch stems, artificial greenery, stones, shells, or decorative fillers in place. The result looks like flowers standing in clear water, but the “water” is permanent. No spills. No mosquitoes. No panic when your cat investigates.
This guide walks you through the full process: choosing materials, designing the arrangement, mixing and pouring acrylic water safely, preventing bubbles, styling the final piece, and avoiding the mistakes that make DIY projects look like they were assembled during a power outage. Whether you want a dining table centerpiece, a bathroom vanity arrangement, wedding décor, or a cheerful desk bouquet, this project is surprisingly beginner-friendly when you plan before you pour.
What Is an Acrylic Water Flower Arrangement?
An acrylic water flower arrangement is a faux floral display set in a transparent resin-like liquid that hardens to imitate water. It is most often used with artificial flowers rather than fresh flowers because the stems become sealed in place permanently. Fresh flowers need real water, air circulation, and eventual removal; acrylic water does not allow that. In short, use faux flowers unless you want to create a very expensive science experiment.
The finished look is clean, elegant, and realistic. Clear glass vases show off the stems, while the acrylic water adds visual weight and structure. It also keeps flowers from shifting, which is especially helpful for tall stems, minimalist designs, or arrangements that need to survive transport, display, or a curious toddler with jam hands.
Why Make Your Own Instead of Buying One?
Pre-made faux water arrangements can be beautiful, but they are often pricey and limited in color, size, and style. A DIY version lets you customize everything: the vase shape, flower type, stem height, water level, filler material, and overall mood. Want white orchids in a cylinder vase for a spa-like bathroom? Easy. Pink peonies in a square vase for a romantic bedroom? Absolutely. A dramatic tropical arrangement that looks like it belongs in a hotel lobby? Go big, floral superstar.
Making your own also lets you match your home décor. You can coordinate with wall colors, seasonal palettes, wedding themes, or holiday tablescapes. Better yet, artificial flowers today can look impressively realistic, especially real-touch tulips, orchids, hydrangeas, roses, calla lilies, eucalyptus, magnolia leaves, and cherry blossoms.
Supplies You’ll Need
Basic Materials
- Clear glass vase, bowl, cylinder, cube, or bud vase
- Artificial flowers or real-touch faux stems
- Acrylic water kit, clear floral resin, or craft water product
- Disposable mixing cup
- Wooden stir stick or disposable craft stick
- Wire cutters or floral stem cutters
- Paper towels or lint-free cloth
- Rubbing alcohol or glass cleaner
- Nitrile gloves
- Protective surface covering, such as cardboard or a disposable tablecloth
Optional Decorative Add-Ins
- River rocks, glass gems, marbles, or polished pebbles
- Faux moss or preserved-looking greenery
- Decorative sand for coastal designs
- Ribbon, jute twine, or vase wrap
- Floral tape for temporary positioning
- Clear-drying craft glue to seal stems if needed
Safety First: Read This Before Mixing
Acrylic water and floral resin products vary by brand, so always read the manufacturer’s instructions before opening the bottles. Some kits use two parts that must be mixed in a specific ratio. Others are ready-to-pour formulas. Cure time, odor level, working time, and safety recommendations can differ.
Work in a well-ventilated area, wear nitrile gloves, protect your table, and keep children and pets away from the project while the product is liquid and curing. Avoid touching uncured resin or acrylic water with bare skin. Do not use kitchen measuring cups, spoons, or bowls unless you plan to retire them forever into the glamorous world of craft supplies. Once resin touches a cup, that cup is no longer invited to soup night.
Also remember that acrylic water is usually permanent. Once it cures, the flowers and vase become one finished arrangement. That is wonderful for stability, but it means you should test your design before pouring. This is not the moment for “I’ll figure it out as I go.” Resin laughs at that attitude.
Step-by-Step: How to Make a DIY Acrylic Water Flower Arrangement
Step 1: Choose the Right Vase
Clear glass works best because the goal is to show off the water illusion. A cylinder vase creates a clean modern look. A square cube feels crisp and contemporary. A narrow bud vase is perfect for a few stems. A wide bowl works well for low centerpieces, but it may require more acrylic water and more flowers to look full.
For beginners, choose a vase with straight sides and a stable base. Tall, narrow vases can tip if the flowers are too top-heavy, while very wide openings may make the arrangement harder to control. A vase that is slightly taller than it is wide is often easier to style.
Step 2: Clean the Vase Thoroughly
Cleanliness matters because every speck of dust, lint, or fingerprint can become a tiny museum exhibit once trapped in clear acrylic water. Wash the vase, dry it completely, then wipe the inside with rubbing alcohol or glass cleaner. Let it air dry before adding anything.
Check the vase in bright light. If you see streaks now, you will see them forever after the acrylic water cures. Think of this step as cleaning a window that will never open again.
Step 3: Plan Your Flower Design Before Pouring
Arrange your flowers dry first. Place the stems in the empty vase and experiment with height, spacing, and direction. Start with greenery or structural stems, then add focal flowers, secondary flowers, and filler pieces.
A good rule of thumb is to let the overall height of the arrangement feel balanced with the vase. For many designs, flowers look natural when the full arrangement is about one and a half to two and a half times the height of the container, depending on style. A low modern cube may look best with compact blooms, while a tall cylinder can support elegant, upright stems.
Step 4: Trim the Stems
Use wire cutters to trim faux stems to the right length. Do not use your best kitchen scissors unless you enjoy destroying them slowly and dramatically. Many artificial stems contain wire, so proper cutters make the job cleaner and safer.
Vary the stem lengths slightly for a more natural look. Perfectly equal heights can make the arrangement look stiff, like the flowers are lining up for a school photo. Let some blooms sit higher, some lower, and some angle outward.
Step 5: Seal Stems If Needed
Some artificial stems may release dye or tiny particles into the acrylic water. If you are unsure, test one stem in a small amount of clear-drying glue or water first. For extra protection, you can brush the lower part of the stems with a thin layer of clear-drying craft glue and let them dry completely before placing them in the vase.
This is especially useful for dark green stems, inexpensive faux flowers, or stems wrapped in paper-like material. The goal is to prevent discoloration and keep the faux water crystal clear.
Step 6: Add Decorative Fillers
If you want rocks, marbles, glass gems, or sand at the bottom, add them before pouring. These fillers can hide stem ends, add weight, and create a more realistic base. Keep the filler clean and dry. Dusty pebbles can cloud the acrylic water, which is not the tranquil pond effect we are going for.
For a natural design, use river rocks with greenery and white flowers. For a glam arrangement, try clear glass gems with roses or orchids. For a coastal arrangement, use a small amount of sand and shells, but avoid overfilling the vase. Too many extras can make the design look crowded.
Step 7: Mix the Acrylic Water
Follow the exact instructions on your acrylic water or resin kit. If it is a two-part product, measure carefully and stir slowly. Scrape the sides and bottom of the mixing cup so the components blend evenly. Stirring too aggressively can create bubbles, so channel calm tea-stirring energy, not pancake-batter panic.
Only mix the amount you can use within the product’s working time. If your vase is unusually shaped, estimate the amount first by filling the vase with real water to the desired level, pouring that water into a measuring cup, then drying the vase completely before using the acrylic product.
Step 8: Pour Slowly
Pour the mixed acrylic water into the vase slowly and steadily. Aim for the side of the vase or pour over a stir stick to reduce bubbles. Fill the vase only to the level that looks like realistic water. Most arrangements look best when the faux water fills about one-quarter to one-third of the vase, though small bud vases may need less.
Wipe drips immediately according to the product instructions. Once the material starts curing, cleanup becomes much harder.
Step 9: Insert and Position the Flowers
Place the stems into the acrylic water while the product is still workable. Recreate the design you tested earlier. Adjust angles gently and avoid moving stems repeatedly, which can introduce bubbles or smear resin on the glass.
If stems drift or lean, use floral tape across the vase opening as a temporary grid, or prop stems with craft sticks until the acrylic water thickens. Make sure the arrangement is sitting on a level surface while it cures.
Step 10: Let It Cure Completely
Leave the arrangement undisturbed until fully cured. Depending on the product, room temperature, depth of pour, and vase size, curing may take several hours or longer. Do not poke it to “check.” We all want to poke it. Be strong.
Keep dust away by placing a loose box or clean cover over the arrangement without touching the flowers. Once cured, the acrylic water should look clear and solid, and the stems should stay firmly in place.
Design Ideas for Acrylic Water Flower Arrangements
Modern Orchid Arrangement
Use a tall cylinder vase, white faux orchids, a few green leaves, and smooth black or white stones. Keep the design simple. Orchids already know they are fancy; they do not need a backup choir.
Romantic Peony Centerpiece
Choose blush, cream, or dusty pink peonies in a square glass vase. Add eucalyptus or soft greenery. Keep the stems short and full for a lush dining table centerpiece.
Coastal Bathroom Arrangement
Use blue hydrangeas, white ranunculus, pale greenery, and a small layer of clean sand or glass pebbles. A low glass vase works well on a vanity, shelf, or guest bathroom counter.
Minimalist Tulip Vase
Place five to seven real-touch tulips in a narrow vase with a low acrylic water line. Let the stems bend slightly for a natural look. This style is simple, cheerful, and perfect for spring décor.
Holiday Faux Water Arrangement
For winter, combine faux amaryllis, pine sprigs, berries, and a clear vase. Use just enough acrylic water to anchor the stems. Add a velvet ribbon around the vase for a festive finish.
Common Mistakes to Avoid
Using Fresh Flowers
Fresh flowers are not a good match for acrylic water because they need hydration and will decay. Use artificial flowers, silk flowers, preserved-looking faux greenery, or real-touch stems instead.
Pouring Before Planning
Once the acrylic water is mixed, the clock starts ticking. Always design and trim your arrangement before pouring. A dry run saves stress, wasted product, and the emotional damage of watching a flower sink sideways forever.
Overfilling the Vase
Real flower vases are rarely filled to the very top. A lower water line looks more realistic and uses less product. It also gives stems room to show through the glass.
Ignoring Bubbles
Some bubbles may rise and disappear during curing, but too many can make the water look cloudy. Stir slowly, pour gently, and avoid shaking the vase after pouring.
Choosing Cheap, Shiny Flowers
The acrylic water may look realistic, but overly shiny plastic flowers can ruin the illusion. Look for real-touch petals, fabric blooms with natural veining, matte greenery, and flexible stems.
How to Care for the Finished Arrangement
Acrylic water arrangements are low maintenance, but not zero maintenance. Dust the flowers regularly with a soft cloth, feather duster, or cool air from a hair dryer on a gentle setting. Keep the arrangement out of harsh direct sunlight when possible, as strong UV exposure may fade flowers or affect clear materials over time.
Do not soak the arrangement in water. Wipe the outside of the vase with glass cleaner sprayed onto a cloth, not directly into the flowers. If the blooms get bent during storage, reshape them gently by hand.
Best Places to Display Acrylic Water Flower Arrangements
These arrangements work beautifully in places where fresh flowers would be inconvenient. Try one on a dining table, entry console, kitchen island, office desk, nightstand, bathroom shelf, mantel, coffee table, or guest room dresser. They are also great for weddings, open houses, short-term rentals, reception desks, and event tables because they look polished without needing daily care.
For small rooms, choose one compact arrangement instead of several busy ones. For larger spaces, use taller stems or a wider vase to create visual impact. Match the arrangement to the room’s personality: soft and romantic for bedrooms, clean and sculptural for offices, bright and cheerful for kitchens, and calm and spa-like for bathrooms.
Budget Tips for a Beautiful Result
You do not need to spend a fortune to make a professional-looking DIY acrylic water flower arrangement. Spend more on the most visible flowers and save on filler stems. Reuse a glass vase you already own, or look for sturdy clear containers at thrift stores. Choose fewer, better stems instead of stuffing the vase with every flower in the craft aisle.
Another smart trick is to use greenery generously. Faux eucalyptus, fern, olive branches, or magnolia leaves can make an arrangement feel fuller without requiring many large blooms. Greenery also softens the design and hides awkward stem angles.
Personal Experience: Lessons From Making DIY Acrylic Water Flower Arrangements
The first time you make a DIY acrylic water flower arrangement, you may feel like a florist, chemist, interior designer, and slightly nervous cake decorator all at once. The project is simple, but it rewards patience. The biggest lesson is this: arrange everything before mixing anything. Once the acrylic water is ready, you do not want to be hunting for wire cutters or debating whether the hydrangea looks “too dramatic.” Spoiler: hydrangeas are always dramatic. That is their job.
One experience that helps is treating the empty vase like a rehearsal stage. Place the flowers inside, turn the vase from every angle, and take a quick photo with your phone. That photo becomes your map when it is time to rebuild the design in the acrylic water. Without it, stems can mysteriously migrate, and suddenly your elegant centerpiece looks like it got startled.
Another useful lesson is to avoid using too many flower types in one arrangement. Beginners often think more variety means more beauty, but too many colors and shapes can make the design feel cluttered. A cleaner formula works better: one focal flower, one secondary flower, and one or two types of greenery. For example, cream roses, small white ranunculus, and eucalyptus can look expensive even when the supplies are affordable.
Stem quality matters more than people expect. If the stems look fake, the clear vase exposes them like a tiny floral courtroom. Real-touch stems or well-made silk flowers usually create a better illusion. If the stems are unattractive, use pebbles, glass gems, or a slightly higher flower density to distract the eye. You can also bend stems gently so they appear relaxed rather than perfectly straight.
The pouring stage teaches another important truth: bubbles are usually caused by rushing. Stir slowly. Pour slowly. Move slowly. This is not a race; there is no gold medal for aggressive resin mixing. If you see a few bubbles, do not panic. Many small bubbles rise naturally, and some can look like real water movement. The goal is clarity, not absolute laboratory perfection.
It is also wise to start with a small vase. A bud vase or compact cube lets you practice measuring, mixing, pouring, and positioning without using a large amount of product. Once you understand how the acrylic water behaves, you can move on to bigger centerpieces. Think of the small vase as your training wheels, except prettier and less embarrassing in old family photos.
Finally, the finished arrangement often looks better the next day. After curing, the flowers settle visually, the clear base looks calmer, and the whole piece feels more intentional. Place it where natural light can hit the glass indirectly, and you will see why acrylic water arrangements are so popular: they give you the fresh-flower look without the fresh-flower countdown. No wilting. No cloudy vase water. No sad petals performing a slow collapse on your table. Just a polished, long-lasting arrangement that quietly says, “Yes, I have my life together,” even if there is laundry hiding in the next room.
Conclusion
A DIY acrylic water flower arrangement is one of the easiest ways to make artificial flowers look refined, realistic, and intentionally styled. With the right vase, high-quality faux stems, careful measuring, slow mixing, and patient curing, you can create a long-lasting floral display that looks custom-made for your home. The secret is preparation: clean the vase, test the design, trim stems properly, pour gently, and let the arrangement cure without disturbance.
Whether your style is modern, romantic, coastal, rustic, seasonal, or “I saw this in a boutique and refused to pay that much,” acrylic water gives faux flowers a professional finish. Start small, keep the design balanced, and let the clear faux water do what it does best: make your arrangement look fresh forever without requiring a single water change.
SEO Tags
Note: This article is written in original standard American English for web publishing and is based on practical floral design methods, acrylic water usage guidance, and widely recommended resin safety practices.