
A blank wall has two personalities. On a good day, it is “minimalist.” On a bad day, it is “I moved in three years ago and still have not decided what goes here.” If that wall has been quietly judging your furniture, a DIY floral accent wall with stencils may be the affordable, creative, and surprisingly forgiving project that turns the room from unfinished to unforgettable.
Floral stenciling gives you the charm of wallpaper without the commitment, glue drama, or the emotional spiral of trying to line up twelve-foot strips while gravity laughs at you. With a reusable stencil, a small amount of paint, painter’s tape, and a calm Saturday playlist, you can create a custom botanical wall that feels fresh, personal, and high-end.
This guide covers how to plan, prep, paint, and troubleshoot a stenciled floral accent wall. Whether you want a soft cottage-style bedroom, a bold dining room backdrop, a nursery feature wall, or a renter-friendly glow-up, the process is approachable for beginners and flexible enough for experienced DIYers who already own three kinds of rollers and say things like “dry brush technique” at dinner.
Why Choose a Floral Stenciled Accent Wall?
A floral accent wall works because it adds pattern, movement, and softness without overwhelming an entire room. Instead of covering every wall with a busy print, you choose one focal surface and let it do the decorative heavy lifting. The result feels intentional, like your home has a planeven if the junk drawer says otherwise.
Compared with wallpaper, wall stencils are often more budget-friendly and easier to customize. You can choose your own colors, adjust spacing, fade the design for a hand-painted effect, or repaint later when your style changes. That makes stenciling especially appealing for bedrooms, home offices, powder rooms, entryways, and dining nooks where a little drama goes a long way.
Floral patterns are also extremely versatile. Large peonies can feel romantic and elegant. Wildflower stencils bring a relaxed garden feel. Tropical leaves and blooms add energy. Fine-line botanicals create a modern, almost mural-like look. The trick is matching the scale and color of the stencil to the mood of the room.
Best Rooms for a DIY Floral Accent Wall
Bedroom
A floral stencil behind the bed can act like a built-in headboard. Soft sage, dusty rose, warm beige, muted lavender, or creamy white can make the room feel cozy without becoming overly sweet. For a modern look, use one floral stencil in a tone-on-tone palette, such as matte taupe over warm white.
Living Room
In a living room, a floral accent wall can frame a sofa, fireplace, console table, or reading corner. Choose a medium-to-large pattern so the design does not disappear behind furniture. If your furniture is simple, the wall can be bolder. If your sofa already has patterned pillows, let the stencil whisper instead of shouting through a megaphone.
Dining Room
Dining rooms can handle more personality because they are not usually used all day. A dramatic floral stencil in deep green, navy, charcoal, terracotta, or berry tones can create a boutique-restaurant atmosphere. Add warm lighting and suddenly Tuesday pasta feels like a reservation.
Nursery or Kids’ Room
Floral wall stencils are lovely for nurseries because they can be customized beyond the usual pastel wallpaper options. Try soft vines, daisies, tulips, or woodland florals. Keep contrast gentle so the room feels peaceful, not like a botanical garden exploded during naptime.
Powder Room
Small bathrooms and powder rooms are perfect for bold stencil experiments. Because the wall area is limited, the project costs less and finishes faster. A floral accent wall behind the vanity can make a tiny room feel polished and memorable.
Materials You’ll Need
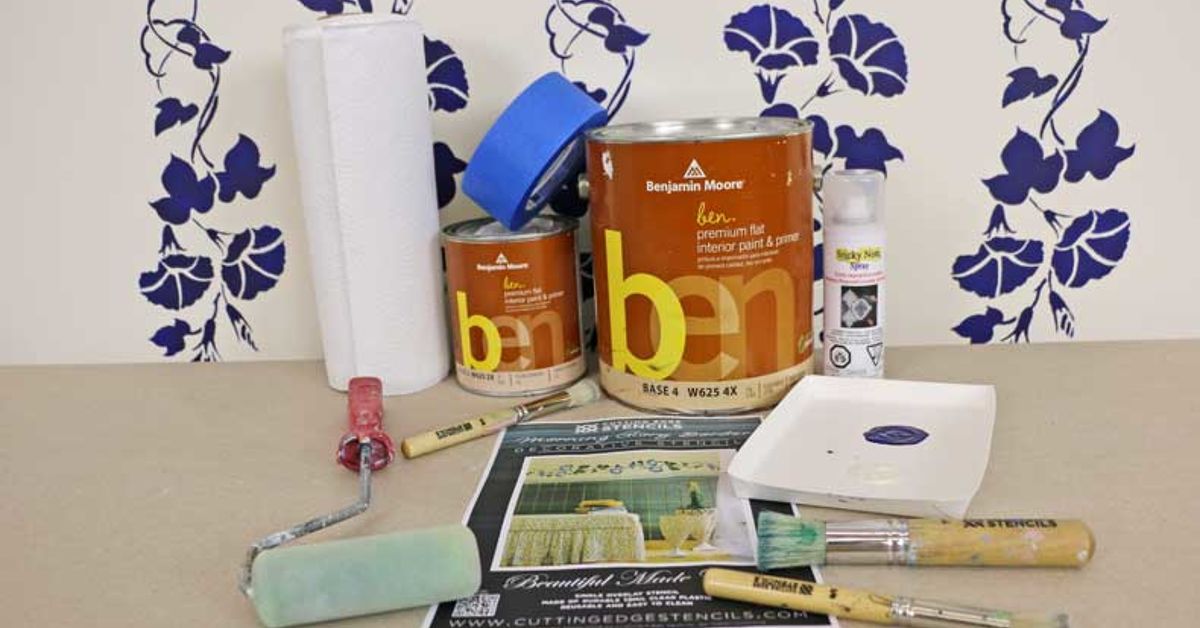
Before opening a paint can, gather your tools. Stenciling is not difficult, but stopping halfway to hunt for tape with wet paint on your hands is how chaos enters the chat.
- Floral wall stencil, preferably reusable mylar
- Painter’s tape or low-tack stencil tape
- Repositionable spray adhesive, optional but helpful
- Stencil brush, dense foam roller, or small foam pouncer
- Interior latex or acrylic paint
- Base wall paint, if repainting the background
- Paint tray or paper plate
- Paper towels or lint-free rags
- Level or laser level
- Pencil for light guide marks
- Drop cloth
- Step stool or ladder
- Small artist brush for touch-ups
The most important supply is not fancy paint. It is restraint. Too much paint on the brush or roller is the fastest route to bleeding edges. A stencil brush should be almost dry before it touches the wall. If it looks underloaded, you are probably doing it right.
How to Choose the Right Floral Stencil
Scale matters. A small floral pattern can look delicate up close, but on a large wall it may become visually busy and take forever to repeat. Large floral stencils cover more area quickly and feel more modern. Medium designs are the safest choice for most bedrooms and living rooms.
Also consider the shape of the pattern. Some floral stencils are designed as repeating wallpaper-style patterns. Others are single motifs, like one large rose cluster or a vine. Repeating patterns require careful alignment. Single motifs give you more freedom and are easier for beginners because slight spacing differences look artistic rather than accidental.
If your room already has lots of texturewood furniture, patterned rugs, gallery walls, open shelveschoose a simpler floral stencil. If the room is mostly neutral, a more detailed botanical pattern can become the star.
Pick a Color Palette That Looks Intentional
Color can make a stenciled floral wall look expensive or, unfortunately, like a craft-store coupon had too much power. Start with the colors already in your room: upholstery, bedding, curtains, rugs, wood tones, and art. Your stencil color should connect with at least one existing element.
For a subtle look, choose colors that are close together, such as ivory over beige, sage over pale green, or warm white over greige. This tone-on-tone approach creates texture without visual noise. For a statement wall, try higher contrast: white florals on navy, blush on charcoal, olive on cream, or terracotta on soft white.
A good rule is to test your stencil colors on poster board first. Hold the sample against the wall in morning light, afternoon light, and evening lamplight. Paint changes personality throughout the day. Some colors are lovely at noon and mysteriously turn into wet cardboard by 8 p.m.
Step-by-Step: How to Create a DIY Floral Accent Wall With Stencils
Step 1: Choose the Accent Wall
Pick the wall that naturally draws attention when you enter the room. This is usually the wall behind a bed, sofa, vanity, desk, or dining table. Avoid walls broken up by too many doors, windows, vents, or awkward corners unless you enjoy advanced-level stencil gymnastics.
Step 2: Clean and Repair the Surface
Wipe the wall with a damp cloth to remove dust. If the wall is near a kitchen or bathroom, use a mild cleaner to remove grease or residue. Fill nail holes, sand rough patches, and wipe away sanding dust. Stencils need a smooth surface for crisp edges.
Step 3: Paint the Base Coat
If your wall color is already suitable, you can stencil directly over it. If not, apply a fresh base coat and allow it to cure fully. A matte, eggshell, or satin finish usually works well. Very glossy paint can make stencil paint slide around, while very flat paint may absorb touch-ups unevenly.
Step 4: Plan the Layout
Find the center of the wall and decide where the pattern should begin. Many DIYers start at the top center and work outward, especially for repeating stencils. Use a level to draw very light guide marks. Do not press hard with the pencil unless you want ghost lines haunting your flowers.
Step 5: Secure the Stencil
Tape the stencil in place on all sides. For extra stability, lightly spray the back of the stencil with repositionable adhesive, wait until it becomes tacky, then press it gently onto the wall. The goal is to keep the stencil flat so paint does not creep underneath.
Step 6: Load the Brush or Roller Correctly
Dip your stencil brush or foam roller into a small amount of paint, then offload most of it onto a paper towel. This feels wrong at first. You may think, “There is barely any paint left.” Perfect. Stenciling rewards patience, not paint puddles.
Step 7: Apply Paint With a Light Touch
Use a pouncing motion with a stencil brush or gentle rolling with a dense foam roller. Keep pressure light and even. Build color gradually with thin layers instead of trying to get full coverage in one pass. Heavy paint causes bleeding, raised edges, and regret.
Step 8: Remove and Reposition the Stencil
Carefully peel the stencil away while the paint is still fresh. Align it with the previous section using the registration marks or edges of the pattern. Continue across the wall, checking level frequently. If the pattern drifts slightly, correct it early. Tiny errors are normal; large diagonal flower parades are less charming.
Step 9: Handle Corners and Edges
When you reach trim, corners, ceilings, or outlets, bend the stencil gently and tape it securely. Use a smaller brush near edges. Do not overload paint in tight areas. If the stencil cannot fit perfectly, paint what you can and touch up missing details by hand later.
Step 10: Touch Up and Let Dry
After the wall dries, inspect it from normal viewing distancenot with your nose two inches from the paint like a detective in a home improvement crime drama. Use a small artist brush to fix obvious bleeds or gaps. Let the wall cure before pushing furniture back into place.
Common Stenciling Mistakes and How to Avoid Them
Using Too Much Paint
This is the number one mistake. A nearly dry brush creates cleaner lines. If paint bleeds under the stencil, wipe the stencil back, offload more paint, and use lighter pressure.
Skipping Wall Prep
Dust, grease, and rough patches can ruin paint adhesion and make the stencil sit unevenly. Cleaning and patching may not be glamorous, but neither is a floral wall with lint permanently embedded in the petals.
Ignoring the Level
Repeating patterns can slowly tilt if you rely only on your eyes. Use a level every few repeats. Your future self will thank you, possibly with snacks.
Choosing a Pattern That Is Too Small
Tiny stencils can look busy and take much longer to complete. For a full accent wall, larger motifs usually create a cleaner, more designer-inspired result.
Not Cleaning the Stencil
Paint buildup on the stencil can blur details. Wipe the stencil periodically, especially if you notice the edges getting less crisp. Let it dry before placing it back on the wall.
Creative Floral Accent Wall Ideas
Soft Vintage Garden
Use cream walls with dusty rose, sage, and muted lavender flowers. Keep the design airy and imperfect, like an old botanical print. This works beautifully in bedrooms and reading corners.
Modern Monochrome Florals
Paint a white floral stencil over a charcoal, black, or deep navy wall. The contrast feels bold, graphic, and sophisticated. Use simple furniture so the wall remains the focal point.
Half-Wall Floral Border
Instead of covering the entire wall, stencil only the upper third or lower half. Pair it with wainscoting, chair rail molding, or a painted two-tone wall. This approach saves time and adds architectural polish.
Oversized Botanical Mural
Use a large floral stencil in scattered placements rather than a strict repeat. Layer leaves and blooms in two or three colors for a hand-painted mural effect. This is ideal for creative spaces and statement entryways.
Renter-Friendly Canvas Panel
If you cannot paint the wall, stencil a large canvas, lightweight wood panel, or removable wallpaper panel instead. Hang it like oversized art. You get the floral drama without having to explain anything to a landlord named Gary.
How Long Does a Stenciled Accent Wall Take?
Most floral accent walls take one weekend. Wall prep and base painting may take a few hours plus drying time. Stenciling can take three to eight hours depending on wall size, stencil complexity, and whether you are using one color or several.
A small powder room wall might be finished in an afternoon. A large bedroom wall with a detailed repeating floral pattern may require a full day of focused work. Build in breaks. Stenciling while tired is when petals start wandering and vines begin making questionable life choices.
How Much Does It Cost?
A DIY floral stencil wall is usually much cheaper than wallpaper or a professional mural. Costs vary based on paint quality, stencil size, and supplies you already own. A reusable wall stencil may cost more upfront than a small craft stencil, but it saves time and gives a cleaner repeat. Paint samples or quarts are often enough for the stencil layer, while a full gallon may be needed for the base coat if you repaint the wall.
Expect to spend money on a good stencil, painter’s tape, a small roller or stencil brush, and paint. Avoid the cheapest brush if the bristles shed. Nobody wants a romantic floral wall with surprise brush hairs preserved like fossils.
Maintenance and Durability
Once dry and cured, a stenciled wall can be maintained like any painted wall. Dust it gently with a microfiber cloth. For smudges, use a slightly damp sponge and mild soap. Avoid aggressive scrubbing, especially on matte finishes.
If the wall is in a high-traffic area, consider using durable interior paint with a washable finish. In bathrooms, make sure the room is well ventilated and use paint suitable for moisture-prone spaces. A clear topcoat is usually not necessary for standard walls, but it may help in areas that get frequent contact.
Real Experience: What It’s Actually Like to Stencil a Floral Wall
The first thing you learn while making a DIY floral accent wall with stencils is that confidence arrives after the first repeat. Before that, you may stand there holding a paint-loaded roller like you are about to perform surgery on your house. This is normal. The wall looks huge, the stencil looks flimsy, and suddenly every design decision you have ever made comes back for a committee meeting.
The best experience comes from starting in a less noticeable area or testing on cardboard. Once you see how little paint you need, the process becomes less intimidating. The second repeat is usually better than the first. By the fourth repeat, you begin to feel suspiciously professional. By the tenth, you may start giving imaginary interviews about your creative process.
One helpful lesson is to keep the paint tray almost boringly clean. A small amount of paint is easier to control than a tray full of temptation. Offloading paint onto a paper towel is not optional; it is the secret handshake of good stenciling. When the roller looks too dry, try it anyway. The result is often crisp and soft, exactly what you want for floral designs.
Another real-world tip is to step back often. Up close, every tiny imperfection looks enormous. From across the room, those small variations create charm and depth. Handmade projects should not look machine-printed. A slight fade on one leaf or a softer edge on one flower can make the wall feel custom rather than factory-perfect.
Edges and corners are the fussiest parts. If you are new to stenciling, do not judge the whole project by the awkward five minutes spent bending a stencil near the ceiling. Use a smaller brush, breathe, and remember that curtains, lamps, and furniture are excellent teammates. Not every inch of the wall needs to be a museum-quality petal.
Cleaning the stencil during the project also matters more than many beginners expect. Paint buildup can make the pattern blurry. Keep wipes or damp rags nearby, but make sure the stencil is dry before putting it back on the wall. A wet stencil can smear the previous section, which is a dramatic plot twist nobody requested.
The most satisfying moment happens after the wall dries and the furniture returns. Suddenly the room has a focal point. The bed looks more finished. The sofa looks more intentional. The lamp that once seemed lonely now appears curated. A floral stencil wall has a way of pulling unrelated pieces together, as if the room finally received the group text.
The experience also teaches patience in a very practical way. Rushing creates paint bleed, crooked repeats, and touch-up work. Moving slowly creates rhythm. Tape, paint, peel, align, repeat. It becomes almost meditative, except with more squatting and occasional muttering at corners.
If you are nervous, choose a low-contrast color palette for your first project. A soft white flower over beige or a muted green vine over pale sage is forgiving and elegant. Once you understand the technique, you can go bolder in another room. Many DIYers start with one accent wall and then begin looking suspiciously at closets, stair risers, furniture fronts, and laundry rooms. Stencils are gateway decor. You have been warned.
Final Thoughts
A DIY floral accent wall with stencils is one of the most rewarding ways to transform a room without a major renovation. It combines the beauty of wallpaper, the flexibility of paint, and the satisfaction of saying, “I made that,” every time someone compliments the wall.
The keys are simple: choose the right stencil scale, prep the wall properly, use very little paint, check alignment often, and embrace the handmade character of the finished design. Whether your style is romantic, modern, cottage-inspired, dramatic, or quietly botanical, a floral stencil can turn a plain wall into a custom feature that feels personal and polished.
Best of all, it is changeable. When your taste evolves, you can repaint. Until then, enjoy the fact that your once-boring wall now has flowers, personality, and absolutely no wallpaper glue under your fingernails.












