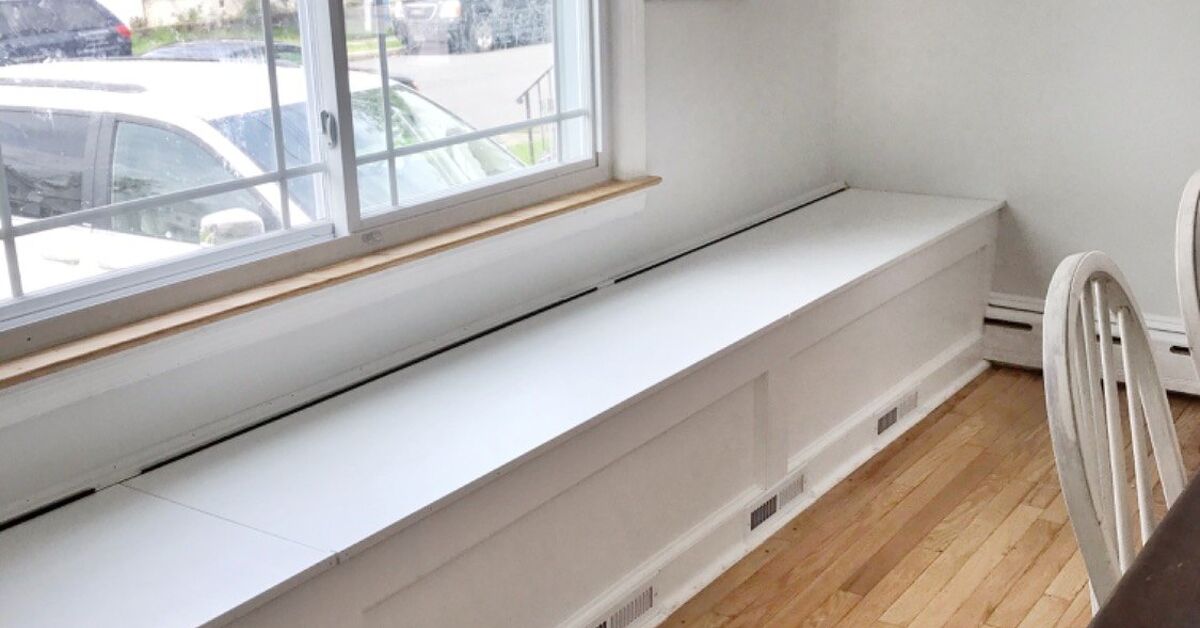
A DIY storage dining room bench is one of those home projects that politely solves three problems while pretending to be just furniture. It gives you extra seating, hides the mysterious pile of table linens you swear you use “all the time,” and makes a dining room or breakfast nook feel custom without demanding a custom-cabinet budget. In other words, it is the Swiss Army knife of dining furnitureexcept it will not poke you in the pocket.
The beauty of building your own storage bench is control. You decide the length, height, style, storage type, finish, cushion, trim, and whether the inside becomes a calm home for placemats or a secret cave for board games, craft supplies, seasonal decor, and that one serving tray too big for every cabinet in the house. A store-bought bench may look nice, but a custom DIY bench can fit your exact wall, table, family, and chaos level.
This guide walks through planning, materials, construction steps, design choices, safety tips, and real-world lessons for building a dining room bench with hidden storage. The project is approachable for confident beginners, especially if you can measure carefully, cut plywood or lumber safely, and resist the urge to say “close enough” before checking square corners.
Why Build a Storage Bench for the Dining Room?
Dining rooms are sneaky storage deserts. They often have tables, chairs, maybe a cabinet, and then nothing. Meanwhile, dining-related items multiply in drawers across the house. Napkins live in the kitchen. Candles live in a hallway closet. Holiday runners live somewhere you will only discover in July. A storage dining bench brings those items back where they belong.
It Saves Space
A bench can sit against a wall, under a window, or in a corner where chairs would need extra pull-out room. This is especially useful in small dining rooms, apartments, breakfast nooks, and eat-in kitchens. A built-in or semi-built-in bench also creates a cleaner visual line, making the room feel less crowded.
It Adds Hidden Storage
The space under a bench seat is valuable real estate. With a lift-up lid, drawers, cubbies, or baskets, you can store tablecloths, serving pieces, extra dishes, cookbooks, kids’ art supplies, pet gear, or seasonal decorations. The best storage bench does not just hold stuffit keeps the stuff close to where you actually use it.
It Creates a Custom Look
A DIY dining bench can match your trim, wall color, table style, or kitchen cabinets. Add beadboard for cottage charm, flat panels for a modern look, shaker trim for classic style, or stained wood for a warmer furniture feel. A simple box can become a built-in beauty with the right trim and finish.
Planning the Perfect DIY Storage Dining Room Bench
Before buying wood, decide where the bench will go and how people will use it. A storage bench for a busy family breakfast nook may need durable paint, easy-clean cushions, and soft-close lid supports. A bench for a formal dining room may focus more on elegant trim, stain, and proportions.
Measure the Space Carefully
Measure the full wall or corner where the bench will sit. Then measure the table. A bench that looks perfect by itself can feel awkward if it traps guests too close to the table or leaves them reaching for dinner like they are playing a polite game of dining-room limbo.
A practical dining bench seat is often around 18 inches high, including the cushion if you plan to add one. Seat depth commonly lands around 18 inches for comfortable dining, though you may increase the depth to 20 or 22 inches if you want pillows or a more lounge-like banquette feel. For length, allow roughly 21 to 24 inches of seating width per adult. If your family includes enthusiastic elbow users, lean toward the generous side.
Choose the Storage Style
There are four common storage options for a DIY dining room bench:
- Lift-up seat: Offers the most open storage and is great for bulky items.
- Front drawers: Easier to access without removing cushions, but more complex to build.
- Open cubbies: Simple, casual, and great with baskets.
- Cabinet doors: A polished option for a built-in look.
For most DIYers, a lift-up storage bench is the best balance of usefulness and simplicity. Just remember that a heavy lid needs proper hinges or lid supports. Nobody wants a bench seat that behaves like a tiny drawbridge with an attitude problem.
Materials and Tools You Will Need
Your exact materials depend on the bench size, but the following list works for a straight dining room storage bench about 48 to 72 inches long. Adjust quantities for your space.
Suggested Materials
- 3/4-inch plywood or MDF for the main box
- 1×2 or 1×3 boards for trim and face framing
- 2×4 lumber for a sturdy base frame, if desired
- Wood screws
- Wood glue
- Brad nails or finish nails
- Piano hinge or heavy-duty hinges
- Soft-close lid supports
- Wood filler
- Sandpaper in medium and fine grits
- Primer and paint, or stain and protective finish
- Foam, batting, and fabric if making a cushion
Suggested Tools
- Tape measure
- Level
- Speed square
- Circular saw, table saw, or track saw
- Miter saw for trim
- Drill and driver bits
- Pocket hole jig, optional but helpful
- Clamps
- Nail gun or hammer
- Sander
- Stud finder if anchoring to a wall
Plywood is a popular choice because it is strong and predictable. MDF can create a very smooth painted finish, but it is heavy and less forgiving around moisture. For a dining room or breakfast nook, cabinet-grade plywood is a strong option if the budget allows. For a painted bench, sanded plywood or MDF can work well with trim covering the exposed edges.
Step-by-Step: How to Build a DIY Storage Dining Room Bench
Step 1: Sketch the Bench Design
Start with a simple drawing. Mark the overall width, height, and depth. Include the thickness of your cushion if you plan to use one. For example, if you want the final seat height to be 18 inches and your cushion is 2 inches thick, build the wooden bench box about 16 inches high.
Also decide whether the bench will be freestanding or attached to the wall. A freestanding bench can move if you rearrange the room. A wall-mounted or built-in bench feels more permanent and can use wall cleats for support.
Step 2: Build the Base Frame
A base frame lifts the bench slightly off the floor and gives it structure. You can build a rectangular frame from 2×4 lumber or plywood strips. Keep it level and square. If the bench is going against a wall, check whether the floor slopes. Old houses enjoy surprises, and floors are often where they hide them.
For a built-in look, recess the base a few inches from the front so the bench has a toe-kick. This makes it more comfortable for feet and gives the finished piece a cabinet-like appearance.
Step 3: Cut and Assemble the Box
Cut the front, back, sides, and bottom panels from 3/4-inch plywood or MDF. Dry-fit the pieces before adding glue. Once everything lines up, apply wood glue along the edges, clamp the panels, drill pilot holes, and drive screws through the sides into the adjoining pieces.
If the bench is long, add internal dividers or braces. These prevent the seat from sagging and help organize the storage area. Dividers also stop blankets, board games, and random household items from forming one giant archaeological layer.
Step 4: Add the Seat Lid
Cut the lid from 3/4-inch plywood. It should cover the storage opening with a slight overhang at the front and sides if you want a finished furniture look. Sand the edges smooth. Attach the lid with a piano hinge along the back or with several heavy-duty hinges.
For safety, install soft-close lid supports. A dining bench lid can be heavier than it looks, especially after foam, fabric, or trim is added. Soft-close supports help prevent slamming and make the bench more pleasant to use every day.
Step 5: Install Trim and Face Framing
Trim is where the bench stops looking like a plywood box and starts acting fancy. Add 1×2 or 1×3 boards to the front and sides to create shaker-style panels. Use wood glue and brad nails, then fill nail holes with wood filler.
For a farmhouse or cottage look, add beadboard panels. For a modern style, keep the front flat and focus on crisp edges. For a traditional dining room, match the bench trim to the existing baseboards or wall molding.
Step 6: Sand, Prime, and Finish
Sand the entire bench, paying special attention to edges and corners. Sharp corners are not charming when someone slides into dinner wearing shorts. Slightly round the edges with sandpaper for comfort.
Prime before painting, especially if using MDF or raw plywood. Choose a durable enamel or cabinet-grade paint for high-traffic dining areas. If staining, test the stain on a scrap piece first, because wood can be dramatic. One board says “warm oak,” another says “orange raccoon.” Test first.
Step 7: Add a Cushion
A cushion is optional, but it makes the bench more inviting. Use high-density foam for comfort, wrap it in batting, and cover it with durable fabric. Performance fabric, outdoor fabric, vinyl, or washable slipcovers are smart choices for dining areas because food happens. Sauce happens. Children happen. Sometimes adults happen worse.
You can secure the cushion with Velcro strips so it does not slide around. If you prefer a cleaner wooden look, skip the cushion and add a few pillows instead.
Design Ideas for a DIY Storage Dining Room Bench
Modern Minimalist Bench
Use smooth plywood, flat panels, hidden hinges, and a neutral paint color. Pair it with a simple rectangular table and clean-lined chairs. This style works beautifully in apartments and contemporary homes.
Farmhouse Dining Bench
Add shaker trim, beadboard, or a stained wood top. Paint the base white, cream, sage, navy, or charcoal. Add a striped cushion for a relaxed breakfast-nook feel.
Built-In Banquette Bench
Run the bench along one wall or around a corner. Add a backrest, tall pillows, or wall paneling behind it. This works especially well in small kitchens where chairs would crowd the walkway.
Bench with Basket Cubbies
Instead of a lift-up lid, create open cubbies underneath and slide in woven baskets. This is easier for children to use and makes quick cleanup painless. It is not truly hidden storage, but it is very practical.
Common Mistakes to Avoid
Making the Seat Too High
If you forget to account for cushion thickness, the bench can become too tall for the dining table. Always calculate the final seated height, not just the wood frame height.
Skipping Internal Supports
A long bench seat needs support. Add dividers, cleats, or braces so the lid and box stay strong. A sagging bench is not a rustic feature. It is a warning sign with throw pillows.
Using Weak Hinges
Small decorative hinges may not handle a wide plywood lid. Use a piano hinge or multiple heavy-duty hinges, and add soft-close lid supports for safety.
Forgetting Wall Vents or Outlets
Before building a bench against a wall, check for air vents, outlets, baseboard heaters, and access panels. Do not block ventilation. If needed, build vent openings into the bench front or adjust the design.
What Can You Store Inside a Dining Room Bench?
A dining storage bench is perfect for items that belong near the table but do not need to be displayed. Think cloth napkins, table runners, placemats, candles, chargers, holiday dishes, serving bowls, board games, puzzles, kids’ homework supplies, pet leashes, and extra seat cushions.
Use bins inside the bench to prevent the storage area from becoming a wooden junk drawer. Label containers by category: “linens,” “games,” “seasonal,” or “please do not open unless relatives are visiting.” Clear bins help you see what is inside, while fabric bins make the space look tidy if the bench has cubbies.
Budget-Friendly Tips
To save money, design the bench dimensions around standard sheet goods. A 4×8 sheet of plywood goes further when your cuts are planned efficiently. Use paint-grade plywood instead of premium hardwood plywood if the entire bench will be painted. Repurpose leftover trim from another project, or use stock cabinets as a shortcut for the base.
You can also build the bench in phases. Start with the basic storage box, then add trim later. Make a simple cushion now and upgrade to custom upholstery when the dining room budget recovers from buying groceries, light fixtures, and that rug you definitely measured before ordering.
Maintenance and Cleaning
A dining room bench should be easy to maintain. Use wipeable paint, durable topcoat, and washable cushion covers. Vacuum inside the storage compartment every few months, because crumbs are adventurous. Check hinge screws once or twice a year, especially if the bench gets daily use.
If the bench is painted, keep a small jar of touch-up paint. Dining furniture gets bumped by shoes, chairs, bags, and the occasional dramatic dinner exit. A quick touch-up keeps the bench looking custom instead of “well-loved by gravity.”
Real-World Experience: Lessons From Building and Living With a DIY Storage Dining Room Bench
The most important lesson from building a DIY storage dining room bench is that comfort starts before the first cut. Many people get excited about storage volume and build the biggest box possible. That sounds logical until everyone sits down and realizes the bench is too deep, too tall, or too close to the table. A dining bench is not just a container with a cushion. It is a seat first and storage second. Before building, test the dimensions with dining chairs, cardboard boxes, or painter’s tape on the floor. Sit at the table and pretend to eat. It feels silly for about eight seconds, then it saves the whole project.
Another real-life tip: make the inside storage easy to use. A giant open compartment looks impressive, but once it is filled, the item you need will always be at the bottom. Dividers, bins, or shallow sections can make the bench much more practical. If the bench stores table linens, use separate fabric bags or containers for everyday linens and holiday pieces. If it stores games or kids’ supplies, choose bins that can be lifted out completely. Storage is only useful when you can reach things without performing a full excavation.
Finishing also matters more than beginners expect. Dining areas are high-touch spaces. People slide across the seat, kick the base, spill drinks, and lean on the lid. A pretty paint color is not enough; use primer and a tough finish. Cabinet paint or enamel tends to hold up better than ordinary wall paint. If you stain the lid, protect it with a durable clear coat. The bench may look like a calm piece of furniture, but daily family life treats it like gym equipment with snacks.
Soft-close hardware is worth the money. A storage lid can be awkward, especially when the cushion adds weight. Without lid supports, one hand has to hold the seat open while the other hand searches for napkins, which is how people invent new words not suitable for dinner. Soft-close supports keep the lid controlled and make the bench feel more polished. They are also a smart safety upgrade in homes with kids.
Finally, the best DIY storage bench is one that fits your actual habits, not your fantasy habits. If your family uses placemats every day, store them on top or in the easiest section. If holiday dishes come out twice a year, they can go deeper inside. If guests often sit there, invest in better foam. If pets claim every cushion as personal property, choose washable covers. The project succeeds when the bench looks good, works hard, and quietly absorbs the clutter of real life. That is the magic of DIY: you are not just building furniture; you are building a solution that knows your house personally.
Conclusion
A DIY storage dining room bench is a smart project for anyone who wants more seating, better organization, and a custom look without hiring a cabinetmaker. With careful measurements, sturdy materials, safe hinges, and a finish that can survive dinner duty, you can build a bench that feels intentional and useful every single day.
Whether your style is modern, farmhouse, traditional, or cozy breakfast nook, the basic idea remains the same: create a comfortable seat, hide practical storage underneath, and finish it in a way that belongs in your home. Done well, this project gives your dining room a little more charm, a little more function, and a lot fewer homeless table runners.