
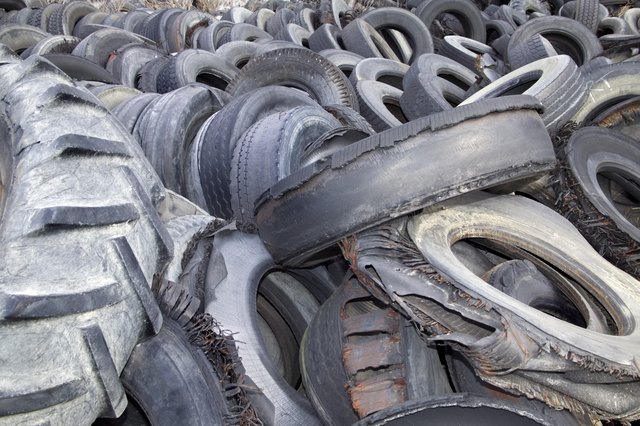
A tire wall can turn a stack of worn-out rubber into a rugged landscape feature, but this is not a project where “pile it up and hope gravity feels cooperative” counts as engineering. The most practical DIY version is a low rammed-earth tire retaining wall: whole tires are laid flat, packed tightly with mineral soil, staggered like masonry, and paired with a proper drainage system.
This guide focuses on low garden and erosion-control walls. A tire wall supporting a building, driveway, steep slope, fence, pool, or other heavy load requires a site-specific design from a qualified professional. Local rules also matter. The model residential code commonly exempts certain retaining walls no more than 4 feet high, measured from the bottom of the footing to the top of the wall, but that exemption can disappear when the wall supports a surcharge, and local jurisdictions may use stricter limits.
What Is a Rammed-Earth Tire Wall?
A rammed-earth tire wall uses old, rimless tires as permanent forms. Each tire is filled with slightly moist, compactable soil and pounded until it becomes a dense, heavy unit. The filled tires are arranged in courses, with joints offset between rows. The result behaves more like a massive gravity wall than a floppy stack of car parts.
Federal guidance has documented whole tires in low retaining-wall and erosion-control applications, while state research has described the basic method of placing a tire, covering the lower opening, filling it with soil, and compacting the material. Guidance for civil-engineering uses also emphasizes anchoring tire structures so the assembly cannot move.
When a Tire Wall Makes Sense
This approach can work for a short garden terrace, a low boundary feature, a raised planting area, or modest erosion control on a stable site. It is less suitable near property lines, waterways, utilities, septic systems, wildfire-prone vegetation, or anywhere failure could injure people or damage structures.
Plan the Wall Before Collecting Tires
Begin with the job the wall must perform. Sketch the length, exposed height, finished grades, drainage outlet, nearby slopes, and anything located above or behind the wall. A parked vehicle, shed, tree, driveway, stockpile, or steep backslope creates a surcharge that increases pressure. That is the moment to stop sketching and call an engineer.
Keep the DIY wall low and simple. Avoid tiering several walls close together unless the arrangement has been reviewed, because closely spaced tiers can act like one taller wall. Check setbacks, easements, drainage restrictions, and sight-line rules before choosing the location.
Estimate the Number of Tires
Measure the average outside diameter and thickness of the tires you plan to use. Divide the wall length by the average tire diameter to estimate tires per course. Divide the planned wall height by the compacted thickness of one filled tire to estimate the number of courses. Multiply those figures and add about 10 percent for sorting and layout adjustments.
Do not rely on catalog dimensions alone. Pack one test tire first. It reveals the real finished height, the amount of soil required, and the mildly alarming amount of labor hidden inside the phrase “compact thoroughly.”
Materials and Tools
Materials
- Clean, rimless passenger-vehicle tires of similar outside diameter
- Compactable mineral soil with little organic matter
- Well-graded crushed stone for the base
- Washed drainage gravel
- Perforated drainpipe, solid outlet pipe, fittings, and an approved discharge point
- Nonwoven geotextile to separate soil from drainage stone
- Heavy cardboard or durable fabric circles to close the lower tire openings during filling
- Approved anchoring, lacing, or reinforcement specified by the design
- Exterior-rated finish materials if the tires will be concealed
Tools and Safety Gear
- Shovels, mattock, rake, wheelbarrow, and buckets
- Hand tamper and an 8- to 10-pound sledgehammer
- String line, stakes, tape measure, long level, and straightedge
- Plate compactor for the crushed-stone base, when appropriate
- Heavy gloves, safety glasses, hearing protection, sturdy boots, and dust protection
Inspect every tire. Reject tires contaminated with oil or chemicals, tires with sharply exposed steel belts, and badly torn casings. Source them through a tire shop, recycler, or other legal channel rather than liberating a mysterious roadside pile at midnight.
How to Build a Tire Wall Step by Step
1. Mark the Layout and Confirm the Drainage Route
Stake the face of the wall and mark the excavation limits. Plan where the drainpipe will discharge before digging. Water must flow to daylight, a suitable stormwater feature, or another location approved locally. Never direct concentrated runoff onto a neighbor’s property, an unstable slope, or a place where it can return behind the wall.
2. Excavate to Firm, Undisturbed Soil
Remove topsoil, roots, loose fill, and soft pockets. Excavate a level trench wide enough for the tires, drainage zone, and working space. Embed the first course so the wall cannot simply skate forward across wet soil. The required excavation depth depends on frost, soil, wall geometry, and local rules; expansive clay, saturated ground, or deep frost calls for professional guidance.
3. Build and Compact the Crushed-Stone Base
Install a geotextile separator where fine native soil could migrate into the base. Place several inches of well-graded crushed stone in thin lifts, moisture-condition it if necessary, and compact it until the surface is firm and level. A retaining wall inherits every mistake in its foundation. A quarter-inch error in the first course can become a visible wobble several rows later.
4. Install the Drainage System
Place perforated pipe at the heel of the wall near the base, surround it with washed stone, and connect it to a positive outlet. Maintain continuous fall and protect the outlet from rodents, clogging, and erosion. Separate the drainage stone from fine soil with geotextile, but do not wrap the entire system so tightly that water cannot enter.
Extension and engineering guidance consistently treat an outlet, free-draining aggregate, and perforated pipe as essential parts of subsurface drainage. A pipe with nowhere to discharge is not a drain; it is a long underground cup.
5. Place and Pack the First Course
Set the first tire on the base and check it in both directions. Place cardboard or durable fabric beneath the center opening to hold the first soil. Add soil in small amounts. Pack material under the sidewalls first, working around the tire evenly, and then fill and compact the center. Alternate sides so the casing remains round and level.
The soil should be damp enough to compact but not muddy. Continue adding and pounding until the sidewalls are firm, the tire no longer rebounds under the hammer, and the top is dense and nearly level. Repeat with adjoining tires, keeping the course aligned to the string.
6. Interlock and Anchor the Assembly
Install the anchoring or lacing system shown in the approved plan. Depending on the project, that may involve cables, straps, deadmen, geogrid, earth anchors, or another engineered detail. Do not improvise by driving random steel through the wall without checking buried utilities, corrosion, pullout resistance, and local acceptance.
Place the second course in running bond so each tire bridges the joint between two tires below. Maintain the specified backward batter or setback toward the retained soil. Check level, line, and face position after every tire; correcting a leaning wall later generally requires the technical method known as “taking it apart.”
7. Backfill One Course at a Time
After completing each course, place drainage gravel immediately behind the tires and compact the retained soil farther back in thin lifts. Keep heavy compactors away from the wall face unless the design specifically permits them. Large equipment can create lateral pressure while the wall is still incomplete.
Fill gaps between tires with compacted mineral soil, small stone, or the infill specified by the finishing system. Do not leave cavities where water can collect. Continue stacking, packing, staggering, anchoring, and backfilling until the planned height is reached.
8. Shape the Top Grade and Cap the Wall
Grade the soil above the wall so surface water moves away from the back of the structure. Add a shallow swale or interceptor drain uphill if runoff naturally heads toward the wall. Cap the upper tires with compacted soil and an exterior finish, coping, or roof-like cover that sheds water and prevents the tire cavities from becoming miniature ponds.
Finish the Tire Wall Safely
Exposed tires weather, collect debris, and can hold rainwater. The CDC specifically identifies tires as containers that can support mosquito breeding, even with small amounts of standing water. Seal or cover every upward-facing cavity and maintain the top after storms.
For a stucco-like finish, attach corrosion-resistant expanded metal lath or another approved reinforcing mesh, and then apply a compatible exterior base coat and finish coat. Do not assume plaster will bond reliably to rubber by optimism alone. Other options include a ventilated wood facing, stone veneer supported by a suitable system, or a planted earthen finish designed to stay drained.
Keep the wall away from open flames, burn piles, grills, and other ignition sources. Scrap tires are not generally classified as hazardous waste, but tire fires can release hazardous gases, metals, and oily residues. Covering the wall, controlling vegetation, and maintaining defensible space are sensible precautions.
Common Tire Wall Mistakes
- Building too high: A wall can look stable right up until the soil becomes saturated or a surcharge is added.
- Skipping the drain outlet: Gravel without an outlet only stores water temporarily.
- Using topsoil as structural fill: Organic soil decomposes and settles. Save it for planting areas.
- Mixing wildly different tire sizes: Inconsistent units make bonding, leveling, and finishing difficult.
- Packing only the center: Loose soil under the sidewalls leaves soft zones and misshapen units.
- Cutting steel-belted tires casually: Exposed wires can cause severe injuries and create difficult-to-finish edges.
- Leaving tires exposed upward: Open cavities collect water, leaves, and mosquitoes.
- Ignoring movement: Bulging, rotation, settlement, and clogged drains are warnings, not decorative quirks.
Maintenance Checklist
Inspect the wall after major storms and at least twice a year. Confirm that the drain outlet flows freely, the top grade still sheds water, and no tire cavities are exposed. Look for a bowed face, widening joints, settlement, new cracks in the finish, erosion at the toe, or soil pulling away behind the wall.
Remove woody plants whose roots could disturb the assembly. Repair small finish cracks before water enters them. If the wall leans, bulges, or moves noticeably, keep people away from the area and have the structure evaluated rather than adding another layer of soil and calling it character.
Field Experience: What Tire Wall Builders Commonly Learn
The first practical lesson is that tire walls are cheap in materials but expensive in effort. A free tire is not a free wall. Each casing must be collected legally, sorted, cleaned, positioned, filled, and compacted. One properly packed passenger tire can become extremely heavy, which is excellent once it is in the wall and less delightful when it is three inches out of line.
Experienced crews usually build a test unit before committing to the full layout. That single tire answers several questions at once: Is the soil too wet? Does it contain too much organic matter? How much fill is needed? What is the compacted course height? How long does one unit take? Sorting tires beside the test unit also pays off; matching diameters by course prevents constant shimming and keeps the face from developing an accidental wave pattern. The test exposes an optimistic schedule before the schedule has a chance to expose the builder.
Consistency matters more than speed. The most successful workflow uses one person to shovel measured amounts of soil, one to pack under the sidewalls, and one to check line and level. Rotating jobs reduces fatigue. It also prevents the strongest crew member from compacting one tire into a granite pancake while everyone else produces soft rubber dumplings.
Another lesson is to prepare more suitable fill than the first estimate suggests. Soil disappears into the sidewalls, gaps, backfill zone, and grading work. A nearby stockpile saves hours of moving small loads. However, placing a large stockpile directly behind an unfinished wall creates an unwanted surcharge, so store material well away from the excavation.
Water management is where good projects separate themselves from future repair projects. Builders sometimes focus so intensely on packing tires that the drainage pipe becomes an afterthought. In practice, it is easier to install the pipe, outlet, gravel, and fabric correctly while the first course is open. Once several rows are complete, access narrows and every correction involves awkward digging beside a wall that now weighs several tons.
Finishing also takes more planning than expected. Tire sidewalls are curved, flexible, and unimpressed by ordinary plaster. A finish needs mechanical reinforcement, adequate thickness, weather protection, and clean transitions at the top and ends. Rounded corners and generous caps generally perform better than thin, sharp edges. A small mock-up can prevent an entire wall from developing a peeling, cracked costume.
Finally, builders learn that the wall is only as permanent as its maintenance. Leaves can block outlets, erosion can expose the base, and new landscaping can redirect runoff. A ten-minute inspection after a major storm is more useful than a heroic repair after several wet seasons. It also helps to photograph the base, drainpipe, anchoring, and every completed course during construction. Those images preserve details that disappear behind backfill and finishes, making future troubleshooting far less mysterious. The best tire wall is not the one that uses the most tires; it is the one that quietly stays level, dry, covered, and boring for years.
Conclusion
To build a tire wall that lasts, treat it as a compacted-earth and drainage project rather than a recycling craft. Confirm local approval, choose a safe low-wall application, excavate to competent soil, construct a compacted crushed-stone base, install a drain with a real outlet, pack each tire completely, stagger and anchor the courses, backfill in controlled lifts, and cap the wall against water.
Used tires can provide durable mass and an unusual second life, but they do not cancel the basic rules of retaining-wall construction. Gravity remains undefeated, water remains sneaky, and permits remain much easier to obtain before the wall exists.














