
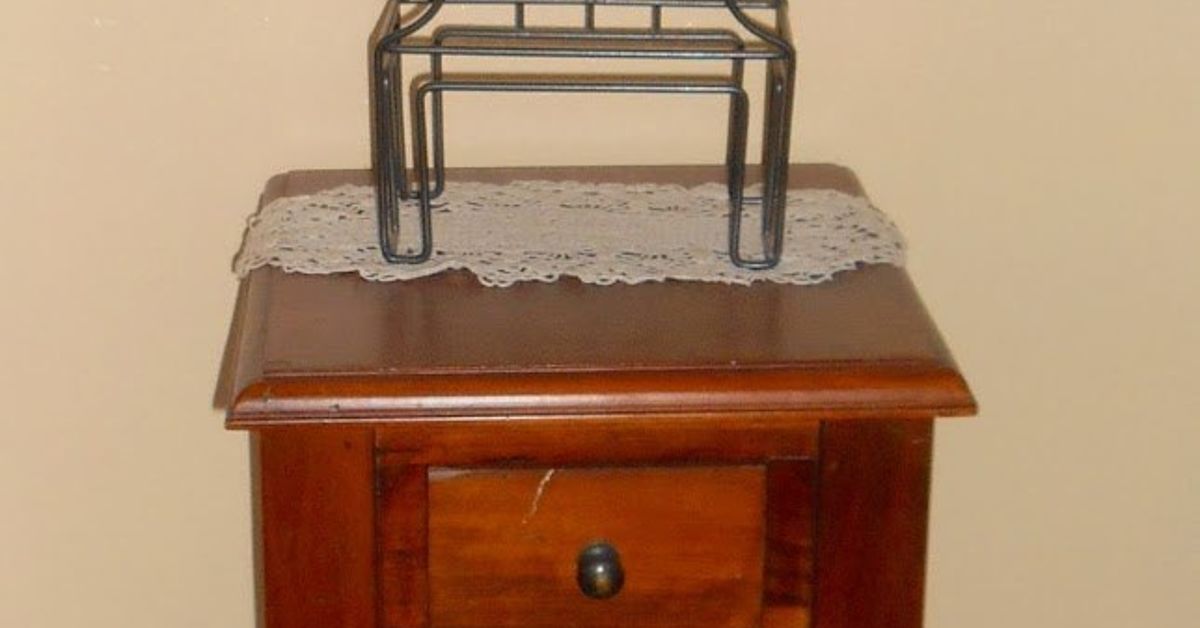
If you’ve got a small table that looks tired, scratched, or aggressively beige, congratulations: you’re holding the easiest furniture makeover project in the house. Small tables are the low-risk, high-reward darlings of DIY. They’re affordable, easy to move, forgiving when you make a tiny mistake, and dramatic enough to make a room feel newly pulled together. Best of all, they let you experiment without committing to repainting an entire dresser, dining set, or your emotional stability.
And while paint gets all the glory, it’s far from your only option. A truly good small table makeover can go well beyond a brush and a quart of “greige.” You can re-stain the wood, add a decoupage top, wrap the surface in peel-and-stick wallpaper, swap chunky legs for sleek hairpin ones, apply wood veneer, add trim, install a fresh top, or dress the whole thing up with new hardware and a protective finish. In other words, if the table has good bones, it doesn’t need a trip to the curb. It needs a plot twist.
This guide walks through how to DIY a small table makeover beyond paint in a way that feels creative, practical, and actually worth your Saturday. Whether you’re flipping a thrifted end table, rescuing a hand-me-down nightstand, or reviving a flea market side table that currently looks like it has seen things, here’s how to make it look intentional, stylish, and very much not sad.
Why a Small Table Is the Perfect DIY Furniture Makeover
A DIY small table makeover is ideal for beginners because the footprint is manageable, the material costs are lower, and the project moves quickly enough to keep your motivation alive. You can test new techniques on a tabletop without needing an industrial sander, a garage workshop, or the patience of a museum conservator.
Small tables also give you freedom to go bolder than you might on a large piece. A dramatic wood stain, a patterned wallpaper insert, a tiled top, or metallic hardware can feel exciting on a compact table instead of overwhelming. If a coffee table is a design speech, a side table is a clever one-liner. It can be witty, sharp, and just a little unexpected.
Before You Make Over the Table, Check the Bones
Before choosing finishes and decorative ideas, inspect the table like a practical person who has learned at least one lesson the hard way. Look at the structure first and the style second. A makeover should improve a table, not just disguise a wobbly mess in a cute outfit.
What to inspect first
- Stability: Tighten screws, wiggle the legs, and make sure the frame isn’t loose.
- Material: Is it solid wood, veneer, laminate, metal, or a mix?
- Surface damage: Check for water rings, deep scratches, chips, veneer lifting, or peeling laminate.
- Function: Does it need to hold drinks, books, a lamp, or just look cute in a corner?
- Heat and moisture exposure: A bedside table has different needs than a coffee table that doubles as snack headquarters.
If the table is solid wood, you have the most makeover flexibility. If it’s veneer, go lightly with sanding and avoid acting like you’re refinishing a barn door. If it’s laminate, you’ll want methods that cover the surface rather than trying to sand down to something that isn’t there.
Supplies That Actually Matter
You do not need to buy half the hardware aisle to update one small table. For most projects, the basics are enough:
- Microfiber cloths or rags
- Mild degreaser or wood-safe cleaner
- Screwdriver
- Wood filler for chips and dents
- Sandpaper in several grits
- Tack cloth or vacuum brush attachment
- Scissors or utility knife
- Measuring tape
- Adhesive of choice, depending on the makeover
- Stain, wax, decoupage medium, veneer, wallpaper, or contact paper
- Protective topcoat or sealer
Also important: patience, ventilation, and the ability to let a finish dry before poking it “just to see.” That last one ruins more projects than bad taste ever will.
8 Smart Ways to DIY a Small Table Makeover Beyond Paint
1. Strip It and Re-Stain It for a Richer Wood Look
If the table is real wood and the shape is good, re-staining is one of the best side table makeover ideas. It updates the piece without hiding the grain, which often gives furniture more depth and character than paint ever could.
Start by cleaning the table thoroughly, removing any wax, grime, or mystery residue from its former life. Repair dents or scratches with wood filler if needed, then sand in the direction of the grain. If the old finish is stubborn, use a stripper or refinisher appropriate for furniture, then sand again lightly for smoothness. Once dust-free, apply stain evenly and let the wood do its thing. Finish with a clear protective coat.
This approach works especially well when the table has pretty legs, carved details, or a classic shape that deserves a more natural finish. Think warm walnut, medium oak, espresso, or a lighter modern finish if you want a calmer, Scandinavian-style look.
2. Decoupage the Top for Pattern Without Bulk
If your tabletop is scratched beyond redemption but structurally sound, decoupage is your secret weapon. It’s one of the easiest ways to create a tabletop makeover that looks customized rather than rescued.
You can use fabric, wrapping paper, wallpaper scraps, maps, botanical prints, sheet music, or even art prints. The trick is to use a flat surface, smooth out bubbles carefully, and build up thin layers of decoupage medium and topcoat until the finish looks intentional. This works beautifully on nightstands, plant stands, tray tables, and accent tables that need personality more than perfection.
A floral pattern can make a plain table feel cottage-inspired. A faux grasscloth print can make it feel upscale. A vintage map can make it look like the table has opinions about Paris. It’s a lot of personality for very little money.
3. Use Peel-and-Stick Wallpaper or Contact Paper for a Fast Flip
For laminate, damaged veneer, or budget furniture, contact paper furniture makeover techniques can be surprisingly effective. Marble-look, wood-look, tile-look, and linen-texture films can transform a flat tabletop in under an hour.
This method is best for decorative or medium-duty pieces, not surfaces that will face daily abuse from hot mugs, sharp objects, or your cousin who sets pizza boxes directly on furniture. Choose a pattern that fits the room, cut carefully, wrap the edges neatly, and use a smoothing tool or old credit card to remove air bubbles.
If you want the result to look less temporary, pair the updated top with upgraded legs, new hardware, or a clean wood edge. That combination keeps the project from screaming, “I found adhesive vinyl and became unstoppable.”
4. Add Trim, Molding, or Appliqués for Instant Character
A plain small table can look dramatically better with a little dimension. Thin wood trim, half-round molding, corner appliqués, or decorative edge banding can give a cheap table a more custom profile.
Use trim to frame the tabletop, outline a drawer front, or create panel details on the sides. This is especially useful when a table feels boxy, bland, or builder-basic. The change is subtle, but it shifts the piece from “flat-pack energy” to “oh, where did you find that?”
After installation, you can stain the trim to match the wood, wrap over it with wallpaper, or use a clear coat if the wood itself looks good. The point is to create visual structure, not a craft store explosion.
5. Swap the Legs for a Whole New Style
Sometimes the problem is not the top. Sometimes the legs are the crime scene. Replacing chunky turned legs with tapered ones, bun feet with casters, or plain supports with hairpin legs can completely change a table’s style.
This is one of the smartest furniture flip ideas because it changes the silhouette immediately. Want a midcentury look? Add slim angled legs. Want a more industrial vibe? Use metal legs. Want a lighter, more delicate profile? Raise the table visually with taller, narrower supports.
Always check height, weight capacity, and mounting plates before buying anything. A leg swap is quick, but proportions matter. A tiny side table on oversized legs can start looking like it borrowed its shoes from somebody else.
6. Replace Hardware and Upgrade the Small Details
If your table has a drawer or cabinet door, never underestimate the power of hardware. New knobs or pulls are the jewelry of a DIY table makeover. They add contrast, polish, and style without requiring a full rebuild.
Brass can warm up darker wood. Matte black looks crisp on lighter finishes. Ceramic knobs add charm. Acrylic or glass pulls can make a small table feel cleaner and more modern. Line the drawer with peel-and-stick wallpaper or a fun printed liner while you’re at it. The inside should have a personality too.
One note of caution: measure the existing hole spacing before shopping. There is nothing humbling quite like buying gorgeous new hardware and realizing your table has its own opinions about math.
7. Add a New Top If the Existing One Is Too Far Gone
If the tabletop is deeply damaged, warped, or visually hopeless, replace it. A new top can be made from edge-glued wood panels, plywood with veneer edging, tile, stone-look board, or even a salvaged slab from another piece.
This works especially well for thrifted bases with good structure but ugly surfaces. Keep the base, ditch the top, and suddenly you’ve got a custom table. Tile tops are great for outdoor or boho styles. A wood slab feels warm and handmade. A stone-look surface feels elevated and modern.
Because the piece is small, material costs stay fairly reasonable. It’s the furniture version of changing the haircut instead of the whole personality.
8. Use Veneer, Cane, or Fabric to Introduce Texture
If you want your table to look more expensive, texture helps. Wood veneer can update drawer fronts or a tabletop with a cleaner grain pattern. Cane webbing can be added to panels or shelves for a breezy, vintage-inspired look. Fabric can be used under a glass top, inside an open shelf, or as part of a skirted side table design.
This kind of makeover works best when you keep the shape simple and let the texture be the star. It’s ideal for turning a generic small table into something that feels layered, collected, and a little more designer than DIY.
A Simple Step-by-Step Plan for a Weekend Small Table Makeover
Day 1: Prep Like You Mean It
- Remove hardware, knobs, or detachable parts.
- Clean every surface thoroughly.
- Tighten loose joints and screws.
- Repair chips, dents, and holes with wood filler.
- Sand lightly or strip the finish as needed.
- Remove every bit of dust.
Day 2: Apply the Transformation
- Choose one main makeover method: stain, decoupage, wallpaper, veneer, or a new top.
- Apply carefully and let each layer dry fully.
- Install trim, legs, or hardware after the main surface work is finished.
- Seal the project with an appropriate topcoat.
- Let it cure before heavy use.
That last step matters. Dry and cured are not the same thing. A table that feels dry to the touch may still be vulnerable to dents, rings, or scratches if you rush it back into service too soon.
Mistakes That Can Ruin a Small Table Makeover
- Skipping the cleaning step: Dirt, grease, and wax sabotage adhesion.
- Over-sanding veneer: Once you sand through it, there is no inspiring comeback speech.
- Choosing style before function: Beautiful finishes still need to survive real life.
- Ignoring scale: Oversized hardware or bulky legs can overwhelm a small table.
- Forgetting a topcoat: Especially on frequently used surfaces, protection matters.
- Trying three design ideas at once: Pick one hero move and support it well.
How to Style the Finished Table So It Looks Intentional
Once your small table makeover beyond paint is done, style it with restraint. One lamp, a coaster, a small tray, and a book stack can make the table feel polished. A tiny plant or bud vase adds softness. Baskets underneath can add storage. If the table has a dramatic top, keep accessories simple so the finish gets to shine.
A good makeover is not just about the furniture. It’s about how the piece lives in the room. The goal is for someone to notice it and assume you either found it at a stylish vintage shop or have your life more together than you actually do.
Extra: Real-World Experience and Lessons From Small Table Makeovers
After enough thrift-store flips and hand-me-down rescues, you start to notice that how to makeover a small table is only partly about materials. The bigger lesson is learning how furniture behaves once you stop looking at it like a problem and start looking at it like potential. Small tables are especially good teachers because they show every decision right away. A bold stain looks bolder. A crooked line looks crookeder. A beautiful hardware swap can make a mediocre table look custom in under ten minutes, while one rushed shortcut can have the whole thing looking like a science fair project with trust issues.
One common experience is thinking the table just needs a cosmetic refresh, only to realize during prep that cleaning changes everything. Layers of polish, dust, oil, and old residue can make a table look worn out when it is really just dirty. Then comes sanding, which has its own little plot twist: damage that seemed minor under the old finish suddenly appears center stage. Tiny dents, dark water marks, veneer bubbles, and chipped corners suddenly introduce themselves like uninvited guests. This is normal. In fact, it’s part of the process. A good makeover usually looks worse before it looks dramatically better.
Another real-life lesson is that small tables invite experimentation because the financial risk is low, but they also reveal whether your idea actually works. Maybe the marble-look film you loved online reads a little too “apartment lease special” in person. Maybe the floral decoupage you planned is beautiful, but only on the drawer front instead of the whole top. Maybe the table doesn’t need a loud pattern at all and only wanted fresh legs, a warm wood finish, and one excellent brass knob. Projects like this teach restraint. They remind you that design is often about editing, not piling on every clever idea you had while wandering the craft aisle.
There’s also the emotional part nobody talks about enough. A small table makeover is satisfying because it’s finite. You can finish it. You can carry it by yourself. You can see the before and after in one glance. In a world full of long renovations, giant shopping lists, and projects that somehow require six weekends and a second mortgage, a tiny table is refreshingly honest. It asks for a few hours, a little effort, and a decent playlist. In return, it gives you a visible win.
And perhaps the best experience of all is discovering that the piece you almost ignored becomes one of the most charming things in the room. The thrifted side table with the scratched top becomes the nightstand guests compliment. The awkward plant stand becomes an entryway accent that suddenly looks designer. The old end table from your aunt’s basement becomes the one piece that makes the whole room feel layered, personal, and finished. That is the magic of DIY furniture makeovers beyond paint: they are not just about fixing furniture. They’re about seeing possibility where other people only saw outdated wood and bad decisions.
Conclusion
If you want a project that is creative, affordable, and genuinely satisfying, a DIY small table makeover is hard to beat. Going beyond paint opens up far more interesting options: rich stains, patterned decoupage, peel-and-stick finishes, new legs, custom tops, pretty hardware, and tactile materials that give a simple piece real personality. Start with the structure, prep the surface properly, pick one clear design direction, and protect the final finish. That’s how a forgotten little table turns into a piece that looks thoughtful, stylish, and surprisingly expensive.
In short: don’t underestimate a small table. It may be tiny, but it is absolutely capable of a major glow-up.














