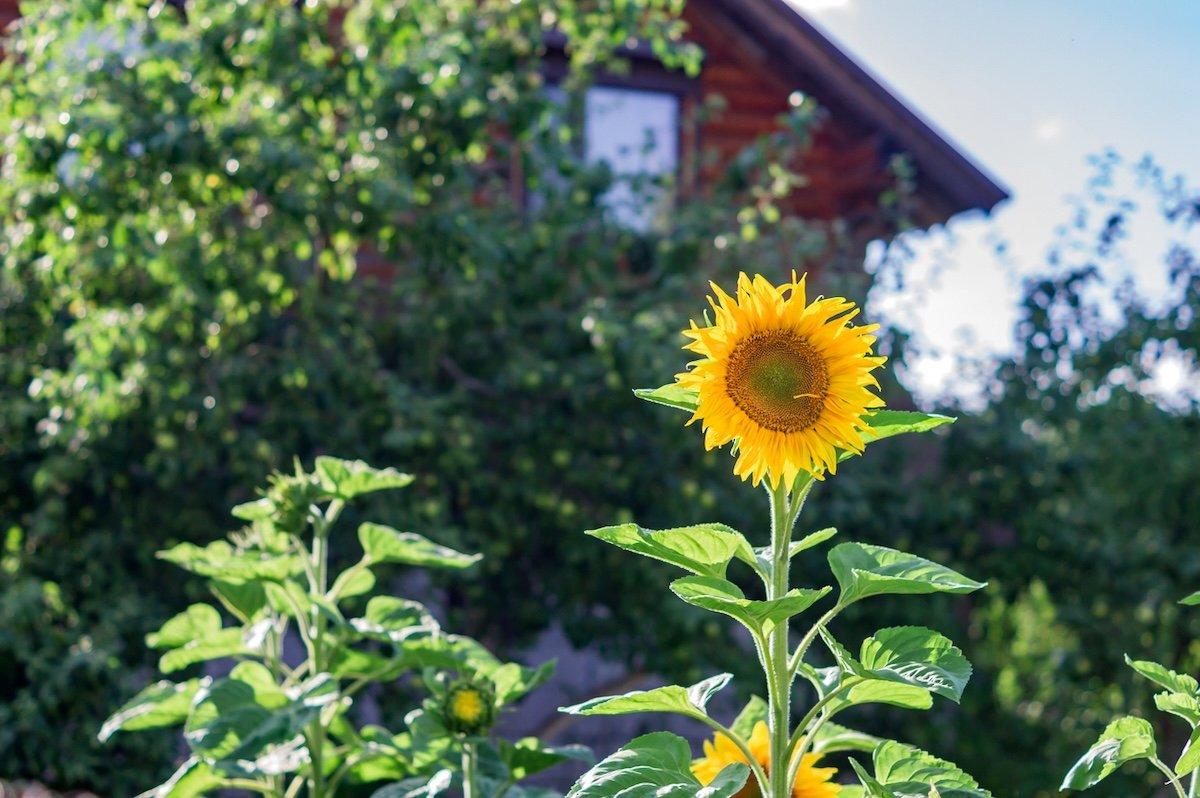
Sunflowers are the garden equivalent of cheerful neighbors who wave every time you pass. They grow quickly, attract bees, brighten dull corners, and may reward you with hundreds of edible seeds. Even better, they rarely demand the constant attention required by fussier flowers.
Learning how to grow sunflowers is mostly a matter of giving them sunshine, room for their roots, and enough water to establish themselves. The bigger challenge comes later, when birds, squirrels, and determined chipmunks realize that you have installed a free snack bar.
This guide explains how to choose the right sunflower varieties, plant and care for them, recognize when the heads are mature, and harvest sunflower seeds before the neighborhood wildlife claims everything.
Choose the Right Sunflowers for Your Garden
The common annual sunflower, Helianthus annuus, is available in an enormous range of heights, colors, flower forms, and growth habits. Before buying seeds, decide what you want from the plants.
Giant sunflowers
Giant varieties may grow 8 to 12 feet tall, with some exceeding that range under favorable conditions. Their thick stalks and enormous flower heads create dramatic garden landmarks. They are also popular with children because measuring their weekly growth feels like monitoring a friendly vegetable-store beanstalk.
Many giant varieties produce large seeds suitable for roasting, feeding birds, or saving for another season. Because their heavy heads can act like sails during storms, plant them in a sheltered location or provide support.
Branching sunflowers
Branching varieties produce multiple stems and flowers rather than one primary bloom. They are excellent for pollinator gardens and cut-flower arrangements because their bloom period usually lasts longer than that of single-stem types.
Give branching plants more room than narrow single-stem varieties. Crowding can reduce airflow and create a tangled jungle that looks as though the sunflowers held a meeting and forgot to arrange the chairs.
Dwarf and container varieties
Dwarf sunflowers generally grow 1 to 4 feet tall and work well in pots, raised beds, borders, and small urban gardens. Although their heads are smaller, many still produce usable seeds. Choose a deep, stable container with drainage holes so the mature plant does not tip over in the first enthusiastic breeze.
Seed-producing versus pollenless varieties
Some ornamental sunflowers are bred to be pollenless, which helps keep cut-flower arrangements tidy. These varieties may not be the best choice when your primary goal is harvesting a large crop of filled seeds.
Read the seed packet carefully. Look for descriptions such as “edible seed,” “confection type,” “birdseed,” or “large-seeded.” For saving seed to grow next year, open-pollinated varieties are generally more predictable than hybrids. Seeds collected from hybrids may germinate, but the new plants may differ noticeably from their parents.
Select the Best Planting Site
Sunflowers perform best in full sun. Choose a location receiving at least six to eight hours of direct sunlight each day. More sun generally supports stronger stems, better flowering, and fuller seed development.
The soil should drain well. Sunflowers develop extensive root systems and do not appreciate sitting in waterlogged ground. Loosen compacted soil before planting and mix in finished compost if the site is extremely sandy, heavy, or low in organic matter.
Avoid excessive nitrogen fertilizer. It can encourage huge leaves and rapid stem growth at the expense of flowers. The result may be an impressive green tower that falls over before producing the seed head you wanted.
Place tall sunflowers along the north side of a vegetable garden whenever possible. This helps prevent them from shading shorter crops. A fence can offer wind protection, but leave enough space for airflow and root growth.
When to Plant Sunflower Seeds
Sunflowers are warm-season annuals. Direct-sow them after the danger of frost has passed and the soil has begun to warm. In many regions, this falls between late spring and early summer, but local frost dates are more useful than a one-size-fits-all calendar.
Most sunflowers bloom or reach maturity approximately 70 to 120 days after planting, depending on the variety and growing conditions. Check the seed packet and count backward from the period when you want flowers or mature seeds.
For a longer bloom season, sow another small group every two to three weeks. Succession planting is especially useful with single-stem varieties, which normally produce one main flower and then consider their professional responsibilities complete.
How to Plant Sunflower Seeds
Direct-sowing in the garden
- Remove weeds and loosen the top several inches of soil.
- Plant each seed approximately 1/2 to 1 inch deep, following the packet directions for the specific variety.
- Space seeds about 6 inches apart initially.
- Water gently but thoroughly so the soil is moist without becoming muddy.
- After the seedlings develop their first true leaves, thin them to their final spacing.
Dwarf varieties may need only 6 to 12 inches between plants. Medium and branching varieties often benefit from 12 to 24 inches. Giant seed-producing plants usually perform best with approximately 18 to 30 inches of room, depending on their expected size.
Thinning feels wasteful, especially when every seedling looks promising. However, crowded sunflowers compete for water, nutrients, light, and airflow. If you cannot bear to remove healthy extras, transplant them while they are still very small and water them immediately afterward.
Starting sunflowers indoors
Sunflowers can be started indoors three to four weeks before the last expected frost, particularly in areas with short growing seasons. Plant them in individual biodegradable or deep containers to minimize root disturbance.
Do not start them too early. A sunflower trapped indoors for weeks may become tall, weak, and root-bound. Harden seedlings gradually by exposing them to outdoor conditions for increasing periods over about a week before planting them in the garden.
How to Care for Growing Sunflowers
Water young plants consistently
Keep the soil evenly moist while seeds germinate and seedlings establish their roots. Newly sprouted plants can fail quickly if the surface soil dries completely during hot or windy weather.
Once established, sunflowers tolerate some dryness, but drought during flowering and seed development can reduce seed size and fullness. Water deeply around the root zone rather than sprinkling the foliage every day. Deep watering encourages roots to travel downward, where moisture remains available longer.
Control weeds early
Young sunflowers do not compete well with aggressive weeds. Pull or hoe weeds while they are small, taking care not to damage shallow side roots.
A 2- to 3-inch layer of organic mulch can conserve moisture and suppress weeds. Keep mulch a few inches away from the stalk to reduce the risk of rot and discourage hiding places for stem-chewing pests.
Support very tall plants
Sunflowers grown in rich soil, partial shelter, or crowded conditions may develop long stems that lean. Install a sturdy stake before the plant becomes enormous. Tie the stalk loosely with soft material, leaving room for expansion.
Good spacing and full sunlight often produce stronger plants than staking alone. A sunflower should look like a confident garden resident, not a hostage tied to a broom handle.
Encourage pollinators
The center of a sunflower head contains hundreds of small disk flowers. Bees and other insects move among them, supporting pollination and seed formation.
Avoid spraying broad-spectrum insecticides while plants are blooming. If pest control becomes necessary, identify the pest first and choose the least disruptive method. Planting additional nectar-rich flowers nearby can help create a more diverse pollinator habitat.
Common Sunflower Problems
Birds and rodents digging up seeds
Birds, mice, and squirrels may uncover freshly planted seeds. Cover the area with lightweight mesh or a temporary row cover until seedlings emerge. Remove the cover before the young plants become entangled.
Seedlings disappearing overnight
Cutworms, slugs, rabbits, and other hungry visitors can remove seedlings surprisingly quickly. Cardboard collars around stems may discourage cutworms, while fencing or mesh can help exclude larger animals.
Aphids and beetles
Small aphid colonies can often be knocked off with a strong stream of water. Hand-pick larger beetles when practical. Healthy plants usually tolerate limited insect feeding without requiring chemical treatment.
Leaf spots, rust, and mildew
Fungal diseases are more likely when plants are crowded or leaves remain wet for long periods. Space plants properly, water at soil level, rotate planting areas, and remove heavily diseased debris. Do not automatically compost infected material unless your composting process reaches temperatures capable of destroying plant pathogens.
Empty or poorly filled seeds
Unfilled shells may result from poor pollination, extreme heat, drought, nutrient imbalance, or harvesting before the seeds mature. Growing several compatible sunflowers near one another and welcoming pollinators can improve seed development.
How to Tell When Sunflower Seeds Are Ready
A sunflower head changes dramatically as it matures. The bright petals fade and drop, the head becomes heavy and turns downward, and the back changes from green to yellow and eventually brown.
Look for several signs rather than relying on only one:
- The back of the flower head is yellow-brown or brown.
- The head hangs downward.
- The small florets covering the seeds rub off easily.
- The outer bracts are dry and beginning to curl.
- The seeds appear plump and have developed their mature color or striping.
- A test seed comes out easily and contains a firm kernel.
Harvesting too early produces thin, immature kernels. Waiting too long gives birds extra time to organize a buffet.
Protect Seed Heads Before Harvest
As soon as seeds begin filling, cover valuable heads with breathable material. Fine mesh bags, cheesecloth, or paper bags with ventilation holes can discourage birds while allowing moisture to escape.
Do not wrap a ripening head tightly in plastic. Trapped humidity can encourage mold and spoilage. Secure the covering around the stalk without squeezing it.
You can also leave several unprotected heads for wildlife. This turns the garden into a shared harvest rather than an escalating diplomatic incident with the local finches.
How to Harvest Sunflower Seeds
Harvesting fully dried heads outdoors
In dry weather, allow the heads to mature on the stalk until the backs are brown and the seeds loosen easily. Cut each head with approximately 12 inches of stem attached. Carry it carefully to avoid scattering seeds.
Finishing the drying process indoors
If rain, frost, birds, or rodents threaten the crop, cut the heads once the backs have turned yellow-brown and the seeds are well filled. Hang them upside down in a warm, dry, well-ventilated area.
Place a cloth or paper bag loosely around each head to catch falling seeds. Keep the drying heads away from rodents and inspect them regularly for moisture or mold. Depending on humidity and maturity, drying may take one to several weeks.
Removing seeds from the head
When the head is thoroughly dry, remove the remaining florets and rub the seeds free with your hands. Wearing gloves can make the job more comfortable. A stiff vegetable brush or the edge of another dried head can help loosen stubborn seeds.
Work over a clean bucket, tray, or sheet. Separate plant debris by hand, with a coarse screen, or by carefully pouring the seeds between containers in front of a gentle fan. Use only enough airflow to move the lightweight chaff, not enough to launch your harvest across the garage.
Drying and Storing Harvested Seeds
Spread freshly removed seeds in a single layer on screens, trays, or clean paper. Place them in a dry location with good airflow and stir them periodically. They must be completely dry before storage; residual moisture can cause mold, off-flavors, or loss of germination.
Store eating seeds in airtight containers in a cool, dark place. Refrigeration or freezing can extend their usable life when the seeds are fully dry.
For planting, select large, undamaged seeds from healthy plants. Label an envelope with the variety and harvest year, place the envelope in a tightly sealed jar, and store it somewhere cool and dry. When removing cold-stored seeds, let the sealed container reach room temperature before opening it so condensation does not form on the seeds.
Preparing Sunflower Seeds to Eat
Only eat seeds from plants that have not been treated with products unsuitable for food crops. Remove damaged, discolored, moldy, or insect-infested seeds.
Seeds can be eaten raw after proper cleaning and drying, although roasting produces a crisp texture and richer flavor. For salted seeds, soak them in a light saltwater solution, drain thoroughly, and spread them in a single layer on a baking sheet. Roast at a moderate temperature, stirring occasionally, until dry and crisp.
Because seed size and moisture vary, watch them rather than relying entirely on the clock. Burned sunflower seeds have a flavor best described as “campfire regret.” Allow roasted seeds to cool completely before placing them in a sealed container.
Can You Replant Harvested Sunflower Seeds?
Yes, mature seeds can be planted the following season if they were properly dried and stored. However, the results depend on the variety.
Open-pollinated sunflowers may produce plants similar to the parent, but cross-pollination with nearby varieties can create differences in height, color, branching, or seed characteristics. Hybrid seeds are even less predictable and may produce highly variable offspring.
That unpredictability can be disappointing when you need a uniform crop, but it can also be entertaining. Your saved seeds may produce a garden full of botanical surprises.
Practical Growing Experience: Lessons From a Sunflower Season
A typical first sunflower season begins with confidence. The seeds are large, the instructions seem simple, and the gardener imagines a perfect row of golden flowers standing at attention. Then the first lesson arrives: wildlife reads seed packets too.
Freshly planted seeds often disappear before germination. Covering the bed with mesh immediately after sowing is easier than replanting three times while accusing every squirrel in the yard. Once seedlings emerge, the next temptation is to keep all of them. A row that looks pleasantly full in May can become an overcrowded wall by July. Thinning early produces thicker stalks, larger heads, and better airflow.
Another common discovery is that sunflowers really do need full sun. Plants receiving morning light followed by afternoon shade may survive, but they often lean toward the brighter area. Their stalks can become thinner, and nearby plants may be pushed aside as the sunflowers search for better exposure. Choosing the sunny site from the beginning saves considerable staking later.
Watering also requires balance. Daily surface sprinkling creates shallow moisture and can encourage roots to remain near the top of the soil. A more successful routine is to water young seedlings consistently and then shift toward deeper, less frequent irrigation as the plants mature. Mulch helps, but it should not be piled against the stalk.
The most memorable stage begins when the flowers open. Bees may visit from morning until evening, moving across the disk florets as though inspecting every apartment in a circular high-rise. This activity is a useful reminder not to spray blooming plants casually. A few chewed leaves rarely matter as much as healthy pollination.
As the petals fade, beginners sometimes assume the plant is finished and remove the head too soon. The less glamorous ripening period is when the seeds are filling. The head becomes heavier, the back slowly changes color, and the plant redirects energy away from its leaves. Yellowing foliage late in the season is not necessarily a crisis; it may simply indicate natural maturity.
Bird protection works best when installed before obvious damage begins. A breathable mesh bag allows the head to continue drying while limiting access. Paper bags can work in dry conditions, but they should be checked after rain. Plastic bags are a poor substitute because they trap moisture.
Harvest timing is the final major lesson. A head cut with a green back may contain seeds that look finished but have thin kernels. A head left outside until completely brittle may be perfect, except that half its seeds have already been eaten. The practical compromise is to cut when the back is yellow-brown, the seeds are plump, and wet weather or wildlife makes further outdoor drying risky.
Indoor drying teaches patience. Seeds that feel dry on the surface may still hold moisture. Hanging the heads in moving air and spreading removed seeds in a single layer prevents many storage problems. Containers should be filled only after the seeds are thoroughly dry and cool.
By the end of the season, the garden may not resemble the flawless picture imagined in spring. Some stalks lean, a few leaves are ragged, and the birds probably collected a tax. Even so, a bucket of clean seeds, several saved heads, and a packet labeled for next year make the project feel remarkably complete. Sunflowers are forgiving teachers: they make mistakes obvious, recovery possible, and success tall enough to see from across the yard.
Conclusion
Growing sunflowers from seed is straightforward, but the best harvest comes from a few deliberate choices. Select a seed-producing variety, plant it in full sun after frost danger has passed, provide adequate spacing, water deeply, and avoid overfertilizing. As the heads mature, protect them from wildlife and watch for yellow-brown backs, drooping heads, dry bracts, and plump seeds.
Dry the harvested heads thoroughly before removing and storing the seeds. You can roast the crop, share it with birds, or save selected seeds for another growing season. With a small amount of preparation, one inexpensive packet can become a towering summer display and a surprisingly generous fall harvest.