
Note: This guide is written for decorative DIY barn door shutters and general home-improvement inspiration. Use safe, clean reclaimed wood, wear protective gear, and get experienced adult help when using saws, drills, ladders, or exterior mounting hardware.
There are home projects that quietly improve curb appeal, and then there are projects that make your house look like it suddenly developed a personality, learned to make coffee, and started wearing great boots. DIY barn door shutters from reclaimed wood belong firmly in the second category.
They are rustic, affordable, charming, and surprisingly practical as a weekend project. Better yet, they let you reuse old boards that might otherwise sit in a garage corner forever, judging you silently. Whether you want farmhouse shutters for exterior windows, decorative barn door style shutters for a porch, or indoor accent shutters for a cozy wall feature, reclaimed wood gives the project instant character that new lumber has to fake with stain and wishful thinking.
In this guide, you will learn how to choose safe reclaimed boards, measure your windows, build strong board-and-batten shutter panels, add the classic barn door “Z” brace, finish the wood for long-term durability, and install your shutters so they look intentionalnot like you lost a fight with a pallet.
Why Reclaimed Wood Works So Well for Barn Door Shutters
Reclaimed wood has two big advantages: texture and story. New boards are clean and predictable, which is nice if you are building a cabinet. But reclaimed wood shutters are meant to look warm, weathered, and slightly imperfect. Nail holes, saw marks, old grain, sun fading, and small dents all add visual interest.
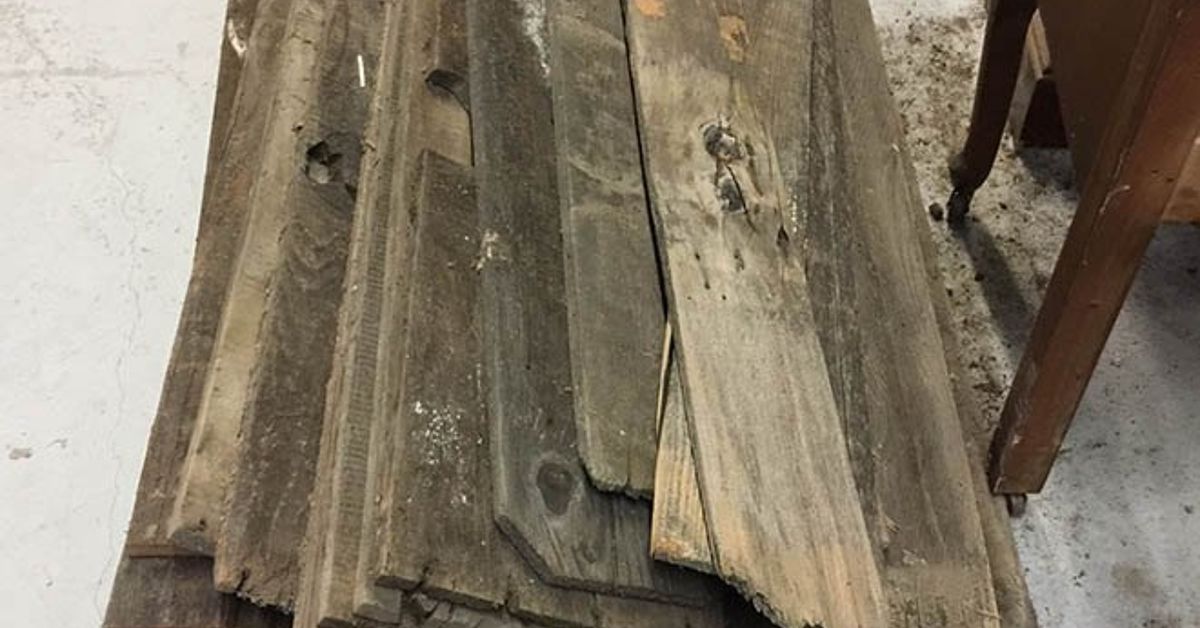
Old fence boards, barn boards, shipping crate lumber, salvaged cedar, and weathered pine can all work for this project if they are structurally sound. The goal is not to find perfect boards. The goal is to find boards that are straight enough to build with and interesting enough to make your windows look like they belong on a magazine cover titled “Yes, I Totally Meant to Be This Charming.”
Reclaimed wood is also budget-friendly. Depending on where you source it, your main costs may be screws, exterior finish, mounting hardware, and sandpaper. For homeowners who want rustic window shutters without paying custom-shutter prices, this is where the project starts to look very attractive.
What Are Barn Door Shutters?
Barn door shutters are typically inspired by the look of sliding barn doors and traditional board-and-batten construction. Instead of louvers or raised panels, they use vertical boards held together by horizontal battens. Many designs also include a diagonal brace, creating a “Z” or “X” pattern.
The result is simple, bold, and easy to customize. You can build them narrow and clean for a modern farmhouse look, chunky and weathered for a rustic cabin feel, or dark-stained with black hardware for a dramatic exterior upgrade.
Decorative vs. Functional Shutters
Before cutting wood, decide whether your shutters will be decorative or functional. Decorative shutters are fixed beside the window and do not open or close. Functional shutters require more precise sizing, stronger hinges, proper clearances, and hardware that allows them to cover the window opening when closed.
Most DIY barn door shutters are decorative, which makes the project easier and more forgiving. However, even decorative shutters should look correctly sized. A common mistake is making them too skinny or too short. Ideally, each shutter should visually appear as if it could cover half the window if closed. That small detail makes the entire project look more authentic.
Safety First: Choosing the Right Reclaimed Wood
Reclaimed wood is beautiful, but it needs a safety check before it becomes part of your home. Do not use unknown painted boards without testing for lead, especially if the wood may be from a building constructed before 1978. Avoid boards that smell strongly of chemicals, show signs of oil contamination, have active insect damage, or came from questionable industrial sources.
Good reclaimed wood for shutters should be dry, solid, and free of soft rot. A few cracks and nail holes are fine. Spongy spots, crumbling edges, or boards that twist like a potato chip auditioning for gymnastics are not ideal.
Use gloves when handling old wood. Remove nails, staples, screws, and metal fragments before cutting. A hidden nail can ruin a saw blade faster than you can say, “Well, that was expensive.”
Tools and Materials You’ll Need
Tools
- Tape measure
- Pencil and carpenter’s square
- Miter saw, circular saw, or handsaw
- Drill and drill bits
- Clamps
- Hammer or pry bar for removing old nails
- Orbital sander or sanding block
- Paintbrush or staining cloth
- Level
- Stud finder or masonry bit, depending on your exterior wall
- Safety glasses, dust mask, hearing protection, and work gloves
Materials
- Reclaimed boards for vertical planks
- Reclaimed or new boards for battens and diagonal braces
- Exterior-grade screws
- Waterproof wood glue, optional
- Exterior wood stain, paint, or clear sealer
- Exterior primer if painting
- Mounting blocks or furring strips, if needed
- Decorative strap hinges, handles, or clavos, optional
- Exterior anchors suitable for wood, brick, stucco, or siding
Step 1: Measure Your Windows
Measure the height of the window trim from top to bottom. For decorative shutters, many DIYers make the shutter the same height as the window trim or slightly taller, depending on the style of the house. Then measure the width of the window. A good visual rule is to make each shutter about half the width of the window opening, especially if you want an authentic look.
For example, if your window is 36 inches wide and 60 inches tall, each shutter might be around 18 inches wide and 60 inches tall. If you are using three reclaimed boards that are each about 5.5 inches wide, your finished shutter will be about 16.5 inches wide before gaps. That is close enough for decorative shutters and usually looks balanced.
Write down the measurements for every window. Do not assume all windows are the same size. Houses enjoy little surprises. Measuring each one prevents your shutters from becoming a custom art installation called “Almost.”
Step 2: Pick and Prepare Your Boards
Lay your reclaimed boards on a flat surface and group them by thickness, width, and color. Try to pair boards with similar thicknesses so your shutter sits evenly. If one board is much thicker than the others, save it for another project or plane it down if you have the tools.
Clean the boards with a stiff brush to remove dirt, dust, and loose debris. If they are very dirty, wipe them with mild soapy water and allow them to dry completely. Never trap moisture inside a finished shutter. Moisture is the villain in exterior wood projects, and unfortunately, it never takes a vacation.
Remove all hardware and inspect the boards carefully. Look along the edges for cracks that may split when screwed. Trim off weak ends and keep the strongest sections for the visible shutter face.
Step 3: Design the Shutter Layout
The classic DIY barn door shutter layout uses three or four vertical boards with two horizontal battens and one diagonal brace. For a taller window, three battens can look better: one near the top, one in the center, and one near the bottom.
Lay your boards side by side on the floor. Place the best-looking side facing down if you plan to attach screws from the back. This keeps the front cleaner. Use small spacers between boards if you want visible gaps. Paint stir sticks work well for narrow, even spacing.
For a tighter, more modern look, butt the boards together. For a rustic farmhouse look, leave tiny gaps so the individual boards stand out. Just avoid wide openings that make the shutter look unfinished or allow too much movement.
Step 4: Cut the Vertical Boards
Mark each board to the correct height. Use a square to draw straight cut lines. Cut slowly and check each board after cutting. Reclaimed wood may have irregular edges, so measuring from one end only can sometimes create uneven lengths.
If the bottom edges are rough, you can keep some natural variation for character, but the top and bottom should still look intentional. For exterior shutters, clean lines usually look better from the street, even when the wood itself is weathered.
Step 5: Cut the Battens and Diagonal Brace
Measure the total width of your shutter panel after the vertical boards are arranged. Cut two horizontal battens to that width. These battens will hold the panel together and create the barn door style.
Next, cut the diagonal brace. Place a board diagonally across the shutter from the lower inside corner to the upper outside corner, or the opposite direction if you prefer the look. Mark the angle where it meets the top and bottom battens, then cut along those lines.
For a pair of shutters on the same window, mirror the diagonal braces. This creates a balanced appearance, especially when viewed from the street. If both braces lean the same direction, the shutters may look slightly off, even if nobody can explain why.
Step 6: Assemble the Shutter Panel
Clamp the vertical boards together or hold them in place with spacers. Position the horizontal battens about 6 to 10 inches from the top and bottom, depending on the shutter height. For short shutters, keep the battens closer to the ends. For tall shutters, give them a little more breathing room.
Drill pilot holes before driving screws. This is especially important with reclaimed wood because dry old boards can split. Use exterior-grade screws long enough to secure the battens without poking through the front face.
If attaching from the back, drive screws through the battens into the vertical boards. If attaching from the front, use screws as part of the design or choose decorative black screw heads. A small amount of waterproof wood glue can add strength, but screws should do the real holding.
Install the diagonal brace last. Predrill, glue if desired, and screw it into each vertical board it crosses. The brace adds style and helps reduce movement.
Step 7: Sand Without Erasing the Character
Sanding reclaimed wood is a balancing act. You want to remove splinters, sharp corners, and rough patches, but you do not want to sand away the weathered texture that made you choose reclaimed wood in the first place.
Start with medium-grit sandpaper, such as 80 or 100 grit, for rough spots. Move to 120 or 150 grit for a smoother finish. Round over sharp edges slightly so the shutters feel finished. Pay extra attention to the ends of boards because end grain absorbs finish quickly and can invite moisture if left exposed.
Step 8: Finish the Shutters for Exterior Use
If your reclaimed wood barn door shutters will be outdoors, finishing is not optional. Sun, rain, humidity, and temperature swings are tough on wood. A good exterior stain, exterior paint, or clear outdoor sealer helps protect the boards from moisture and UV damage.
For a natural rustic look, use an exterior-grade clear sealer or semi-transparent stain. For a bold farmhouse style, paint the shutters black, charcoal, navy, forest green, or classic white. If painting, use an exterior primer first, especially on bare or mixed wood species.
Apply finish to all sides, including the back and edges. Many people finish only the front, but the back side still absorbs moisture. That uneven moisture exposure can cause cupping and warping over time.
Let the finish cure according to the manufacturer’s directions before installation. Dry to the touch does not always mean fully cured. The can knows things. Listen to the can.
Step 9: Add Decorative Hardware
Decorative hardware gives DIY shutters a finished look. Black strap hinges, pull handles, shutter dogs, or metal accents can make simple boards look custom. If your shutters are decorative, the hardware does not need to be functional, but it should be exterior-rated so it does not rust quickly.
Keep scale in mind. Oversized hardware can look dramatic on large shutters but silly on small ones. On the other hand, tiny hinges on big rustic shutters may disappear visually. Hold the hardware in place before installing and step back several feet. Your eyes will usually tell you if something looks right.
Step 10: Install the Shutters
Installation depends on your home’s exterior. Wood siding, brick, stucco, fiber cement, and vinyl siding all require different fasteners and methods. For most decorative shutters, you will mark the location, drill pilot holes, use appropriate exterior anchors or screws, and mount the shutter securely beside the window.
Use a level and check alignment before fastening completely. It is helpful to have one person hold the shutter while another person steps back and checks the look from the yard or sidewalk. Shutters can be technically level but visually odd if the window trim or siding is slightly uneven.
If mounting over uneven siding, use spacers or mounting blocks so the shutter sits flat and has airflow behind it. A small gap behind the shutter helps moisture escape, which is better for the wood and the wall.
Common Mistakes to Avoid
Using Unsafe Wood
Do not use painted old boards without checking for lead risk. Avoid wood with chemical smells, oily residue, active pests, or heavy rot. Pretty wood is not worth bringing trouble to your home.
Skipping Pilot Holes
Old wood can be brittle. Pilot holes reduce splitting and make assembly cleaner.
Making Shutters Too Small
Undersized shutters are one of the fastest ways to make a house look awkward. Even decorative shutters should appear proportional to the window.
Finishing Only the Front
Seal every side. Moisture does not politely enter only through the pretty part.
Ignoring Drainage and Airflow
Exterior wood needs room to dry. Keep shutters slightly off the wall when possible and avoid designs that trap water.
Design Ideas for DIY Barn Door Shutters
One of the best parts of this project is how flexible it is. If you want a modern farmhouse look, use clean vertical lines, black stain, and simple hardware. For a cottage style, paint the shutters soft blue, sage green, or creamy white. For a cabin or rustic lodge feel, keep the reclaimed wood natural and use a dark oil-based exterior stain.
You can also mix board widths for a more organic look. A shutter made from three perfectly matching boards looks clean, while one made from varied boards looks more salvaged and handmade. Both can be beautiful. The right choice depends on your house style.
Indoor barn door shutters are another option. Use them to frame a mirror, cover a small cabinet, decorate a fireplace wall, or create a faux window feature. Interior shutters do not need the same weatherproof finish, but they should still be cleaned, sanded, and sealed to prevent dust and splinters.
Estimated Cost and Time
If you already have reclaimed wood, this can be a very affordable project. A pair of decorative shutters may cost less than buying new wood shutters, especially if you keep hardware simple. Expect to spend money on screws, sandpaper, stain or paint, sealer, and mounting hardware.
For time, plan on one weekend. Day one can be used for cleaning, cutting, assembling, and sanding. Day two can be used for finishing and installation, depending on drying times. If the weather is humid or you are applying multiple coats, give yourself extra time. DIY projects love to pretend they are “quick,” then casually ask for another afternoon.
Maintenance Tips for Reclaimed Wood Shutters
Inspect exterior shutters at least once a year. Look for peeling finish, loose screws, cracks, rot, or areas where water collects. Touch up paint or sealer as needed. In sunny or rainy climates, wood shutters may need maintenance more often.
Wash them gently with mild soap and water. Avoid aggressive pressure washing because it can damage the wood fibers and force water into cracks. If hardware begins to rust, remove it, clean it, and repaint or replace it with exterior-rated pieces.
The goal is not to keep reclaimed wood looking brand new. The goal is to keep it protected while letting it age gracefully. Think “charming farmhouse character,” not “forgotten fence behind a gas station.”
Experience-Based Tips: What Makes This Project Turn Out Better
The biggest lesson with DIY reclaimed wood shutters is that the wood tells you what kind of project it wants to become. That may sound dramatic, like the boards are about to release a folk album, but it is true. Some reclaimed boards look best when left natural. Others need paint because their colors clash like relatives at Thanksgiving. Before deciding on a finish, lay every board in daylight and look at the full group together.
Another useful experience is to build one shutter first as a test. Do not cut every single board for every window before assembling the first panel. Once you build the first one, you may realize the battens look too wide, the diagonal brace angle feels too steep, or the spacing between boards needs adjustment. A test shutter saves time and prevents a whole stack of matching mistakes.
Clamps are more important than most beginners expect. Reclaimed boards often have small bows or twists. Clamping them during assembly helps keep the panel flat and tight while you drive screws. If a board is badly twisted, do not force it into the shutter. It may pull against the screws later and cause gaps. Save stubborn boards for smaller decorative projects where they can be dramatic without causing structural drama.
When choosing screws, exterior-rated fasteners are worth the small extra cost. Interior screws can rust, stain the wood, and weaken outdoors. Stainless steel or coated exterior screws are much better for shutters exposed to weather. Also, do not rely only on glue. Wood glue can help, but exterior shutters expand and contract. Mechanical fasteners provide the long-term strength.
Finishing before installation is another lesson learned the easy wayor the hard way, depending on how much you enjoy painting while standing on a ladder. Stain or paint all sides while the shutters are flat on sawhorses. It is faster, cleaner, and gives better coverage around edges and screw holes. After installation, do final touch-ups only where needed.
Hardware placement also deserves patience. Before drilling holes for decorative hinges or handles, tape the hardware in place and step back. View it from the sidewalk, driveway, and across the yard. What looks centered up close may feel too high or too low from a distance. Exterior design is partly about proportion, and proportion is easier to judge from where people actually see the house.
If your home has vinyl siding, brick, stucco, or uneven trim, plan the mounting method before building the shutters. The prettiest shutter in the world becomes frustrating if you realize later that your fasteners are wrong for the wall. For heavy shutters, make sure the mounting points are secure and appropriate for the surface. When in doubt, ask someone experienced with exterior installation or consult hardware instructions.
Finally, do not chase perfection too hard. Reclaimed wood shutters are supposed to have character. A small knot, a faded streak, a saw mark, or an old nail hole can make the final piece more interesting. The trick is to make the construction solid while letting the surface stay honest. Build them square, seal them well, mount them safely, and let the wood keep a little of its past life. That is the whole charm.
Final Thoughts
Making DIY barn door shutters from reclaimed wood is one of those rare home projects that checks almost every box. It is budget-friendly, beginner-friendly, customizable, sustainable, and big enough visually to change the look of your home. With careful measuring, safe wood selection, solid assembly, and a weather-resistant finish, you can create shutters that look custom without paying custom prices.
The beauty of this project is that it does not require perfect lumber or advanced woodworking skills. It rewards patience, planning, and a good eye for proportion. Start with clean, safe boards, build a simple board-and-batten frame, add the barn door brace, finish every surface, and install the shutters with confidence.
And when someone asks where you bought them, you get to say, “Oh, I made those.” Try not to say it too smugly. Or do. You earned it.












