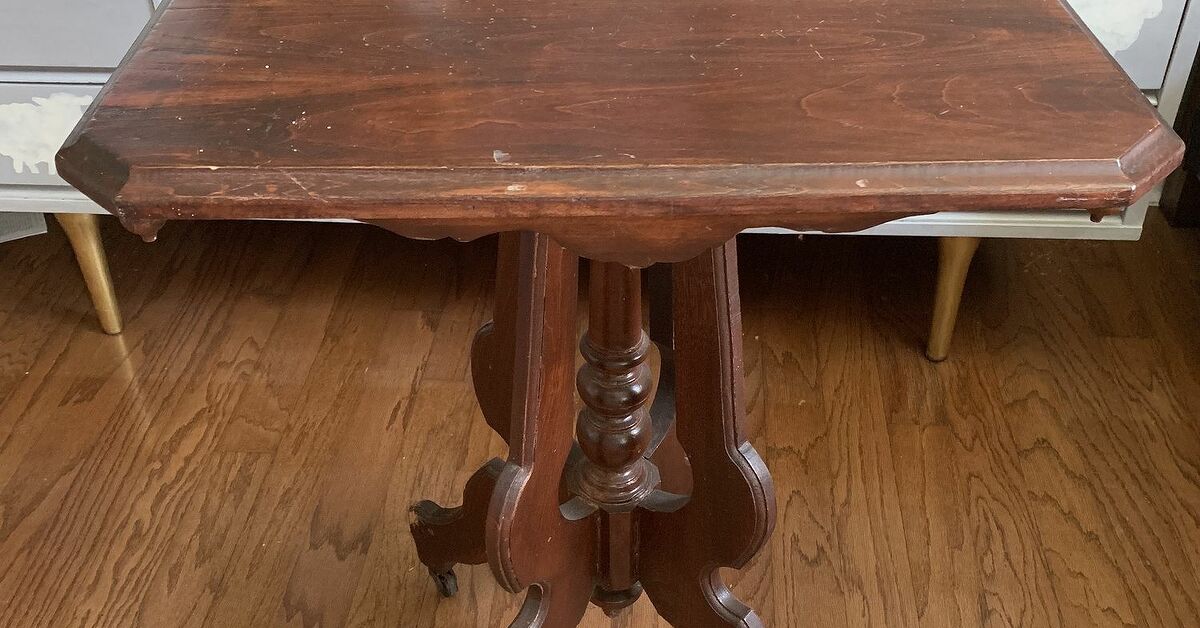
Painting an antique table white can feel a little dramatic at first. One minute you are staring at a dark, scratched, slightly mysterious piece of furniture that looks like it has hosted 80 years of family dinners, tax paperwork, and one very questionable fondue party. The next, you are imagining a fresh white table glowing in your breakfast nook like it belongs in a breezy cottage magazine spread.
The good news? You can absolutely paint an antique table white and make it look beautiful, durable, and intentional. The not-so-good news? You cannot simply slap on white paint and hope for the best. Antique furniture is usually coated in old varnish, stain, wax, shellac, or previous paint. White paint is also famously unforgiving. It shows bleed-through, brush marks, dust, drips, and every tiny bump that your darker table politely kept hidden for decades.
This guide walks you through how to paint an antique table white the right way, from checking for lead paint to choosing primer, applying smooth coats, sealing the finish, and keeping the table from looking like a rushed weekend experiment. With patience, smart prep, and a little furniture-painting confidence, your old table can become bright, clean, and charming without losing its antique character.
Before You Paint: Decide Whether the Table Should Be Painted
Before opening a can of paint, pause for a quick furniture reality check. Some antique tables have significant historical, collectible, or monetary value. If the table is a rare period piece, has original hand-carved details, contains valuable wood, or has a documented maker, painting it may reduce its value. In that case, consult an antique dealer or furniture restoration expert first.
However, many old tables are not museum treasures. They are sturdy, useful, emotionally meaningful, or simply too cute to send to the garage forever. If your table has heavy scratches, water rings, mismatched repairs, or a dated orange-brown finish, painting it white can be a practical way to give it a second life.
Good Candidates for White Paint
An antique table is usually a good candidate for painting if it has a damaged finish, unattractive stain color, repaired veneer, missing original value, or a shape you love more than the existing wood tone. White paint works especially well on small dining tables, side tables, entry tables, farmhouse tables, nightstands, and vintage pedestal tables.
When to Think Twice
Be more cautious if the table has rare wood grain, original hand-painted decoration, delicate inlay, or a finish that is already in excellent condition. In those cases, cleaning, waxing, or refinishing may be better than painting.
Safety First: Check for Lead Paint and Old Finishes
If your antique table is painted or has unknown layers underneath the current finish, lead paint is a real concern. In the United States, lead-based paint was widely used before modern restrictions, and sanding or scraping old paint can create dangerous dust. This matters even more if children, pregnant people, or pets are in the home.
If the table already has old paint, do not aggressively sand it until you know what you are dealing with. Use an EPA-recognized lead test kit or ask a certified professional to test the finish. If the table tests positive for lead, avoid dry sanding, heat guns, power sanding, and messy scraping. In many cases, the safest choice is to hire a professional or encapsulate the surface with appropriate lead-safe methods.
Even if lead is not present, always work in a well-ventilated area. Wear a properly fitted respirator or mask rated for sanding dust, use eye protection, and cover your workspace with a drop cloth. Your lungs deserve better than antique-table confetti.
Tools and Supplies You Will Need
Gathering everything before you begin saves time and prevents that classic DIY moment where one hand is covered in primer and the sandpaper is somehow in another room.
- Drop cloth or plastic sheeting
- Screwdriver or drill for removing hardware
- Mild dish soap or furniture-safe cleaner
- Degreaser for oily or waxy surfaces
- Clean lint-free cloths
- Fine-grit sandpaper, usually 180 to 220 grit
- Sanding sponge for curves and carved details
- Tack cloth or microfiber cloth
- Wood filler for dents, cracks, or old hardware holes
- Painter’s tape
- High-quality primer
- White furniture paint, enamel paint, acrylic paint, mineral paint, or chalk-style paint
- Angled brush for details
- Small foam or microfiber roller for flat surfaces
- Clear protective topcoat, if needed
Step 1: Clean the Antique Table Thoroughly
Cleaning is not optional. Old tables collect furniture polish, wax, hand oils, cooking residue, dust, and mystery grime. Paint does not stick well to grime. It sits on top of it, judges your choices, and eventually peels.
Start with mild soap and water. Wipe every surface, including the underside of the tabletop, the apron, legs, edges, and decorative grooves. If the table feels greasy or waxy, use a furniture-safe degreaser according to the product instructions. Avoid soaking the wood. Antique joints and veneers can loosen when exposed to too much moisture.
After cleaning, wipe the table with a damp cloth to remove cleaner residue, then let it dry completely. If your cloth still comes away brown or sticky, clean again. A clean surface is the foundation of a smooth white finish.
Step 2: Remove Hardware, Pads, and Loose Pieces
If the table has drawer pulls, metal caps, caster wheels, folding leaves, or removable parts, take them off before painting. Label screws and small parts in a bag so you do not end up crawling around the floor later whispering, “Where did that tiny screw go?”
Check the table for loose joints, wobbly legs, lifting veneer, or cracked trim. Repair structural issues before painting. Paint can make a table prettier, but it cannot magically make a wobbly leg stable. Tighten screws, glue loose joints with wood glue, clamp as needed, and let repairs cure fully.
Step 3: Fill Dents, Scratches, and Old Holes
White paint highlights imperfections, so now is the time to fill dents, gouges, deep scratches, and unwanted hardware holes. Use wood filler that is compatible with paint. Press it into the damaged area, slightly overfill it, and let it dry according to the label.
Once dry, sand the filled areas smooth. Run your fingers over the surface. If you can feel a ridge, you will probably see it after painting. The goal is not to erase every sign of age. Antique charm is welcome. Random crater in the tabletop? Less welcome.
Step 4: Sand or Scuff the Surface
If the table is bare wood, varnished wood, or previously stained and sealed, light sanding helps primer grip the surface. Use 180- to 220-grit sandpaper and sand with the grain. You do not need to remove every bit of old finish unless it is failing. The goal is to dull the shine and create a lightly textured surface for primer.
For curved legs, carved details, and turned feet, use a sanding sponge. Work gently so you do not flatten decorative edges. If the table has a glossy factory-like finish, pay extra attention to scuffing it evenly.
After sanding, remove dust with a vacuum, tack cloth, or slightly damp microfiber cloth. Do not skip this step. Dust trapped under white paint looks like tiny furniture acne, and nobody invited that.
Step 5: Choose the Right Primer
Primer is the secret hero of painting an antique table white. It improves adhesion, blocks stains, evens out the surface, and helps your white paint look clean instead of yellow, pink, or weirdly beige.
For antique tables, a stain-blocking primer is often the best choice because old wood tannins can bleed through white paint. Woods like oak, mahogany, cherry, and pine knots are especially known for discoloring light finishes. If your table has dark stain, knots, water marks, or mystery spots, choose a primer designed to block stains.
Acrylic Primer
Acrylic primer is water-based, lower odor, easy to clean up, and suitable for many indoor furniture projects. It works well when the table is in decent condition and you are not fighting heavy stain bleed-through.
Shellac-Based or Oil-Based Primer
Shellac-based or oil-based stain-blocking primer is stronger for blocking tannins, knots, smoke stains, and old discoloration. It can smell stronger and require more careful cleanup, but it is often worth it when painting dark antique wood white.
Bonding Primer
If the table has a very slick surface, bonding primer can help paint stick. This is useful for glossy varnish, laminate-like finishes, or surfaces that cannot be sanded heavily.
Step 6: Apply Primer in Thin Coats
Apply primer with an angled brush for corners and details, then use a small roller for flat areas like the tabletop. Work in thin, even coats. Thick primer can leave ridges, drips, and texture that become more obvious once white paint goes on.
Let the primer dry fully. Then lightly sand with 220-grit sandpaper to smooth raised grain or brush marks. Wipe away all dust before applying another coat. For dark antique tables, two coats of primer are often better than one. If you still see brown, red, yellow, or gray discoloration bleeding through, add another stain-blocking coat before painting.
Step 7: Pick the Best White Paint Finish
Choosing white paint sounds simple until you discover there are approximately one billion whites. Some are warm and creamy. Some are cool and crisp. Some look perfect in the store and oddly gray in your dining room. Always test your white paint in the room where the table will live.
For antique tables, warm whites usually look softer and more natural. Crisp bright whites can look fresh and modern but may also emphasize every brush mark and chip. If the table has ornate details, a slightly creamy white can preserve vintage charm. If your style is coastal, farmhouse, cottage, or Scandinavian, white paint is a natural fit.
Best Sheens for a Painted Table
A matte finish looks charming but can be harder to clean. Satin is a good all-around choice for antique tables because it has a soft glow and decent durability. Semi-gloss is easier to wipe clean but shows imperfections more clearly. For dining tables or high-use surfaces, choose a durable furniture enamel or add a protective topcoat.
Step 8: Paint the Table White
Stir the paint well, but do not shake it into a bubble bath. Start with the table legs, apron, and detailed areas using a quality brush. Then roll the tabletop in long, even passes. Work with the grain when possible.
Apply thin coats. The first coat may look streaky. This is normal. Resist the urge to keep brushing over it until it looks perfect. Overworking paint can create drag marks and texture. Let the first coat dry according to the manufacturer’s instructions, then lightly sand with 220-grit paper if needed. Wipe clean and apply the second coat.
Most antique tables need two to three coats of white paint for full coverage. Dark wood, red-toned stain, or heavy grain may require extra patience. Thin coats create a smoother, stronger finish than one thick coat. Think elegant layers, not frosting a birthday cake.
Step 9: Decide Whether to Distress the Finish
Distressing can make a white antique table look naturally aged instead of freshly painted. It works especially well on farmhouse, cottage, French country, and shabby-chic styles. The trick is restraint.
Use fine sandpaper to gently rub areas that would naturally wear over time: corners, edges, raised carvings, drawer fronts, and the tops of legs. Stop before the table looks like it survived a furniture hurricane. A little distressing adds character. Too much can look forced.
If you prefer a clean modern look, skip distressing and keep the finish smooth. Antique shape plus crisp white paint can create a beautiful blend of old and new.
Step 10: Seal the Painted Table
Not every furniture paint requires a topcoat, but tabletops usually benefit from extra protection. Dining tables, coffee tables, and entry tables deal with cups, keys, elbows, homework, flowers, and the occasional snack emergency. A clear topcoat helps protect the finish from scratches and stains.
Choose a water-based polyurethane, polycrylic, or furniture topcoat that dries clear and is recommended for light colors. Oil-based clear coats can amber over time, which may turn your pretty white table a shade of “vintage vanilla pudding.” Test the topcoat on a hidden area or sample board first.
Apply thin coats with a high-quality synthetic brush or applicator. Let each coat dry, then lightly sand between coats if the label recommends it. Two to three coats are common for tabletops. Allow the final coat to cure fully before heavy use.
Step 11: Let the Finish Cure
Paint may feel dry within hours, but curing takes longer. During curing, the finish hardens and becomes more durable. Avoid placing heavy objects, hot dishes, placemats, or decorative trays on the table too soon. If you put a vase on soft paint and it leaves a ring, the table will remember. Possibly forever.
For the first few weeks, treat the table gently. Use coasters, placemats, and soft cloths. Do not scrub aggressively. Once fully cured, the finish will handle daily life much better.
Common Mistakes to Avoid
Skipping the Cleaning Step
Paint over dirt and wax will not last. Clean first, paint second, celebrate third.
Using the Wrong Primer
If dark stains bleed through white paint, the problem is usually primer. Use stain-blocking primer for antique wood, especially red-toned or tannin-rich pieces.
Applying Thick Paint Coats
Thick coats take longer to dry, show brush marks, and can peel. Thin coats are smoother and more durable.
Not Sanding Between Coats
Light sanding between primer and paint coats can dramatically improve smoothness. Always remove dust before the next layer.
Using the Table Too Soon
Dry paint is not the same as cured paint. Give the finish time to harden before normal use.
How to Keep a White Antique Table Looking Beautiful
White furniture is lovely, but it does ask for a little maintenance. Wipe spills quickly with a soft damp cloth. Avoid harsh cleaners, abrasive pads, and ammonia-based products unless your topcoat specifically allows them. Use coasters under drinks and pads under hot dishes.
If the table chips, touch it up with leftover paint using a small artist’s brush. For deeper scratches, lightly sand the damaged spot, apply primer if needed, repaint, and reseal. Keeping a small jar of labeled touch-up paint is one of those boring grown-up habits that feels heroic six months later.
Best Design Ideas for a White Antique Table
A white antique table is surprisingly flexible. Pair it with natural wood chairs for a warm farmhouse look. Use black metal chairs for contrast. Add woven placemats for coastal style. Place it under a brass pendant light for vintage elegance. For a cottage feel, mix it with floral cushions, soft blue walls, and simple linen curtains.
You can also leave part of the table wood-toned. For example, paint the legs and apron white while refinishing the tabletop in a natural stain. This two-tone approach is practical for dining tables because stained wood tops hide wear better than painted white tops.
Experience Notes: What Really Happens When You Paint an Antique Table White
Painting an antique table white is one of those projects that looks simple in a before-and-after photo but has a full personality behind the scenes. The biggest lesson is that the table will usually tell you what it needs, but only after you start. A table that looks clean may still release decades of polish when you wipe it down. A smooth top may reveal dents only after primer. A beautiful white paint color may look too cold once it meets your room’s lighting.
One useful experience is to test everything before committing. Test the primer on a hidden area. Test the white paint near a window and under artificial light. Test the topcoat over a painted sample to make sure it does not yellow. These little tests feel slow at first, but they save you from repainting the entire table while questioning all your life decisions.
Another real-world lesson is that white paint needs patience. The first coat often looks disappointing. It may be streaky, uneven, or slightly transparent. That does not mean the project is failing. White paint builds beauty in layers. The second coat usually brings confidence. The third coat brings the “Oh, there it is” moment.
Brush choice also matters more than beginners expect. A cheap brush can leave bristles, heavy lines, and rough edges. A good angled brush makes legs and details easier. A small roller makes the tabletop smoother. The best results often come from using both: brush first for corners and curves, then roll flat areas before the paint starts drying.
Dust control is another practical detail. White paint attracts visible dust like a tiny magnet. Before each coat, wipe the surface carefully, check the room for floating dust, and avoid painting near open windows on windy days. If a speck lands in wet paint, let the paint dry, sand it smooth, and touch it up. Trying to dig it out while wet usually creates a bigger mess.
Finally, curing time is where many good projects get damaged. The table may look finished, but the paint and topcoat still need time to harden. During that period, use the table lightly or not at all. Do not place decorative trays, books, lamps, or hot mugs on it too soon. A little patience after the final coat can be the difference between a finish that lasts years and one that gets dents in the first week.
The best part of painting an antique table white is not just the color change. It is the feeling of keeping something old useful and loved. The table still has its shape, weight, history, and character, but now it fits your home. Done well, a white-painted antique table does not look erased. It looks refreshed, like it finally got a good night’s sleep and a very flattering outfit.
Conclusion
Learning how to paint an antique table white is really about preparation, patience, and respect for the piece. Start by checking whether the table is safe and suitable to paint. Clean it thoroughly, repair damage, scuff-sand carefully, choose a stain-blocking primer, and apply thin coats of quality white paint. If the table will get daily use, protect it with a clear topcoat and let everything cure before putting it back to work.
The result can be bright, timeless, and surprisingly durable. Whether your style is farmhouse, cottage, coastal, traditional, or modern vintage, a white antique table can become one of the most charming pieces in the room. Just remember: the magic is not in rushing. The magic is in doing each step well enough that your table looks effortless when it is finished.
Note: This article is written for web publication and is based on practical furniture-painting guidance, lead-safety considerations, paint manufacturer recommendations, and common refinishing best practices. Always follow the safety directions and drying times listed on the specific products you use.