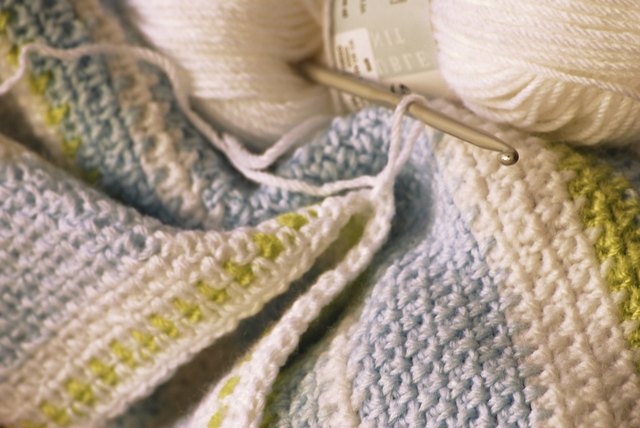
Learning how to single crochet blankets for beginners is a little like learning to make pancakes: the first one may look suspicious, the second one behaves better, and by the third row you begin to feel like a cozy genius. The good news is that a single crochet blanket uses one of the simplest stitches in crochet. The even better news is that blankets are mostly rectangles, and rectangles are very forgiving. They do not judge. They simply sit there, get warmer, and wait for you to add another row.
If you can make a slip knot, chain stitches, and single crochet, you can make a blanket. You do not need a complicated pattern, a mysterious family heirloom hook, or the confidence of someone who owns a yarn wall. You only need yarn, a hook, scissors, a yarn needle, and a willingness to count stitches even when your favorite show gets dramatic.
This guide walks you through the full beginner process: choosing yarn, picking the right hook, making a starting chain, working single crochet rows, fixing common mistakes, adding a simple border, and finishing your blanket neatly. By the end, you will understand not only what to do, but why each step matters.
What Is Single Crochet?
Single crochet, often abbreviated as sc, is one of the most basic crochet stitches in American crochet terminology. It creates a dense, sturdy fabric that works beautifully for baby blankets, lap blankets, throws, pet blankets, and cozy couch companions. Because the stitch is short and compact, it gives your blanket warmth and structure without needing fancy stitch combinations.
The basic motion is simple: insert your hook into the stitch, yarn over, pull up a loop, yarn over again, and pull through both loops on the hook. That is it. One stitch. One tiny yarn brick in your future blanket mansion.
Why Single Crochet Is Great for Beginner Blankets
A single crochet blanket is one of the best beginner crochet projects because it gives you lots of practice without asking you to memorize a long pattern. Every row repeats the same movement, which helps your hands learn rhythm, tension, and stitch placement.
Single crochet is also practical. It makes a fabric that is warm, simple, and durable. If your stitches are not perfectly identical at first, the blanket will still be usable. Handmade blankets are allowed to have personality. In fact, a few wobbles in the early rows are practically a signature.
Main Benefits
- Easy to learn: You only repeat one basic stitch.
- Great practice: Blankets help beginners build muscle memory.
- Warm fabric: Single crochet creates a close, cozy texture.
- Simple shaping: Most beginner blankets are just rectangles.
- Customizable: You can change size, color, border, and yarn weight.
Supplies You Need
You do not need a suitcase of tools to start. Keep your first blanket simple, affordable, and comfortable to work on.
Beginner Supply List
- Yarn: Medium, bulky, or super bulky yarn is easiest for beginners to see and handle.
- Crochet hook: Choose the hook size recommended on the yarn label, then adjust if your fabric feels too tight or too loose.
- Scissors: Any sharp craft scissors will do.
- Yarn needle: Also called a tapestry needle, used to weave in ends.
- Stitch markers: Optional, but extremely helpful for marking the first and last stitch of each row.
- Tape measure: Useful for checking width and length as you go.
Best Yarn for a Beginner Single Crochet Blanket
For a first blanket, choose yarn that is easy to see, easy to wash, and pleasant in your hands. Medium weight yarn is a classic choice because it is widely available and not too bulky. Bulky or super bulky yarn works faster, which can be motivating when your blanket starts to look like a blanket instead of a very ambitious scarf.
Acrylic yarn is popular for beginner blankets because it is affordable, washable, and available in many colors. Acrylic blends are also practical for family blankets, baby blankets, and everyday throws. Cotton can be beautiful, but it is heavier and less stretchy, so it may feel harder on the hands during a large project. Wool is warm and lovely, but it may require more careful washing.
Beginner Yarn Tips
- Choose a smooth yarn instead of fuzzy novelty yarn for your first blanket.
- Use a light or medium color so you can see your stitches clearly.
- Avoid very dark yarn at first unless you enjoy crocheting by detective work.
- Buy enough yarn from the same dye lot if possible, especially for a larger throw.
- Check the yarn label for washing instructions before making a gift blanket.
Choosing the Right Hook Size
Your hook size affects the feel of your blanket. A smaller hook makes tighter stitches and a firmer fabric. A larger hook makes looser stitches and a softer drape. The yarn label gives a recommended hook size, which is a good starting point, not a law carved into a mountain.
If your blanket feels stiff, try going up one hook size. If your stitches look too loose or full of gaps, go down one hook size. The goal is a fabric that feels cozy, flexible, and even. For many beginners, a hook with an ergonomic handle is more comfortable during long crochet sessions.
Beginner Blanket Sizes
You can make your blanket any size you like. That is the joy of a simple single crochet blanket. No blanket police will arrive if your throw is three inches wider than planned.
| Blanket Type | Common Approximate Size | Beginner Notes |
|---|---|---|
| Baby Blanket | 30 x 36 inches | Manageable size and great for practicing neat edges. |
| Lap Blanket | 36 x 48 inches | Good for reading chairs, gifts, or wheelchair comfort. |
| Small Throw | 40 x 50 inches | A nice first adult blanket without becoming a yarn marathon. |
| Standard Throw | 50 x 60 inches | Cozy couch size, but it requires more yarn and patience. |
Make a Gauge Swatch First
A gauge swatch is a small test square made with your chosen yarn, hook, and stitch. Beginners sometimes skip it because they are excited to start the real blanket. Understandable. However, a swatch can save you from discovering 12 rows later that your “baby blanket” is becoming a carpet runner.
To make a simple swatch, chain about 20 stitches, single crochet across, and work enough rows to create a square. Measure how many stitches fit into one inch. If you get four stitches per inch and want a blanket 40 inches wide, you need about 160 single crochet stitches across. Since you work the first single crochet into the second chain from the hook, you would chain 161 to begin.
Simple Starting Chain Formula
Desired width in inches x stitches per inch = number of single crochet stitches.
Number of single crochet stitches + 1 = starting chain.
Example: If your gauge is 4 stitches per inch and you want a 36-inch-wide lap blanket, multiply 36 x 4 = 144. Add 1 chain. Start with 145 chains.
How to Single Crochet a Blanket Step by Step
Step 1: Make a Slip Knot
Make a loop with your yarn, pull another loop through it, and tighten it gently onto your hook. The loop should move easily on the hook. Do not strangle it. Yarn has done nothing wrong.
Step 2: Chain Your Foundation Row
Yarn over and pull through the loop on your hook. That makes one chain. Repeat until your chain is the width you want, using your gauge formula or measuring the chain gently. Try not to make the foundation chain too tight, because a tight starting chain can make the bottom edge curl or shrink.
If counting a long chain makes you nervous, place a stitch marker every 20 or 25 chains. This turns counting from a tragedy into a mild inconvenience.
Step 3: Work Into the Second Chain From the Hook
Insert your hook into the second chain from the hook. Yarn over, pull up a loop, yarn over again, and pull through both loops on your hook. You have made your first single crochet stitch.
Step 4: Single Crochet Across the Row
Insert your hook into the next chain and make another single crochet. Continue across the foundation chain. At the end of the row, count your stitches. Your stitch count should match your planned number of single crochet stitches.
Step 5: Chain 1 and Turn
At the end of the row, chain 1. This is called the turning chain. Turn your work so you can crochet back across the row. For basic single crochet rows, the chain 1 usually does not count as a stitch.
Step 6: Work Into the First Stitch
Insert your hook into the first single crochet stitch of the row below. Work one single crochet. Then single crochet into each stitch across. Be careful not to skip the last stitch, because that is one of the most common reasons beginner blankets slowly become triangles. Lovely in geometry class, less ideal on the couch.
Step 7: Repeat Until the Blanket Is Long Enough
Keep repeating: single crochet across, chain 1, turn. Measure your blanket every few inches. You can stop when the blanket reaches your desired length or when your yarn supply starts giving you nervous side-eye.
How to Keep Your Edges Straight
Straight edges are mostly about stitch count. Count your stitches at the end of every row, especially during the first several inches. Once your hands learn the rhythm, you may count less often, but beginners should treat stitch counting like brushing teeth: not glamorous, but very helpful.
Edge-Saving Tips
- Put a stitch marker in the first and last stitch of each row.
- Remember that the turning chain does not usually count as a single crochet stitch.
- Work into the final stitch of every row, even when it hides like a tiny yarn ninja.
- Count after each row until your edges look consistent.
- Keep your tension relaxed and steady.
Common Beginner Mistakes and Easy Fixes
Your Blanket Is Getting Wider
You are probably adding stitches at the edges. Count your stitches and use stitch markers to identify the first and last stitch. If the extra stitch happened only a row or two ago, pull back the row and fix it. If it happened 30 rows ago, consider whether the blanket has “design character” and keep going.
Your Blanket Is Getting Narrower
You are likely skipping the last stitch of some rows. The final stitch can be tight and hard to see. Mark it before turning, then work into it on the next row.
Your Fabric Feels Too Stiff
Your hook may be too small, or your tension may be too tight. Try relaxing your hands and shoulders. If that does not help, switch to a hook one size larger.
Your Rows Look Uneven
Uneven rows usually come from changing tension. This is normal for beginners. The more rows you make, the more consistent your stitches become. Crochet is not only a craft; it is hand training disguised as cozy productivity.
How to Change Yarn or Add a New Skein
When one skein runs out, stop before the last yarn over of your final stitch. Place the new yarn over the hook and pull it through to complete the stitch. Leave a tail of several inches from both the old and new yarn. Later, use a yarn needle to weave those tails securely into the blanket.
If you are making stripes, change colors at the end of a row for the cleanest look. For example, work 10 rows in cream, 10 rows in blue, and repeat. Simple stripes make a beginner blanket look intentional, even if the blanket was secretly powered by snacks and determination.
Add a Simple Border
A border is optional, but it can make your blanket look polished. The easiest border is one round of single crochet around the entire blanket. Work one single crochet into each stitch along the top and bottom edges. Along the sides, place stitches evenly into the row ends. In each corner, work three single crochet stitches to help the corner turn smoothly.
If the border starts to ripple, you may be adding too many stitches along the sides. If it pulls inward, add more stitches. Borders are part math, part feel, and part convincing the blanket to behave in public.
Fastening Off and Weaving in Ends
When your blanket is finished, cut the yarn, leaving a tail of about six inches. Yarn over and pull the tail through the final loop to fasten off. Thread the tail onto a yarn needle and weave it back and forth through nearby stitches. Change direction at least once to help secure it. Trim the remaining tail close to the fabric, but do not cut the blanket stitches.
Weaving in ends is nobody’s favorite part, but it is what separates “finished blanket” from “yarn octopus.” Do it carefully, especially if the blanket will be washed often.
Should You Block a Single Crochet Blanket?
Blocking means shaping your finished crochet piece so the edges look neater and the fabric relaxes. For a simple single crochet blanket, blocking is optional. If your blanket is acrylic, blocking may have a subtle effect. If it is cotton or wool, blocking can help even the shape more noticeably.
Always check the yarn label before washing or blocking. If you are unsure, test your method on a swatch first. Never apply high heat directly to synthetic yarn unless you know exactly what you are doing, because too much heat can permanently change the fibers.
Beginner-Friendly Single Crochet Blanket Pattern
Here is a simple pattern you can customize for any size.
Materials
- Medium, bulky, or super bulky yarn in the amount needed for your blanket size
- Recommended hook size from the yarn label, or one size larger for softer drape
- Scissors
- Yarn needle
- Stitch markers
Pattern
- Make a gauge swatch and decide your blanket width.
- Calculate your starting chain using: width x stitches per inch + 1.
- Chain the required number of stitches.
- Row 1: Single crochet in the second chain from the hook and in each chain across.
- Row 2: Chain 1, turn. Single crochet in each stitch across.
- Repeat Row 2 until the blanket reaches your desired length.
- Optional border: Work one round of single crochet around the blanket, placing three single crochet stitches in each corner.
- Fasten off and weave in all ends.
Helpful Experience Notes for Beginners
The biggest lesson from making a single crochet blanket is that your first ten rows teach you more than any supply list can. At the beginning, your hands may feel awkward. Your hook may split the yarn. Your chain may look like a small, confused worm. That is normal. Every crocheter has looked at an early project and wondered if yarn can sense fear.
One useful experience is to start smaller than your dream blanket. A full-size throw sounds exciting, but single crochet is a short stitch, which means it takes many rows to build length. A baby blanket, lap blanket, or small throw is less intimidating and still gives you plenty of practice. Finishing a smaller blanket builds confidence, and confidence is the secret ingredient that does not come on the yarn label.
Another practical lesson is to pay attention to your body. Blanket projects can take hours, and beginners often grip the hook too tightly. If your fingers, wrists, shoulders, or neck start complaining, take a break. Stretch your hands, roll your shoulders, drink water, and come back later. Crochet should feel peaceful, not like a tiny gym workout for your knuckles.
Stitch markers are also worth using from the start. Many beginners think markers are only for complicated patterns, but they are actually perfect for simple blankets. Put one in the first stitch and one in the last stitch of each row. This one habit prevents most accidental increases and decreases. It also saves you from staring at the edge of your blanket whispering, “Where did you go wrong, little rectangle?”
Color choice matters more than beginners expect. Very dark yarn can hide stitches, especially at night. Fuzzy yarn can also make it hard to see where your hook should go. For a first blanket, choose a smooth yarn in a light or medium shade. Once your stitch confidence grows, you can absolutely move on to dramatic charcoal, midnight navy, or fluffy cloud yarn. But for the first project, visibility is your best friend.
It also helps to weave in ends as you go, especially if you are making stripes. Leaving every tail until the end can turn the final step into a tiny yarn accounting department. After every few color changes, pause and weave in the tails. Future you will be grateful. Future you may even make tea in your honor.
Finally, remember that handmade does not mean machine-perfect. A beginner single crochet blanket may have a tighter first section, looser middle rows, or a border that needed a little encouragement. That does not make it a failure. It makes it proof that you learned while making something useful. By the time the blanket is finished, your stitches will likely look more even than when you started. The blanket becomes both a cozy object and a record of your progress.
Conclusion
Learning how to single crochet blankets for beginners is one of the most satisfying ways to enter the world of crochet. The stitch is simple, the project is practical, and the result is something you can actually use, gift, wash, fold, display, and proudly point to when someone says, “You made that?”
Start with smooth yarn, a comfortable hook, and a realistic blanket size. Make a small swatch, count your stitches, use markers on the edges, and let each row build your confidence. A single crochet blanket does not need fancy techniques to be beautiful. Sometimes the simplest stitch, repeated with patience, turns into the coziest thing in the room.