Note: This guide is for replacing a basic ceiling light fixture on an existing, code-compliant circuit. Electrical work can cause shock, fire, injury, or property damage if done incorrectly. Always follow the fixture manufacturer’s instructions, local electrical code, and permit rules. When wiring is old, damaged, aluminum, ungrounded, unusually colored, or confusing, call a licensed electrician. Your ceiling light should brighten the room, not your insurance adjuster’s afternoon.
Introduction: A Brighter Room Without the Drama
Learning how to wire a ceiling light and install a new fixture is one of those home improvement skills that feels half practical, half magical. One minute the room has a sad builder-grade dome light from the era of beige carpet. The next minute, you have a stylish flush mount, pendant, or chandelier that makes the room look intentionally designed instead of accidentally illuminated.
The good news: replacing an existing ceiling light fixture is often a manageable DIY project for careful homeowners. The important word is careful. Unlike painting a wall, where the worst-case scenario is usually “modern art,” electrical work demands patience, testing, and respect for safety. You must turn off the correct breaker, verify the wires are not energized, connect the hot, neutral, and ground wires properly, and make sure the electrical box can safely support the new fixture.
This in-depth guide walks through the tools, safety checks, wiring basics, installation steps, troubleshooting tips, and real-world lessons that make the job smoother. We will focus on replacing an existing ceiling light, not running a brand-new circuit from the electrical panel. Adding new wiring, installing a new switch leg, or opening walls and ceilings is a bigger job and usually belongs in the “hire a pro” category.
Before You Start: Know What Kind of Ceiling Light Project You Have
Not every ceiling light installation is the same. Before you grab a screwdriver and begin a dramatic stare-down with your breaker panel, identify the project type.
Simple Fixture Replacement
This is the most common DIY-friendly situation. You already have a working ceiling light controlled by a wall switch. You are removing the old fixture and installing a new one in the same location. The existing electrical box remains in place, and the wiring is in good condition.
Installing a Heavier Fixture
A chandelier or large pendant may need more support than a lightweight flush mount. The electrical box must be rated to hold the fixture’s weight. If the fixture is heavy, do not assume the existing box is good enough just because the old light did not fall during dinner. Gravity is patient. It has time.
Replacing a Ceiling Fan With a Light
This can be straightforward, but check the wiring and box type. A ceiling fan-rated box is designed for dynamic fan movement and may also support certain light fixtures. Still, follow the fixture instructions and box rating.
Adding a New Ceiling Light Where None Exists
This is more advanced. It may involve cutting drywall, running cable, installing a new electrical box, adding a switch, and complying with local code. For most homeowners, this is a licensed-electrician job.
Tools and Materials You May Need
Gathering tools before you begin prevents the classic DIY workout: climbing down the ladder seventeen times while muttering at yourself.
Common Tools
- Non-contact voltage tester
- Screwdrivers, both flathead and Phillips
- Wire stripper
- Needle-nose pliers
- Adjustable wrench
- Stepladder
- Flashlight or headlamp
- Electrical tape, if recommended by the fixture instructions
- Camera or phone for reference photos
Common Materials
- New ceiling light fixture
- Wire connectors approved for the wire size and type
- Mounting bracket or strap, usually included with the fixture
- Grounding screw or grounding clip, if needed for a metal box
- Correct bulbs within the fixture’s wattage rating
Always use the hardware provided by the fixture manufacturer unless the instructions say otherwise. That odd little bracket in the box is not decorative confetti. It probably has a job.
Ceiling Light Wiring Basics: Hot, Neutral, and Ground
Most modern ceiling light fixtures connect to three basic conductors: hot, neutral, and ground. Understanding these wires helps you avoid guessing, which is a terrible strategy when electricity is involved.
Hot Wire
The hot wire carries power to the fixture. In many U.S. homes, it is black. Sometimes a red wire is used, especially in switch-controlled wiring or multi-wire setups. The fixture’s black or smooth lead usually connects to the hot supply wire.
Neutral Wire
The neutral wire completes the circuit. It is usually white. The fixture’s white or ribbed lead typically connects to the neutral wire.
Ground Wire
The ground wire is a safety path. It is usually bare copper or green. The fixture ground should connect to the home’s ground wire and, when required, to the metal electrical box or mounting strap using a grounding screw.
Wire colors are helpful, but they are not a substitute for testing and understanding the circuit. Older homes, previous DIY work, and unusual switch loops can make wire colors misleading. If the wiring does not match the fixture instructions or looks suspicious, stop and call an electrician.
Step 1: Turn Off Power at the Breaker
Go to the electrical panel and turn off the breaker that controls the ceiling light. Do not rely only on the wall switch. A switch can turn the light off while parts of the box remain energized, and that is not the surprise you want while standing on a ladder.
After switching off the breaker, flip the wall switch on and off to confirm the fixture no longer lights. Then use a voltage tester at the fixture before touching any wires. Testing before touching is one of the most important electrical safety habits. It is also much cheaper than learning through interpretive dance after a shock.
Step 2: Remove the Old Ceiling Fixture
Remove the old light bulb, shade, glass dome, decorative nuts, or trim pieces first. Put small screws and caps in a cup or bag so they do not vanish into the mysterious household dimension where missing socks also live.
Support the fixture with one hand while loosening the mounting screws or nuts. Carefully lower the fixture enough to see the wiring. Before disconnecting anything, take a clear photo of the existing connections. Even if the old wiring was not ideal, a photo can help you understand what was there.
Remove the wire connectors and separate the fixture wires from the ceiling wires. Do not let the fixture hang by the wires. If it is heavy or awkward, have a helper support it while you disconnect it.
Step 3: Inspect the Electrical Box and Existing Wiring
With the old fixture removed, inspect the ceiling box. It should be firmly attached, not loose, cracked, overloaded, or hanging from drywall. Ceiling light fixtures must be mounted to an approved electrical box, not just screwed into the ceiling surface.
Check Box Support
Lightweight fixtures are usually supported by standard ceiling boxes rated for luminaires, but heavier fixtures need a box rated for the weight. If the new fixture is a chandelier, large pendant, or anything that makes you say, “Wow, this is heavier than expected,” verify the box rating. When in doubt, install a properly rated support box or hire an electrician.
Check Wire Condition
The insulation should not be brittle, burned, cracked, or frayed. If you see cloth-covered wiring, aluminum branch-circuit wiring, scorch marks, melted insulation, loose connections, or too little wire length to make safe connections, stop. These are not “just push through it” moments.
Check Box Fill
An electrical box cannot safely hold unlimited wires and connectors. If the box is crowded, shallow, or packed like a suitcase before a family vacation, it may need to be replaced with a larger code-compliant box.
Step 4: Assemble the New Fixture Parts
Read the fixture instructions before installation. Yes, the paper booklet that tries to escape under the couch matters. Different fixtures use different mounting plates, threaded rods, canopy nuts, chain lengths, collars, locknuts, and grounding methods.
Preassemble what you can on the floor. Attach the mounting strap to the fixture if instructed, adjust pendant height, thread rods or nipples, and confirm the canopy will sit flush against the ceiling. Doing this while standing on a ladder with one arm overhead is possible, but so is eating soup with a fork. Possible does not mean ideal.
Step 5: Attach the Mounting Bracket
Most ceiling fixtures include a mounting bracket, crossbar, or strap that screws into the electrical box. Attach it using the screws provided or screws approved for the box and fixture. The bracket should be snug and level.
If the fixture uses a threaded rod, adjust it so the canopy will tighten properly after the wires are tucked into the box. If the rod is too short, the canopy will not catch. If it is too long, the fixture may wobble or leave a gap. This is the point where patience saves you from saying creative things to a ceiling.
Step 6: Connect the Ground Wire First
Connect the fixture’s ground wire to the ceiling ground wire, usually bare copper or green. If you have a metal electrical box, the ground may also need to connect to the box with a green grounding screw or grounding clip. Many mounting brackets include a green screw specifically for this purpose.
Grounding is not optional decoration. It is an important safety feature that helps reduce shock risk if a fault occurs. If your ceiling box has no visible ground wire, do not improvise. Older homes may have grounding through metal conduit or may be ungrounded. A licensed electrician can determine the correct safe method.
Step 7: Connect Neutral to Neutral
Connect the fixture’s white wire to the ceiling’s white neutral wire using an approved wire connector. Strip only the amount of insulation recommended by the connector manufacturer. The copper ends should be fully inside the connector, with no bare conductor exposed below it.
After twisting or pushing the connector on, gently tug each wire to confirm it is secure. A loose neutral can cause flickering, intermittent operation, or overheating. The connection should feel firm, not like it is politely considering leaving.
Step 8: Connect Hot to Hot
Connect the fixture’s black wire to the ceiling’s black or switched hot wire. In many ceiling boxes, the hot wire is controlled by the wall switch. If your ceiling has both black and red wires, or multiple cables entering the box, do not guess. Consult the old photo, the fixture instructions, and a qualified electrician if the circuit is not obvious.
For fixtures with lamp cord-style wires, the ribbed conductor is usually neutral and the smooth conductor is usually hot, but always confirm with the manufacturer’s markings. Some fixtures label wires with tags, printed text, or color coding.
Step 9: Tuck the Wires Into the Box
Once the connections are made, carefully fold the wires into the electrical box. Do not crush, sharply bend, or force connectors into a space that is too small. Keep the ground connection clear of sharp edges and position wire connectors so they do not interfere with the mounting hardware.
If the fixture canopy will not sit flush because the wires are too crowded, do not solve the problem with brute force. Brute force is useful for opening pickle jars, not electrical boxes. Recheck the connections, wire placement, and box capacity.
Step 10: Secure the Fixture to the Ceiling
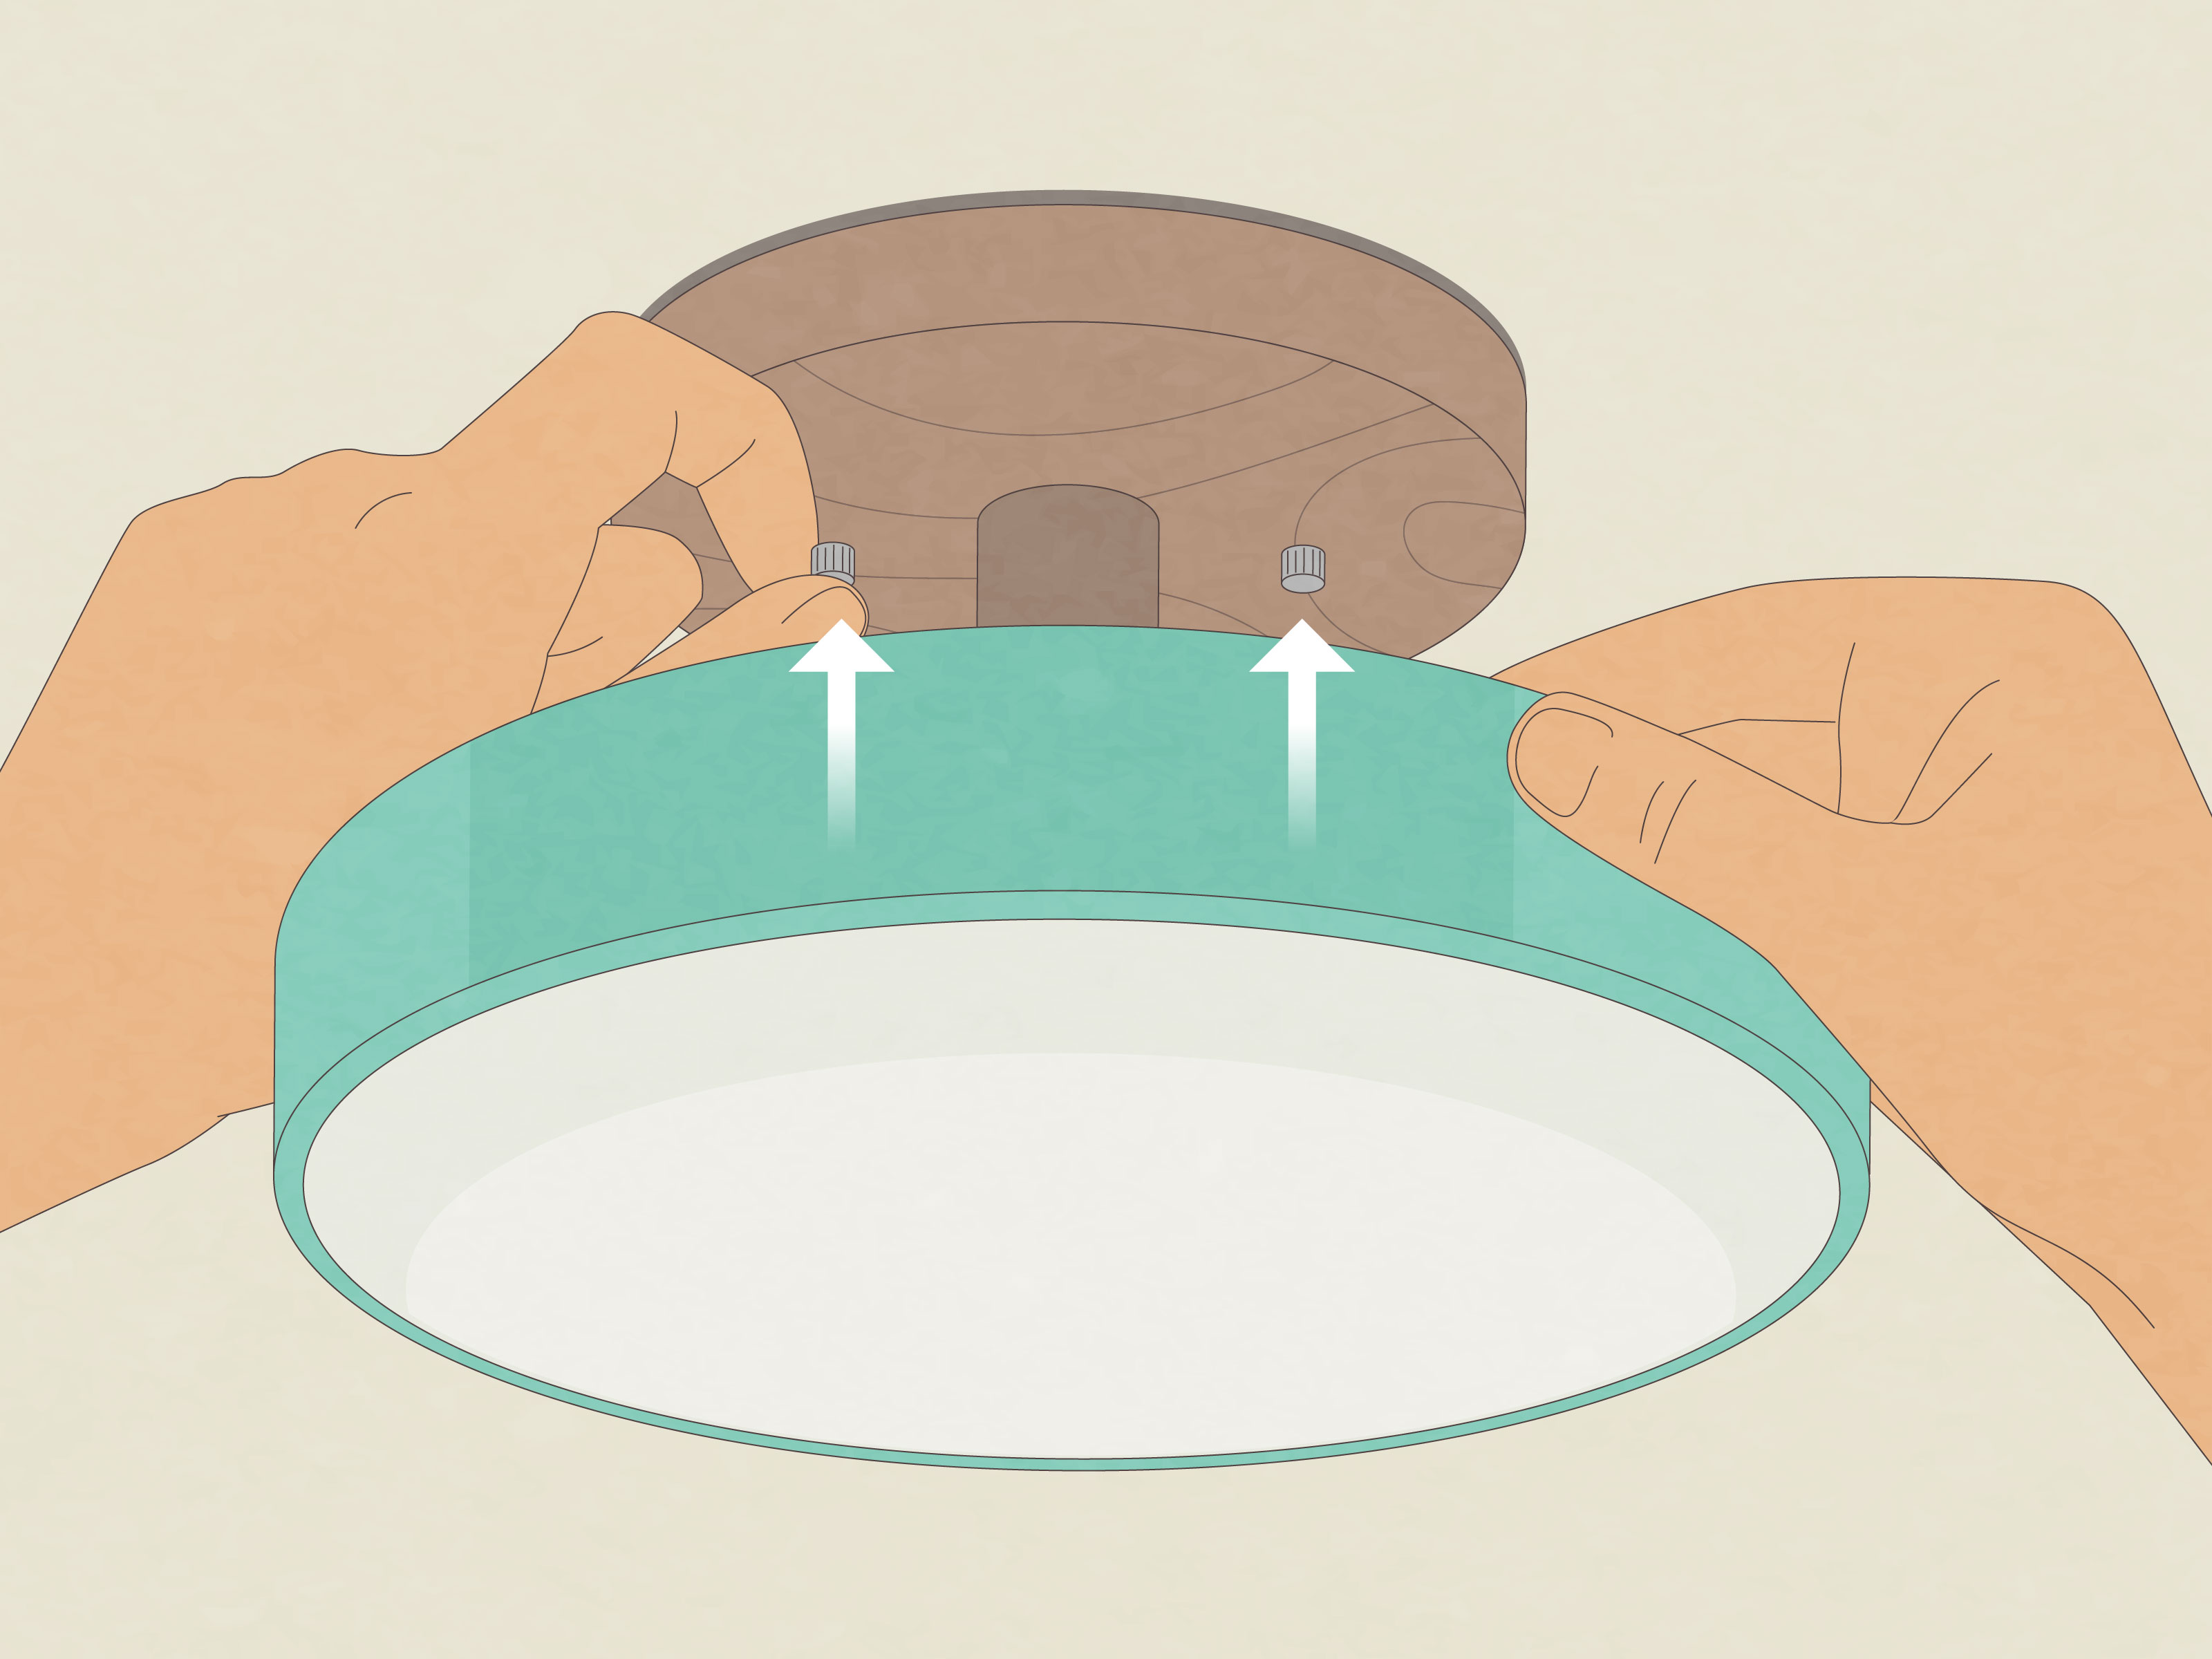
Lift the fixture into position and attach it to the mounting bracket according to the instructions. This may involve canopy screws, decorative cap nuts, a center threaded rod, or side screws. Tighten the hardware enough to hold the fixture firmly, but do not overtighten and crack decorative parts or strip threads.
For pendant lights or chandeliers, make sure the chain, cord, or rod is properly supported and the canopy covers the electrical box completely. The fixture should hang straight. If it leans, check whether the bracket is level, the rod is threaded correctly, or the chain links are uneven.
Step 11: Install the Bulbs and Shade
Install bulbs that match the fixture’s maximum wattage and type. LED bulbs are popular because they use less energy and produce less heat than traditional incandescent bulbs, but they should still be compatible with the fixture, dimmer, and enclosure type.
If the fixture is rated for a 60-watt maximum bulb, do not install a higher-wattage incandescent bulb. More brightness is nice. Excess heat inside a fixture is not. Install the glass shade, diffuser, or decorative parts only after the fixture is securely mounted.
Step 12: Restore Power and Test the Light
Turn the breaker back on and test the wall switch. The light should operate normally without flickering, buzzing, burning smells, sparks, or repeated breaker trips. If anything seems wrong, turn the breaker off immediately and investigate safely.
If the light does not turn on, check the bulb, switch position, breaker, and wire connections after turning the power off again and testing for voltage. If the breaker trips, the fixture hums loudly, wires smell hot, or the problem is unclear, call a licensed electrician.
Common Ceiling Light Wiring Mistakes to Avoid
Skipping the Voltage Test
Turning off a breaker is not the same as proving the wires are safe. Breaker labels are often wrong, especially in older homes. Always use a voltage tester before touching wires.
Ignoring the Ground Wire
A fixture may appear to work without a proper ground, but that does not mean it is safe. Grounding protects people and property during fault conditions.
Using the Wrong Wire Connectors
Wire connectors must be rated for the number, size, and type of wires being joined. Reusing old, damaged connectors is a bad idea. They are small, inexpensive, and important.
Overloading the Electrical Box
Too many conductors in a small box can create unsafe crowding and heat issues. If the box is too small, upgrade it properly.
Mounting a Heavy Fixture to a Weak Box
A heavy chandelier needs proper support. Drywall anchors, luck, and positive thinking are not structural systems.
Mixing Up Fixture Wires
Some fixture wires are not black and white. Look for ribs, smooth insulation, labels, silver conductors, copper conductors, or manufacturer markings. When uncertain, stop and verify.
When to Call a Licensed Electrician
DIY confidence is great. DIY denial is not. Call an electrician if you notice any of the following:
- No ground wire or uncertain grounding method
- Aluminum branch-circuit wiring
- Old cloth-covered wiring or brittle insulation
- Burn marks, melted wire nuts, or a hot electrical smell
- Multiple cables and confusing wire colors in the ceiling box
- A fixture that is too heavy for the existing box
- A breaker that trips after installation
- Local code or permit requirements you do not understand
- A new fixture location where no ceiling box exists
Hiring a professional is not failure. It is often the smartest and safest part of the project. The goal is not to prove you can wrestle electricity and win. The goal is to install a ceiling light that works safely for years.
Ceiling Light Installation Tips for a Cleaner Finish
Choose the Right Fixture Size
A tiny ceiling light in a large room can look lost. A giant chandelier in a small hallway can feel like the house is wearing a crown indoors. Measure the room and ceiling height before buying.
Check Ceiling Height
Flush mount and semi-flush mount lights work well for lower ceilings. Pendants and chandeliers need enough clearance for people to walk comfortably underneath, unless your design goal is “forehead obstacle course.”
Match Bulb Color Temperature to the Room
Warm white light often works well in bedrooms, dining rooms, and living rooms. Neutral or bright white can be useful in kitchens, closets, laundry rooms, and workspaces. The fixture is the outfit; the bulb is the mood.
Use Compatible Dimmers
If the ceiling light is on a dimmer, make sure the fixture and bulbs are dimmable and compatible with the dimmer type. Incompatible LED bulbs can flicker, buzz, or refuse to dim gracefully.
Keep the Fixture Manual
After installation, save the manual or take photos of it. It may include bulb limits, cleaning instructions, replacement parts, and warranty information.
Troubleshooting After Installation
The Light Does Not Turn On
Turn off power and check the bulb, fixture switch if it has one, breaker, and wire connections. Confirm the hot and neutral wires are connected correctly and securely.
The Light Flickers
Flickering may come from a loose bulb, loose wire connection, incompatible dimmer, defective bulb, or circuit issue. If tightening the bulb and using a compatible bulb does not fix it, investigate further with power off or call a pro.
The Breaker Trips
A tripping breaker can indicate a short circuit, incorrect wiring, overloaded circuit, damaged fixture, or other fault. Turn the breaker off and do not keep resetting it. Repeated tripping is the breaker doing its job, not being dramatic.
The Fixture Buzzes
Buzzing can happen with dimmer incompatibility, certain LED drivers, loose parts, or electrical issues. Make sure bulbs and dimmers are compatible. If the sound comes from wiring or the box, call an electrician.
The Canopy Will Not Sit Flush
Check the mounting bracket alignment, screw length, threaded rod position, wire placement, and ceiling box depth. Do not force the canopy into place if wires are being crushed.
Extra Experience Section: Real-World Lessons From Ceiling Light Projects
After you have installed a few ceiling lights, you learn that the official instructions are only half the story. The other half is made of tiny screws, awkward ladder angles, questionable old wiring, and the sudden realization that every ceiling in the house may have its own personality.
One of the most useful experiences is learning to slow down before removing the old fixture. Many people get excited, take the old light down immediately, and then stare at a cluster of wires wondering what connected to what. A quick photo before disconnecting wires can save a lot of confusion. Take one wide shot of the fixture and one close-up of the wire connections. Even if you later discover the old wiring was not perfect, the photo gives you a reference point.
Another practical lesson is that fixture weight matters more than people expect. A small flush mount is usually simple to handle with one person. A chandelier, even a modest one, can become a ceiling-mounted wrestling match. Having a helper hold the fixture while you connect wires is not a luxury. It is a sanity-preserving tool. Some installers use a temporary hanging hook or support wire if the fixture design allows it, but always follow the manufacturer’s instructions.
Lighting projects also teach humility about old houses. In newer homes, wires are often color-coded in a predictable way. In older homes, you may find faded insulation, paint-covered wires, no visible ground, or a switch loop that looks like it was designed during a family argument. This is where good judgment matters. If the wiring is confusing, brittle, overheated, or inconsistent, the best DIY move is to stop and bring in a licensed electrician.
One small detail that makes a big difference is adjusting the mounting hardware before connecting the wires. Many fixtures use a center threaded rod or two long screws that must line up with holes in the canopy. If those screws are too long, too short, or angled incorrectly, you may finish the wiring and then discover the canopy refuses to mount. Dry-fitting the bracket and canopy first can prevent a lot of ladder-based frustration.
Bulb selection is another real-world issue. A beautiful fixture can look disappointing with the wrong bulbs. Clear glass fixtures may show every bulb shape, so decorative LED bulbs often look better. Frosted shades may soften glare. In bedrooms and dining areas, warm light usually feels more comfortable. In closets and laundry rooms, brighter neutral light may be more useful. The wiring makes the fixture work; the bulb choice makes it pleasant to live with.
Finally, cleanup and final inspection are worth doing carefully. Check that the fixture is tight, level, and not pinching wires. Confirm that the shade is secure. Make sure the switch works smoothly. Watch the fixture for a minute after turning it on. There should be no flicker, odor, buzzing, or heat building quickly around the canopy. A ceiling light installation should end with a brighter room and a quiet sense of victory, not a mystery smell and a nervous glance at the breaker panel.
Conclusion: Wire Carefully, Mount Securely, and Let the Room Shine
Wiring a ceiling light and installing a new fixture can transform a room faster than almost any small home improvement project. The basic process is simple in theory: turn off power, verify the circuit is safe, remove the old fixture, inspect the electrical box, connect ground to ground, neutral to neutral, hot to hot, secure the fixture, install bulbs, and test the result.
But the details matter. Safe electrical work depends on proper grounding, secure wire connections, correct box support, compatible bulbs, and respect for local code. If the project is a straightforward replacement on good existing wiring, a careful homeowner may be able to do it successfully. If the wiring is old, damaged, confusing, or unsupported, bring in a licensed electrician. There is no shame in calling a pro. There is, however, plenty of shame in using duct tape as a structural lighting strategy.
With the right preparation, patience, and safety-first mindset, your new ceiling light can do more than brighten the room. It can update the style, improve comfort, and make the whole space feel more finished. And every time you flip the switch, you get the small satisfaction of knowing the room looks better because you did the job right.