
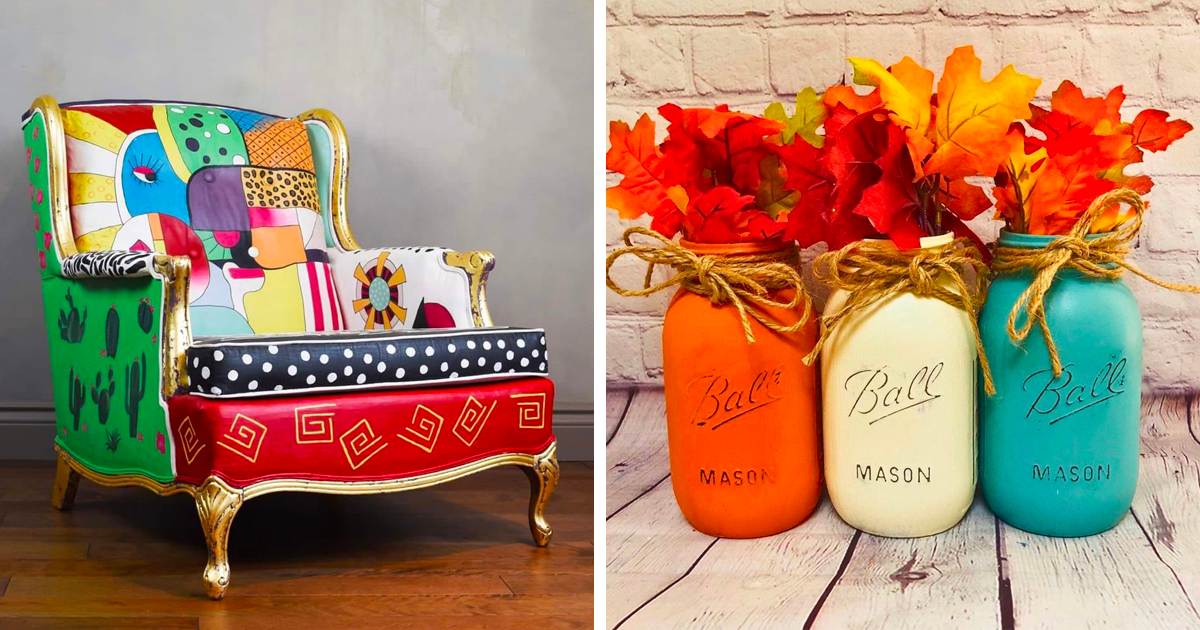
Chalk paint is the home decor equivalent of a great haircut: it can make something tired, awkward, and slightly embarrassing suddenly look intentional. That old dresser in the guest room? Character piece. The thrift-store side table with mysterious ring marks? Vintage charm. The wooden tray you almost donated? Boutique-inspired accent. With the right prep, color choice, and protective finish, chalk paint can help you refresh furniture, cabinets, frames, shelves, and small decor without turning your weekend into a sanding marathon.
The beauty of chalk paint is its forgiving personality. It dries to a soft, matte finish, sticks well to many clean surfaces, and can be styled smooth and modern or distressed and antique. It is not magic in a can, despite what overly cheerful DIY videos may imply, but it is one of the most beginner-friendly ways to transform home decor on a reasonable budget. This guide walks through how to use chalk paint confidently, what mistakes to avoid, and how to make your finished pieces look charming rather than “I panicked in aisle seven of the craft store.”
What Is Chalk Paint?
Chalk paint is a decorative paint known for its velvety, ultra-matte appearance. It is commonly used on furniture and decor because it gives pieces a soft, chalky look that works beautifully with farmhouse, cottage, vintage, bohemian, coastal, and even modern interiors. Despite the name, chalk paint is not the same as chalkboard paint. Chalkboard paint creates a writable surface for chalk. Chalk paint creates a matte decorative finish that looks elegant, aged, or handcrafted.
The term “Chalk Paint” originally refers to the decorative paint developed by Annie Sloan, but many brands now sell chalk-style, chalky finish, or ultra-matte furniture paints. In everyday decorating language, people often use “chalk paint” broadly to describe this family of matte paints. For homeowners and DIYers, the important point is not the label on the front of the can but how the product behaves: it should offer strong adhesion, a soft matte finish, and the ability to be sealed with wax, lacquer, or a protective topcoat.
Why Chalk Paint Works So Well for Home Decor
Chalk paint is popular because it removes several barriers that stop people from starting DIY projects. Traditional furniture painting often involves stripping, priming, sanding, waiting, sanding again, questioning every life choice, and then finally painting. Chalk paint simplifies the process. Many pieces only need cleaning and light sanding before painting, especially if the existing surface is not glossy, greasy, peeling, or damaged.
Another advantage is coverage. Chalk-style paint tends to be thicker than standard wall paint, which helps it cover old finishes, dark wood, and decorative details. It also makes distressing easier. When lightly sanded after drying, chalk paint wears away in a soft, natural-looking way, creating the illusion that the piece aged gracefully instead of surviving three moves, a basement leak, and a toddler with stickers.
The finish is also wonderfully adaptable. Use a smooth roller and thin coats for a clean, contemporary look. Use a round brush and cross-hatched strokes for texture. Add dark wax to carved details for antique depth. Dry-brush a lighter color over raised edges for a weathered effect. Chalk paint is not only paint; it is a styling tool.
Best Home Decor Projects for Chalk Paint
Furniture With Good Bones
Dressers, nightstands, sideboards, console tables, coffee tables, bookshelves, and dining chairs are ideal chalk paint candidates. Look for solid shapes, attractive legs, interesting carvings, or useful storage. If the surface is scratched but structurally sound, chalk paint can hide imperfections while highlighting the design.
Small Decorative Accents
If you are nervous, start small. Picture frames, trays, candle holders, mirror frames, baskets, lamp bases, and wooden boxes are low-risk projects. They use less paint, take less time, and let you practice brush control, layering, and waxing before you attack the family heirloom hutch.
Cabinets and Built-Ins
Chalk paint can be used on cabinets, but high-touch surfaces require extra care. Kitchen cabinets, bathroom vanities, and built-ins need thorough cleaning, proper adhesion, thin coats, and a durable protective finish. For cabinets exposed to grease, water, and daily handling, a tough topcoat is often a smarter choice than wax alone.
Metal, Concrete, and Mixed Materials
Some chalk decorative paints can be used on metal, cast stone, concrete, and other surfaces. Always check the product label. Metal may need rust removal or primer. Slick surfaces may need scuff sanding. Outdoor pieces need an exterior-rated sealer, because indoor wax is not designed to wrestle with rain, sun, and pollen.
Tools and Supplies You Need
A successful chalk paint project does not require a professional workshop. It does require a clean workspace and a few sensible tools. Gather chalk paint, a quality brush, a small foam roller if you want a smoother finish, mild cleaner or degreaser, lint-free cloths, fine-grit sandpaper or a sanding sponge, painter’s tape, drop cloths, wood filler if needed, and your preferred sealer.
For sealers, the main choices are clear wax, colored wax, matte topcoat, satin topcoat, lacquer, or polyurethane. Wax creates a soft, hand-rubbed finish and is excellent for decorative furniture. A water-based topcoat is usually better for tabletops, cabinets, shelves, and pieces that will be wiped frequently. Dark wax and black wax can create age and drama, but apply clear wax first if you want more control over how much color settles into the finish.
Step-by-Step: How to Use Chalk Paint Like a Pro
1. Choose the Right Piece
Start with something sturdy. Paint can fix ugly, but it cannot fix wobbly legs, swollen particleboard, or drawers that require a wrestling match. Check joints, hardware, drawer slides, and veneer before you commit. If the piece is useful and the shape is good, it is probably worth painting.
2. Clean Before You Paint
Cleaning is not glamorous, but it is the step that separates a lasting makeover from a peeling tragedy. Wipe away dust, grease, polish, wax, fingerprints, and mystery residue. A damp cloth may be enough for clean furniture. For kitchen pieces or thrift-store finds, use a mild degreasing cleaner and let the surface dry fully. Paint sticks to surfaces, not to yesterday’s furniture polish.
3. Sand Strategically
Chalk paint is famous for minimal prep, but “minimal” does not mean “none under all circumstances.” If the piece is glossy, slick, laminate, oily, or uneven, lightly scuff-sand it. You do not need to remove every bit of old finish. You are simply dulling the shine so the paint can grip. After sanding, remove dust with a damp cloth and allow the piece to dry.
4. Prime Only When Needed
Many chalk paint projects do not require primer. However, primer is smart when painting over knots, red-toned woods, tannin-rich woods, dark stains, laminate, shiny factory finishes, rust-prone metal, or surfaces with previous bleed-through. If brown or yellow stains appear through the first coat, stop and use a stain-blocking primer. Do not keep adding paint and hoping the stain gets bored. It will not.
5. Stir the Paint Thoroughly
Chalk paint can be thick, and pigments may settle. Stir it well before painting. If the paint feels too thick for a smooth finish, add a tiny amount of water according to the product instructions. Thin coats are better than one heavy coat. Thick paint can leave clumps, drag marks, and texture you did not invite to the party.
6. Apply the First Coat
Use a brush for texture and detail, or combine a brush with a foam roller for flatter surfaces. Paint with the grain on wood when possible. For a rustic finish, brush in multiple directions to create movement. Do not panic if the first coat looks uneven. First coats often look suspicious. Let it dry according to the product directions before adding the second coat.
7. Add a Second Coat
A second coat usually gives richer color and better coverage. For dark colors over light surfaces, one or two coats may work. For white or pale colors over dark wood, expect extra patience. Let each coat dry fully. Rushing dry time is how fingerprints, dents, and regret become part of the design.
8. Distress If Desired
For a vintage look, lightly sand edges, corners, drawer fronts, raised details, and areas that would naturally wear over time. The trick is restraint. Distressing should look like history, not like the furniture lost a fight with a belt sander. Use fine-grit sandpaper and step back often to check the balance.
9. Seal the Finish
Chalk paint usually needs sealing if the piece will be touched, cleaned, or used regularly. Wax creates a soft sheen and enhances color, while topcoats add more durable protection. Apply wax in thin layers with a brush or cloth, wipe away excess, and buff after it dries. For topcoats, use thin, even coats and avoid overworking the finish. Allow curing time before heavy use.
Choosing Colors That Look Expensive
Color is where chalk paint becomes addictive. Classic white, cream, and soft gray create a clean cottage look. Sage green, dusty blue, warm taupe, and mushroom beige feel calm and current. Navy, charcoal, and black create drama, especially on cabinets, consoles, and bookcases. Terracotta, mustard, olive, and muted rose can make accent pieces feel collected rather than purchased in a matching set.
For a designer look, consider contrast. Paint a dresser body in deep green and leave the wood top natural. Use black paint on a mirror frame against white walls. Paint dining chairs in a soft neutral and add new cane, linen, or leather seats. Swap hardware after painting; new knobs can make a $40 thrift find look like it has a publicist.
Creative Chalk Paint Techniques
Two-Color Distressing
Paint one color as the base coat and another on top. After drying, sand edges and raised areas so the first color peeks through. This technique adds depth and works beautifully on carved furniture, picture frames, and decorative panels.
Dry Brushing
Dip the brush lightly into paint, wipe most of it off, then drag it gently across the surface. Dry brushing is excellent for highlighting texture on baskets, frames, clay pots, and rustic furniture.
Color Washing
Thin chalk paint with water to create a translucent wash. This works well when you want color without hiding wood grain completely. It is lovely for coastal, farmhouse, and Scandinavian-inspired decor.
Dark Wax Aging
Dark wax settles into grooves, corners, and brush marks, creating an aged patina. Use it sparingly. A little dark wax says “European antique market.” Too much says “rescued from a haunted shed.”
Common Chalk Paint Mistakes to Avoid
The first mistake is skipping cleaning. Even the best paint struggles against grease and old polish. The second is applying paint too thickly. Chalk paint has body, but it still performs best in thin, controlled coats. The third is forgetting the topcoat. Unsealed chalk paint on high-use surfaces can scuff, stain, or transfer.
Another common problem is choosing the wrong finish for the job. Wax is beautiful, but it may not be tough enough for a kitchen table used daily by children, laptops, coffee mugs, and one suspiciously sticky cereal bowl. For heavy-use surfaces, choose a durable clear topcoat. Also remember that sealers can slightly change the color or sheen, so test first on a hidden area.
Finally, do not ignore hardware. Painting the furniture but reinstalling scratched, dated pulls can make the project feel unfinished. Clean original hardware if it is attractive, or upgrade to knobs and handles that match the new style.
Room-by-Room Chalk Paint Ideas
Living Room
Paint a coffee table in charcoal, a media console in navy, or side tables in warm white. Chalk paint can help mismatched furniture feel coordinated without making the room look like a showroom set.
Bedroom
Refresh nightstands, dressers, mirrors, and benches. Soft neutrals create a restful look, while black or deep green adds boutique-hotel energy. For a romantic vintage feel, distress edges lightly and finish with clear wax.
Kitchen and Dining Area
Use chalk paint on dining chairs, a hutch, a pantry door, or a breakfast nook bench. For cabinets or tabletops, focus on durability. Clean thoroughly, sand glossy areas, apply thin coats, and seal with a tough protective finish.
Entryway
An entryway console is a perfect chalk paint project. It gets seen every day but usually does not suffer the abuse of a kitchen table. Try sage green, matte black, or a soft greige with brass hardware.
Home Office
Paint a bookcase, file cabinet, desk organizer, or old wooden chair. A cohesive color palette can make a work zone feel calmer and more intentional, which may or may not help with email, but at least the shelves will look good.
Examples of Smart Chalk Paint Makeovers
A scratched oak dresser can become a modern storage piece with matte black paint, clear topcoat, and simple brass pulls. A dated china cabinet can feel fresh with creamy white paint outside, a contrasting color inside, and lightly distressed trim. A plain bookcase can become custom-looking when painted the same color as the wall behind it. A thrifted tray can become a coffee table accent with charcoal paint and a dry-brushed gray highlight.
The best transformations usually respect the piece. If a table has beautiful carved legs, use wax to emphasize them. If a cabinet has clean modern lines, keep the finish smooth and skip heavy distressing. Chalk paint gives you options, but the most stylish results come from choosing a finish that matches the furniture’s shape and the room’s personality.
How to Care for Chalk-Painted Decor
After sealing, give the finish time to cure before heavy use. Dry does not always mean hardened. Avoid dragging objects across the surface, using harsh cleaners, or placing hot mugs directly on painted furniture. Clean with a soft damp cloth and mild soap when needed. If waxed furniture begins to look dull, it can often be refreshed with another thin coat of wax. If a topcoated piece gets scratched, lightly sand the area and touch up carefully.
Experience Notes: What Real Chalk Paint Projects Teach You
After a few chalk paint projects, you learn that the paint is forgiving, but it rewards patience. The first lesson is that cleaning matters more than enthusiasm. Enthusiasm gets the can open; cleaning keeps the paint attached. A small table that looks perfectly clean can still have invisible furniture polish on it, especially if it came from a relative’s house where lemon oil was treated like a sacred ritual. Wipe it down, let it dry, and then paint.
The second lesson is that color looks different on furniture than it does on a tiny swatch. A soft gray may turn blue in a north-facing room. A creamy white may look yellow next to bright white walls. A dramatic black may look stunning but show dust faster than you expected. Before painting a large piece, test a small area or paint a scrap board and move it around the room during the day. Light is basically an unpaid interior designer with strong opinions.
The third lesson is that distressing is best done slowly. Beginners often sand too much because it is oddly satisfying. Five minutes later, the charming vintage edge has become a patchy raccoon situation. Focus on places that would naturally wear: corners, handles, raised trim, chair legs, and table edges. Step back often. If you are not sure whether to keep sanding, stop. Future you will be grateful.
The fourth lesson is that topcoat choice changes the whole personality of the project. Wax feels warm and traditional. It gives furniture that soft, touchable finish people associate with antique shops and cozy cottages. A matte water-based topcoat feels more practical and modern. It is easier to recommend for shelves, desks, vanities, and tables. Neither is universally better. The best finish depends on how the piece will be used.
The fifth lesson is that hardware is the secret upgrade. A painted dresser with old hardware can look improved. A painted dresser with cleaned brass pulls, matte black knobs, or simple modern handles can look transformed. If the original hardware is beautiful, keep it. If it is flimsy, damaged, or aggressively 1997, replace it. Measure the hole spacing before shopping, unless you enjoy drilling new holes while muttering motivational phrases.
The final lesson is that chalk paint makes decorating feel less permanent. That is its real charm. It encourages experimentation. You can try a moody color on a side table before committing to an entire room. You can rescue furniture instead of replacing it. You can make mismatched pieces work together. Most importantly, you can create a home that feels collected, personal, and alive. Perfect rooms are nice, but rooms with a few hand-painted stories are better.
Conclusion
Mastering chalk paint is less about being a professional painter and more about understanding the rhythm of a good makeover: choose the right piece, clean it well, sand only where needed, paint in thin coats, style the finish intentionally, and seal it for the way the item will actually be used. Whether you want a farmhouse dresser, a sleek black console, a vintage mirror, or a refreshed set of dining chairs, chalk paint gives you an approachable way to revamp your home decor without a full renovation budget.
The smartest projects start with realistic expectations. Chalk paint can hide flaws, create texture, and deliver charm, but durability comes from prep and protection. Treat the process with patience, and your finished pieces will look less like weekend experiments and more like custom decor with a backstory.














