
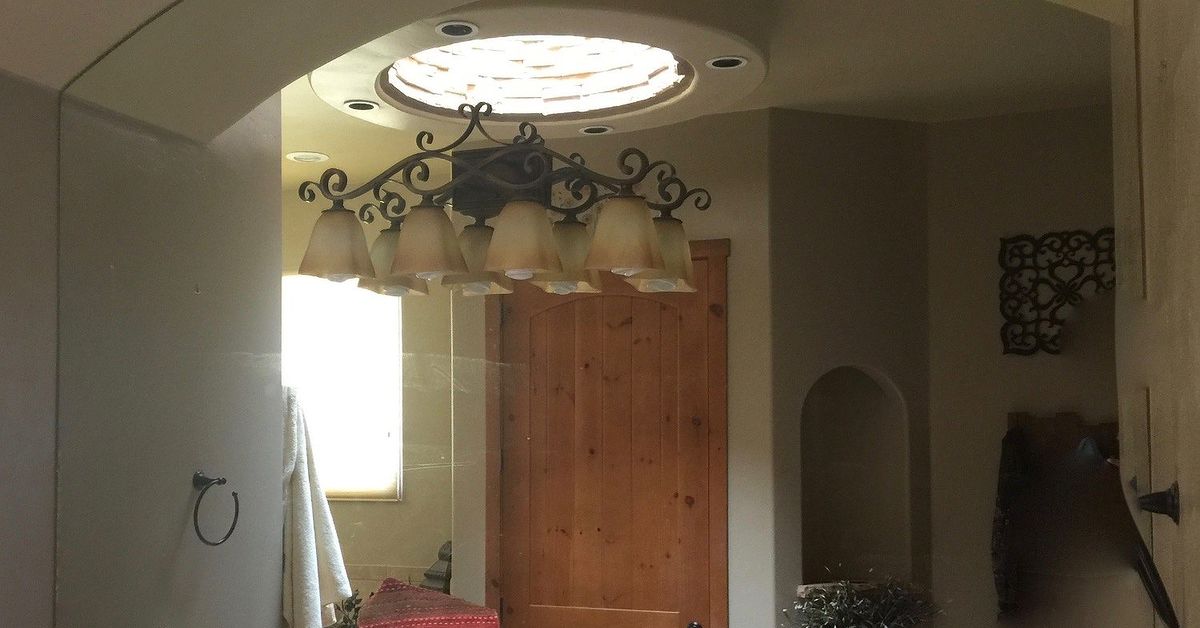
A builder’s wall mounted mirror is one of those bathroom features that quietly says, “I came with the house.” It is usually large, frameless, practical, and about as exciting as plain oatmeal. When it is time to upgrade your bathroom with a framed mirror, medicine cabinet, tile backsplash, or a fresher vanity setup, removing that oversized mirror becomes the first big step.
At first glance, the job may look simple. Remove a few clips, pull the mirror forward, and celebrate with a dramatic home makeover reveal. Unfortunately, builder-grade mirrors often have a secret: adhesive. Many are held in place with both metal or plastic clips and heavy-duty mirror mastic. That means the mirror is not just hanging on the wall; it is emotionally attached to it.
This guide explains how to remove a builder’s wall mounted mirror safely, what tools you need, when to call a professional, how to reduce drywall damage, and what to do after the mirror comes down. The goal is not just to remove the mirror, but to keep your wall, hands, eyes, floor, vanity, and nerves in respectable condition.
What Is a Builder’s Wall Mounted Mirror?
A builder’s wall mounted mirror, often called a builder-grade bathroom mirror, is a large frameless mirror installed during home construction. These mirrors are common above bathroom vanities because they are affordable, functional, and quick for builders to install.
Most builder mirrors are rectangular, mounted directly to drywall or tile, and held by a combination of mirror clips, J-channel brackets, screws, and mirror adhesive. Some are lightly attached and easy to remove. Others are glued so firmly that they seem to have signed a lifetime lease with your bathroom wall.
Common Ways Builder Mirrors Are Attached
Before grabbing a pry bar, it helps to understand how your mirror is mounted. The most common installation methods include:
- Mirror clips: Small plastic or metal clips around the edges that physically hold the glass in place.
- J-channel or bottom rail: A metal track at the bottom edge that supports the mirror’s weight.
- Mirror mastic: A strong adhesive applied to the back of the mirror.
- Combination mounting: Clips plus adhesive, which is very common in builder-grade bathrooms.
If your mirror has visible clips and moves slightly when pressed gently, it may be mostly clip-mounted. If it does not budge at all, adhesive is probably involved. Adhesive-backed mirrors require patience, preparation, and a healthy respect for gravity.
Safety First: Glass Is Not a Forgiving Material
Removing a wall mirror is not the time to test your luck. Large mirrors are heavy, awkward, sharp when broken, and surprisingly dramatic when they crack. Safety should be the first part of the job, not the thing you remember halfway through while holding a wobbling sheet of glass.
Wear the Right Protective Gear
Before starting, put on safety glasses, long sleeves, pants, closed-toe shoes, and heavy-duty work gloves. Cut-resistant gloves are even better. If the mirror breaks, the tape and safety gear help reduce the risk of injury from falling or flying shards.
Do not work barefoot, in sandals, or in shorts. This is a bathroom project, not a beach vacation.
Protect the Bathroom
Cover the vanity, sink, faucet, countertop, and floor with thick drop cloths, cardboard, or moving blankets. A mirror edge can chip a countertop quickly, and glass fragments can hide in bath mats, grout lines, and floor seams.
If the mirror is above a vanity, remove everything from the counter. Soap dispensers, toothbrush cups, candles, and tiny decorative plants all become obstacles when you are trying to control a large mirror.
Tools and Supplies You May Need
The exact tools depend on whether the mirror is clipped, glued, or both. For most builder mirror removal projects, gather the following items:
- Safety glasses
- Heavy-duty gloves or cut-resistant gloves
- Painter’s tape or heavy-duty packing tape
- Drop cloths, cardboard, or moving blankets
- Screwdriver or drill
- Utility knife
- Wooden shims
- Putty knife or drywall knife
- Pry bar
- Heat gun or hair dryer
- Picture wire, piano wire, or mirror removal wire
- Suction cup handles, if available
- Helper, strongly recommended
- Spackle or joint compound for wall repair
- Sandpaper, primer, and paint
A helper is not technically a tool, but for a large bathroom mirror, one extra set of hands can make the difference between a smooth removal and a story your family retells every Thanksgiving.
Step-by-Step Guide to Removing a Builder’s Wall Mounted Mirror
Step 1: Inspect the Mirror
Look closely at the mirror edges. Check for top clips, side clips, bottom brackets, caulk lines, and gaps behind the mirror. If the bottom edge rests in a metal J-channel, the mirror may need to be lifted slightly after the adhesive is loosened.
Also inspect nearby light fixtures, outlets, tile, backsplash, and trim. If a vanity light overlaps the mirror, turn off power at the breaker before removing or loosening the fixture. Never assume bathroom wiring is harmless just because it is hiding behind a stylish light bar from 1998.
Step 2: Tape the Mirror
Apply painter’s tape or heavy-duty packing tape across the mirror in a crisscross pattern. Cover as much of the glass as possible, especially on large mirrors. The tape will not make the mirror unbreakable, but it can help hold pieces together if cracks form.
Some DIYers tape the perimeter and then make large X shapes across the face. For extra caution, use vertical and horizontal strips as well. Think of it as giving the mirror a seat belt before the ride gets bumpy.
Step 3: Remove Visible Clips or Brackets
If the mirror has top or side clips, remove the screws carefully while your helper supports the glass. Bottom clips or a bottom channel may need to stay in place temporarily to support the mirror’s weight until the adhesive is loosened.
Do not remove every support at once if the mirror is not clearly glued. A clip-mounted mirror may suddenly shift when the last clip comes out. Keep one hand on the mirror, and have your helper ready.
Step 4: Score Caulk or Paint Around the Edges
Use a utility knife to cut through any caulk, paint, or sealant around the mirror edges. This reduces tearing and makes it easier to separate the mirror from the wall.
Work slowly. Pressing too hard with a utility knife near glass is a good way to create scratches, chips, or colorful language.
Step 5: Soften the Adhesive
If the mirror is glued to the wall, use a heat gun on a low or medium setting or a hair dryer to warm the mirror surface. Keep the heat source moving. Do not hold intense heat in one spot, because sudden temperature changes can stress the glass.
The goal is to warm the adhesive behind the mirror, not roast the bathroom like a marshmallow. Heat can make mirror mastic more flexible, which may help the mirror release with less drywall damage.
Step 6: Insert Wooden Shims
Gently slide wooden shims into small gaps around the mirror. Start near a corner or edge where there is already a little space. Tap the shims lightly; do not force them.
The shims create gradual pressure and help open a gap for a putty knife, pry bar, or cutting wire. They also help protect the wall by spreading pressure more evenly.
Step 7: Use Wire to Cut Through Adhesive
For glued mirrors, one of the safest methods is using picture wire or piano wire behind the glass. With one person on each side, work the wire back and forth in a sawing motion to cut through the adhesive blobs.
This method takes patience, especially if the adhesive is thick. Move slowly from the top or side toward the center. Continue warming the glass as needed. Do not yank the wire or twist the mirror.
Step 8: Gently Pry Only When Necessary
If wire cutting does not fully release the mirror, use a wide putty knife or pry bar with a shim behind it to protect the wall. Apply steady, gentle pressure. Avoid sudden pulls.
You may hear drywall paper tearing as adhesive releases. That is normal with glued mirrors. The aim is to minimize damage, not perform a magic trick where the wall looks untouched afterward.
Step 9: Support and Remove the Mirror
Once the adhesive releases, support the mirror from the bottom and sides. If you have suction cup handles, use them to control the glass. Lift the mirror out of any bottom channel or away from remaining clips, then carry it upright to a safe location.
Never lay a large mirror flat on an uneven floor. Store it vertically against a stable wall with padding underneath, or prepare it immediately for disposal or reuse.
How to Remove a Mirror Mounted With Clips Only
If your mirror is attached only with clips, the process is simpler. Tape the mirror, protect the area, and have a helper hold the glass. Remove the top and side clips first. Then gently lift the mirror out of the bottom clips or channel.
Some spring-loaded clips push upward. In that case, lift the mirror slightly, pull the bottom edge out, and lower it carefully. If it does not move, stop and inspect for adhesive. A mirror that refuses to move is usually not being stubborn for fun.
How to Remove a Glued Builder Mirror Without Breaking It
Removing a glued mirror in one piece is possible, but never guaranteed. Success depends on the mirror size, adhesive pattern, wall condition, and how patiently you work.
Best Practices for Saving the Mirror
- Use tape across the entire mirror face.
- Warm the adhesive gradually.
- Use wire instead of aggressive prying when possible.
- Have at least one helper support the mirror.
- Work slowly around the edges before pulling the center.
- Stop if the mirror begins cracking or flexing too much.
If the mirror is extremely large, damaged, or mounted over tile, hiring a professional glass contractor may be the smarter choice. Professional removal costs money, but emergency room visits and ruined tile cost moreand are much less charming.
What to Do If the Mirror Breaks
If the mirror cracks, pause immediately. Do not try to catch falling pieces with bare hands. Keep everyone away from the area, especially children and pets. Wear gloves and eye protection while cleaning.
Pick up large pieces carefully and place them in a sturdy box or wrap them in cardboard. Use tape, damp paper towels, or a vacuum hose attachment to capture tiny fragments. Label the package as broken glass before disposal so sanitation workers know what they are handling.
Repairing the Wall After Mirror Removal
Once the mirror is down, you will probably see adhesive blobs, torn drywall paper, screw holes, paint ridges, or an impressive rectangle of old wall color. Congratulations: your bathroom has entered its awkward phase.
Remove Adhesive Residue
Use a putty knife or scraper to remove loose adhesive. Be careful not to gouge the drywall. Some adhesive may need to be cut down rather than completely removed. If the remaining mastic is firmly attached and not too thick, you can skim coat over it after sanding rough edges.
Seal Torn Drywall Paper
If the drywall paper is torn, seal it with a primer designed for damaged drywall before applying joint compound. This helps prevent bubbling when you patch the wall.
Patch, Sand, Prime, and Paint
Apply joint compound in thin layers. Let each layer dry, sand smooth, prime, and paint. If you are installing a smaller mirror, pay extra attention to the exposed wall area around it. The new mirror will not hide the same footprint as the old builder mirror.
Should You Remove the Mirror or Frame It Instead?
Sometimes the best way to “remove” an ugly builder mirror is not to remove it at all. If the mirror is in good condition and securely attached, adding a frame can give it a custom look without the risks of glass removal.
Mirror frame kits, painted trim, or custom molding can transform a plain bathroom mirror into something more stylish. This option is especially useful if you are renting, working on a tight budget, or trying to avoid drywall repair.
However, framing may not solve every problem. If the mirror has black edge damage, poor placement, cracks, cloudy silvering, or conflicts with new lighting or tile, removal may still be the better choice.
When to Call a Professional
DIY mirror removal is realistic for many homeowners, but not every mirror is a weekend warrior project. Consider hiring a professional if:
- The mirror is very large or unusually heavy.
- The mirror is cracked or already damaged.
- The mirror is glued to tile, stone, or delicate wall material.
- You are working alone and cannot get help.
- The wall may contain lead paint in a home built before 1978.
- Electrical fixtures must be moved or disconnected.
- You are not comfortable handling large sheets of glass.
There is no shame in calling a pro. Home improvement confidence is wonderful; overconfidence with glass is how bathrooms become crime scenes without the crime.
Common Mistakes to Avoid
Skipping the Tape
Taping the mirror is simple, cheap, and important. It helps control broken glass if something goes wrong.
Prying Too Hard Too Soon
Hard prying can shatter the mirror or rip out large sections of drywall. Use heat, shims, and wire before reaching for serious leverage.
Working Alone on a Large Mirror
Large mirrors are awkward and heavy. A helper can support the glass, guide the release, and prevent sudden drops.
Ignoring the Bottom Support
Many builder mirrors rest in bottom clips or channels. If you remove top clips and forget the bottom rail, the mirror may bind, tilt, or chip.
Forgetting About Wall Repair
Mirror removal is only half the project. Plan for scraping, patching, sanding, priming, and painting afterward.
Experience-Based Tips for Removing a Builder’s Wall Mounted Mirror
After studying many real-world bathroom mirror removals, one lesson stands above the rest: the mirror decides the timeline. You may think the job will take thirty minutes, but the adhesive may have other plans. Builder mirrors are often installed with large mastic blobs, and those blobs can grip drywall paper with surprising strength.
A practical experience-based approach is to begin with the assumption that the wall will need repair. This mindset prevents frustration. If the mirror comes down cleanly, wonderful. If it leaves torn drywall, you are prepared. Many homeowners are disappointed when the wall looks rough after removal, but that is normal. Adhesive is designed to hold the mirror securely for years, not politely let go when your Pinterest board says it is time.
Another useful tip is to work from the most accessible edge instead of forcing the corner you wish would release first. Sometimes one side has less adhesive or a slightly wider gap. Start there. Once a small opening forms, insert shims gradually and keep the pressure even. Rushing the first gap is where many cracks begin.
Heat helps, but it is not magic. A hair dryer may soften lighter adhesive, while a heat gun can work better on stubborn mastic. However, too much heat in one spot can stress glass or damage nearby paint. Keep the heat moving in slow passes. Warm the area, test gently, and repeat. The process feels slow because it is slow. That is a feature, not a flaw.
Using wire behind the mirror is often cleaner than prying, but it can be tiring. The wire may catch on adhesive blobs, drywall paper, or clips. Wearing gloves makes the back-and-forth motion safer and easier. If possible, have one person guide the wire while another supports the mirror and watches for movement. Communication matters. A simple “stop,” “hold,” or “move left” can prevent a bad moment.
It is also smart to prepare the landing zone before the mirror moves. Decide where the mirror will go once removed. Clear a path from the bathroom to that spot. Large mirrors do not like narrow hallways, open drawers, laundry baskets, or surprised pets. If you plan to reuse the mirror, place padding against a wall before you start. If you plan to dispose of it, prepare cardboard, tape, and labels ahead of time.
One common surprise is the “mirror ghost” left behind. The old mirror often protected part of the wall from humidity, light, cleaning products, and paint changes. When it comes down, you may find a perfect rectangle that does not match the rest of the bathroom. This is why many homeowners end up repainting the entire wall rather than touching up small areas. Touch-up paint rarely blends perfectly in bathrooms because moisture and cleaning wear change the finish over time.
If you are replacing one huge mirror with two smaller framed mirrors, measure before repairing the wall. Mark the new mirror locations, light fixture placement, and vanity centerlines. This helps you focus your patching effort where the wall will actually show. It also prevents the classic mistake of patching beautifully, painting carefully, and then realizing the new mirror exposes a screw hole right at eye level.
Finally, give yourself permission to switch plans. If the mirror starts cracking, if the wall damage becomes excessive, or if the mirror feels too heavy, stop and call a professional. DIY success is not measured by doing everything alone. Sometimes the smartest move is knowing when the glass has won the negotiation.
Conclusion
Removing a builder’s wall mounted mirror can dramatically update a bathroom, but it deserves care, patience, and proper preparation. Start by identifying whether the mirror is held by clips, adhesive, or both. Tape the glass, protect the room, wear safety gear, and use slow methods such as heat, shims, and wire cutting before prying. Expect some drywall repair, especially if the mirror was glued directly to the wall.
For small or clip-mounted mirrors, this can be a manageable DIY project. For large, cracked, heavily glued, or tile-mounted mirrors, hiring a professional may be the safer and cleaner choice. Either way, once that builder-grade mirror is gone, your bathroom gains a fresh opportunity for better style, better lighting, and a mirror that looks like you chose it on purpose.












