Note: This guide is for general DIY information. Washer designs vary by brand and model, so always check your owner’s manual, parts diagram, and warranty terms before removing a drum paddle. When in doubt, call a qualified appliance technicianyour washing machine is not the place to audition for an action movie.
Introduction: That Plastic Fin Inside Your Washer Has a Job
If you have ever opened your washer and noticed one of the raised plastic pieces inside the drum looking loose, cracked, or slightly too enthusiastic about wobbling, you are probably dealing with a damaged drum paddle. This part is also called a washer drum baffle, drum lifter, drum vane, or washing machine paddle. Whatever name your appliance brand uses, the job is basically the same: it lifts, tumbles, and moves clothes through water and detergent so your laundry does not simply sit there like a wet burrito.
Removing a drum paddle from a washer is often a simple repair, especially on many front-load washing machines where the paddle clips into the stainless-steel inner drum. Some models use screws. Others use plastic locking tabs. A few machines hide the fastener in a way that feels personally rude, but there is usually a logical method behind it.
This in-depth guide explains simple ways to remove a drum paddle from a washer in 8 steps, plus how to inspect the part, avoid damaging the drum, and decide whether to replace the paddle yourself or call a professional. The tone is friendly, but the safety advice is serious: unplug the washer before doing anything, wear gloves, and do not force parts that refuse to move. Plastic paddles are replaceable; bent washer drums are a more expensive personality trait.
What Is a Washer Drum Paddle?
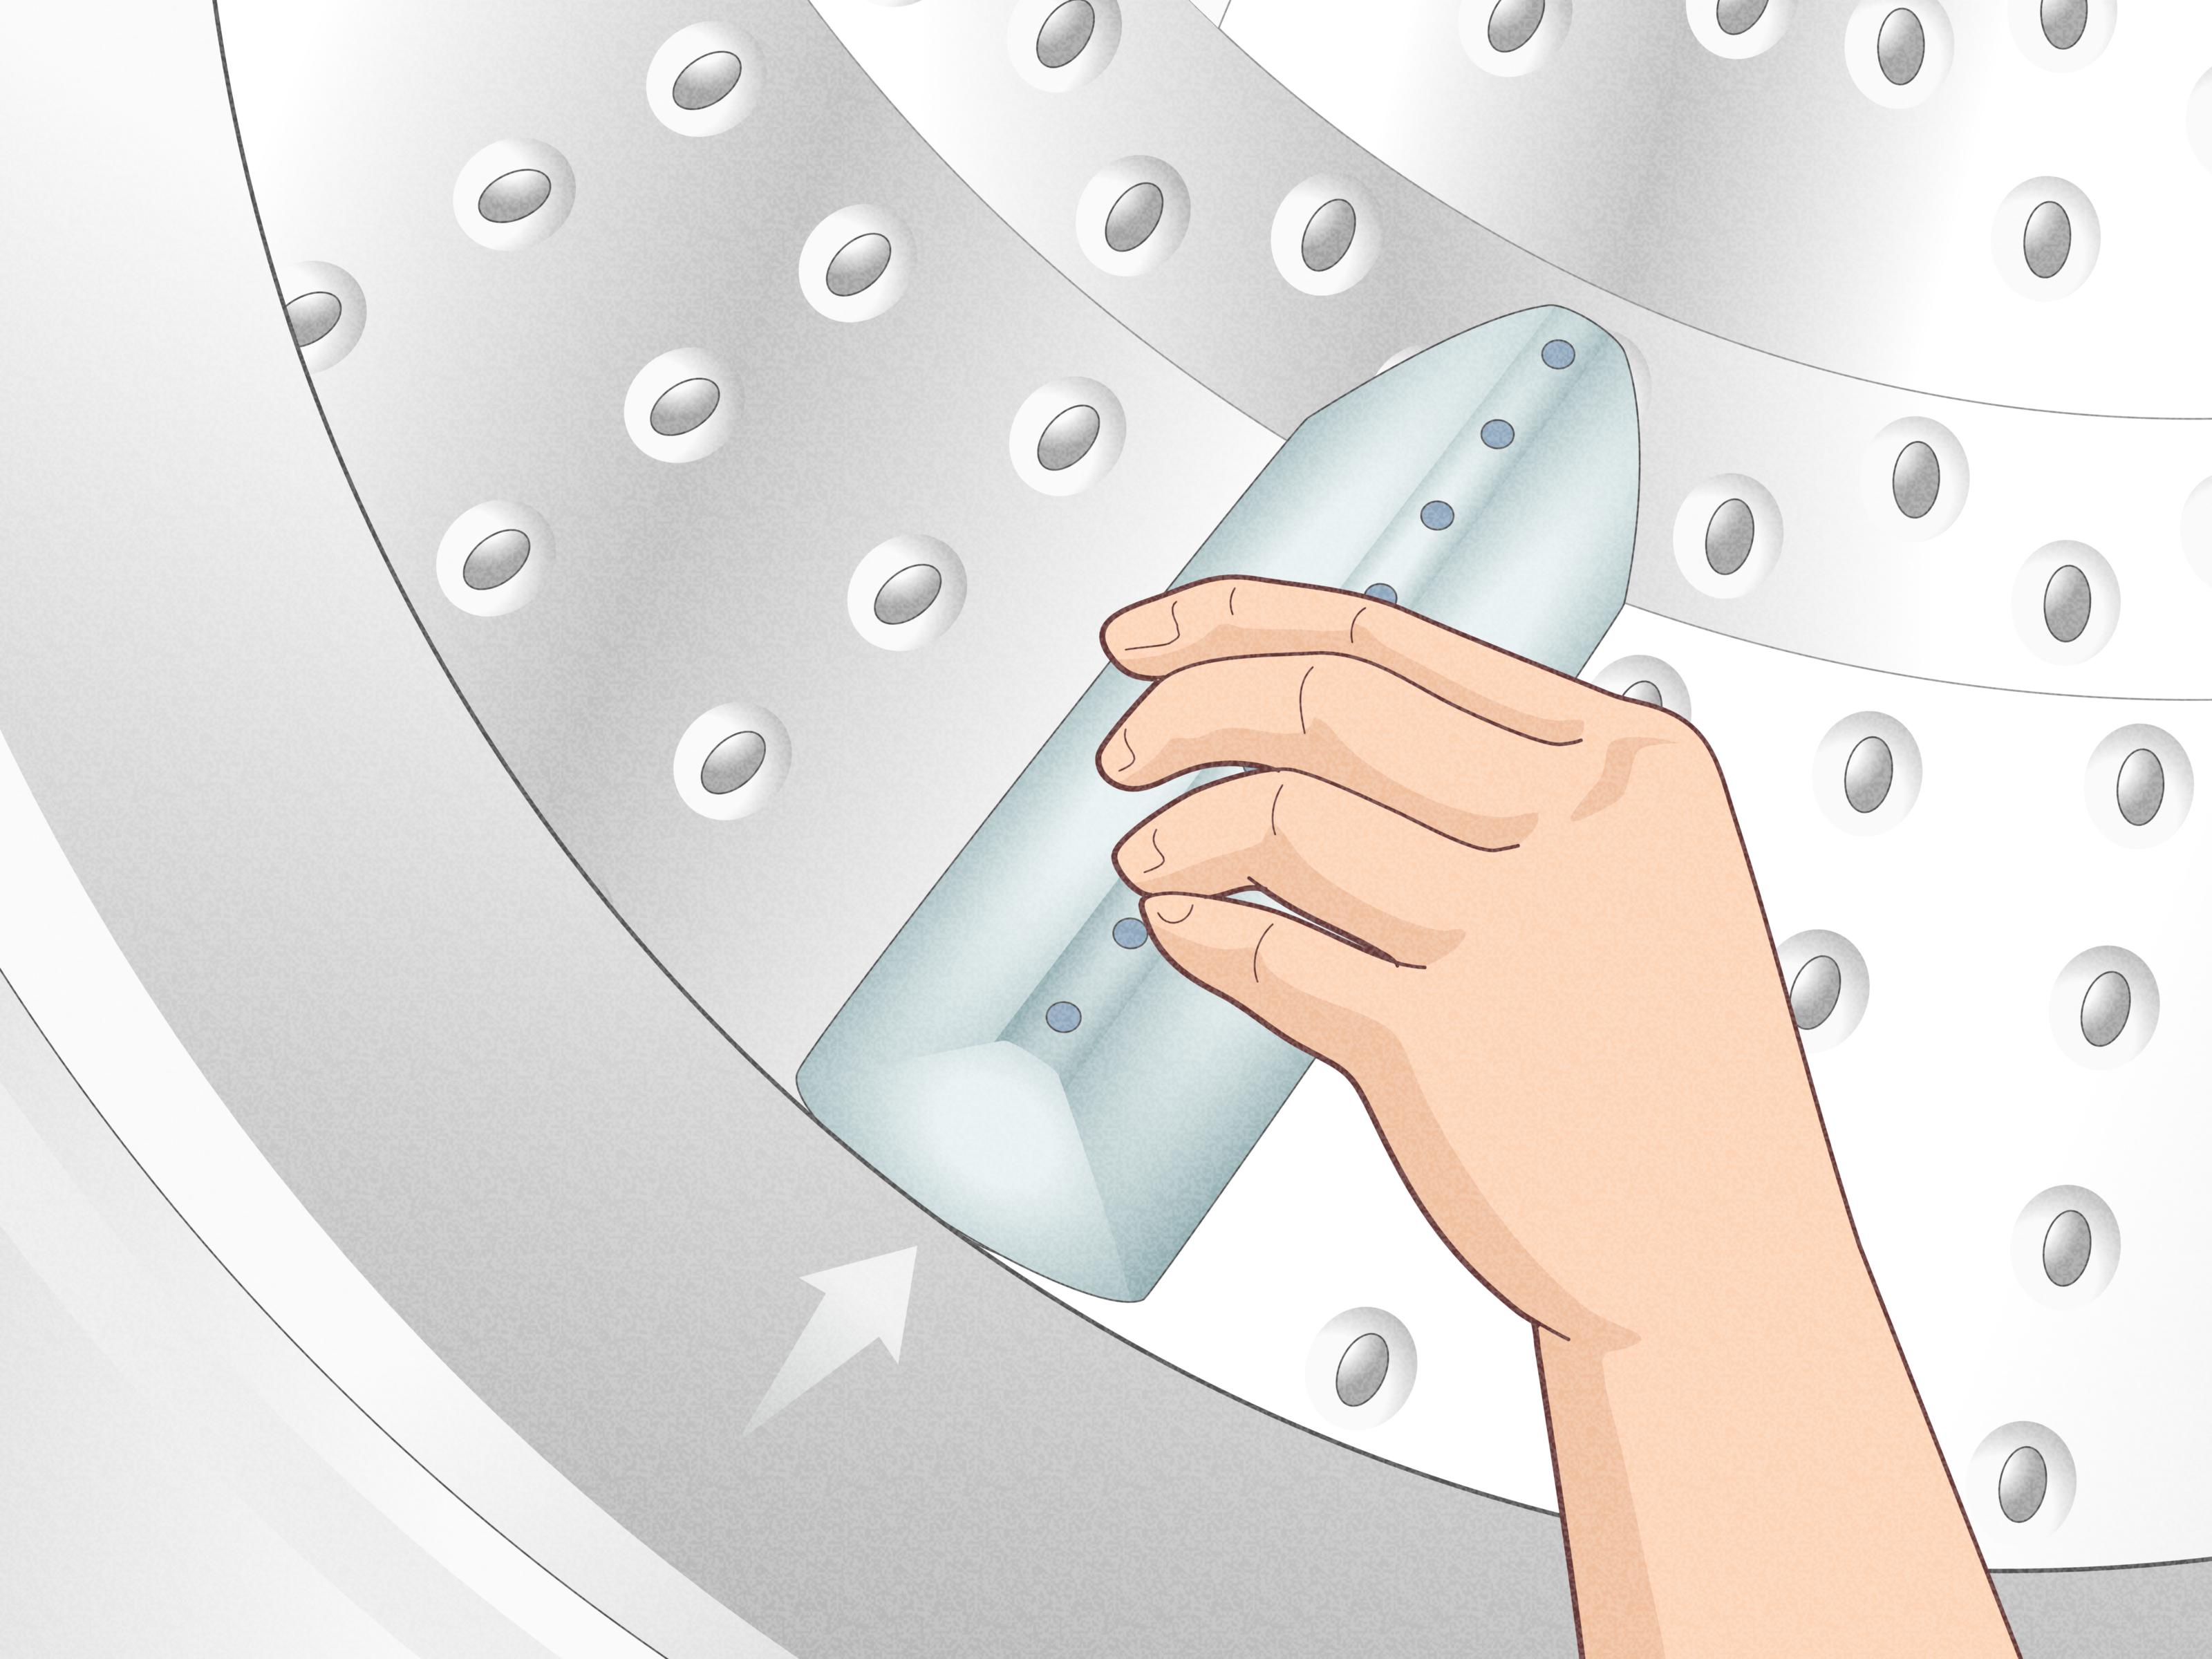
A washer drum paddle is the raised fin-shaped piece attached to the inside of the washer drum. Most front-load washers have three paddles spaced evenly around the drum. These paddles help lift laundry as the drum rotates, allowing clothes to tumble through water, detergent, and rinse cycles. Without them, your washer may still spin, but the cleaning action can become less effective.
Depending on the brand, the same part may appear in parts catalogs as a drum baffle, tub baffle, drum lifter, vane, or paddle. When shopping for a replacement, search using your full model number and try more than one of these terms. “Washer drum paddle” may bring up one result, while “washer baffle” may reveal the exact OEM part you need.
When Should You Remove a Drum Paddle?
You may need to remove a washer drum paddle if it is cracked, loose, missing, or trapping clothing. A damaged paddle can snag fabric, tear delicate garments, create knocking noises, or allow small items like coins, bra wires, or hairpins to slip behind it. If your washer suddenly starts chewing tiny holes in shirts, do not immediately blame moths with gym memberships. Inspect the drum paddles first.
Common signs include:
- A paddle moves when you press it by hand.
- You see sharp plastic edges, cracks, or missing chunks.
- Laundry catches underneath the paddle.
- The washer makes a rhythmic knocking sound during tumbling.
- A foreign object is trapped inside or behind the paddle.
- The replacement paddle has arrived and the old one needs to retire.
Tools and Supplies You May Need
Not every washer requires every tool. Many drum paddles slide out with only a screwdriver and patience. Others require access from the top panel or through a hose opening. Before starting, gather the basics so you are not crawling around the laundry room mid-repair looking for a screwdriver while the washer silently judges you.
- Work gloves
- Phillips screwdriver
- Flat-blade screwdriver
- Nut driver or socket set, if your model uses panel screws
- Flashlight
- Towel
- Small container for screws
- Replacement drum paddle, if installing a new one
- Phone camera for reference photos
Before You Start: Safety and Model Checks
Always disconnect the washer from power before working inside or around it. If your washer is hardwired or you cannot safely access the plug, stop and contact a technician. For extra caution, turn off the water supply valves if you will move the machine or remove top panels and hoses. You are working around metal edges, plastic clips, and possibly sharp broken pieces, so wear gloves.
Next, locate the washer model number. It is usually found around the door frame, inside the door opening, behind the control panel area, or on the back of the appliance. Use that model number to look up the parts diagram. This matters because drum paddles that look similar may lock differently. A Samsung washer paddle may use a screw in one position, while an LG, Whirlpool, Kenmore, Electrolux, or Frigidaire model may use tabs, grooves, or a slide-lock design.
Simple Ways to Remove a Drum Paddle from a Washer: 8 Steps
Step 1: Unplug the Washer and Empty the Drum
Start by unplugging the washing machine. Remove every item from the drum, including socks hiding in the gasket. Wipe away standing water if needed. Open the door fully and rotate the drum by hand until the damaged drum paddle is easy to reach. Ideally, position the paddle at the top or front of the drum so gravity is not actively working against you.
Use a flashlight to inspect the paddle closely. Look for screws, screw holes, locking tabs, or a small release slot. If the paddle is badly broken, remove loose plastic pieces carefully so they do not fall behind the drum.
Step 2: Identify How the Drum Paddle Is Attached
This is the most important diagnostic step. Washer drum paddles are usually attached in one of three ways:
- Screw-mounted paddles: A screw holds the paddle through the drum or from inside the paddle.
- Clip-in paddles: Plastic tabs snap into slots in the drum.
- Slide-lock paddles: The paddle slides forward or backward until tabs align with keyhole-shaped openings.
If you see a screw inside the drum paddle, removal is straightforward. If there is no visible screw, the paddle probably uses clips or tabs. Do not start prying randomly. Washer drums are stainless steel, but the slots and paddle clips can bend, crack, or distort if attacked like a stubborn pickle jar.
Step 3: Remove Any Visible Screw
If your washer paddle has a visible screw, use the correct screwdriver bit and press firmly while turning. A worn or corroded screw can strip easily. If the screw resists, apply steady pressure rather than quick jerky force. Keep a small container nearby so the screw does not roll under the washer and join the mysterious kingdom of lost hardware.
On some models, the screw is accessed by rotating the drum until a hole or opening lines up with the top of the machine. In that case, you may need to remove the washer’s top panel. Usually, this involves removing screws at the back of the washer and sliding the top panel backward. However, only do this if your model design requires it and you are comfortable working around appliance panels.
Step 4: Release the Locking Tabs
If the paddle is held by locking tabs, use a flat-blade screwdriver to gently lift or depress the tab through the access opening or through the paddle slot. Some tabs must be lifted above a metal stop. Others must be pushed down below the stop. The goal is to unlock the paddle, not remodel the inside of your washer.
Work slowly. If one side releases but the paddle still will not move, inspect the opposite end. Many drum paddles have multiple tabs. You may need to release one tab while sliding the paddle in a specific direction. If the tab bends slightly, that may be normal for removal, but avoid bending the metal drum slot.
Step 5: Slide the Drum Paddle in the Correct Direction
Once the screw or locking tab is released, the drum paddle usually slides forward or backward. The direction depends on the model. Try a controlled push with your palm. If it moves a fraction of an inch, continue in that direction until the tabs align with the larger part of the slots. Then lift the paddle away from the drum.
If it does not move, do not slam it. Check again for hidden screws, tabs, or debris. Old detergent residue can create a sticky grip around the paddle. A little gentle rocking can help, but heavy prying can crack the part or scratch the drum.
Step 6: Lift the Paddle Out of the Drum
After the tabs align with the openings, lift the drum paddle out. Keep the broken side facing upward if possible so fragments do not drop into the tub. If the paddle is cracked, remove each piece carefully. Inspect the holes in the drum where the tabs were seated. Look for sharp edges, bent metal, or bits of plastic stuck in the slots.
This is also a good time to check behind the paddle area for foreign objects. Coins, hair clips, buttons, underwire, small screws, and children’s “treasures” can get trapped there. If something falls behind the inner drum, you may need additional disassembly or a technician.
Step 7: Clean and Inspect the Area
Wipe the exposed area with a damp cloth. Remove detergent buildup, lint, and plastic crumbs. Run your gloved fingers gently around the drum slots. If you feel jagged metal or a sharp burr, do not run the washer until the issue is corrected. Sharp edges can damage clothing during washing or spinning.
Compare the removed paddle with the replacement part. The length, tab positions, curve, and screw location should match. A part that is “almost right” is still wrong. Installing the wrong paddle can make it pop loose during a cycle, and nobody wants their washer to sound like it is making popcorn with jeans.
Step 8: Install the Replacement or Secure the Area
If you are replacing the drum paddle, align the new paddle tabs with the drum slots. Insert the tabs, slide the paddle in the locking direction, and press until it clicks or seats firmly. Reinstall any screw that was removed. Do not overtighten plastic parts; snug is good, heroic is not.
Before plugging the washer back in, rotate the drum by hand several times. The new paddle should sit flush and should not rattle, lift, or scrape. After reassembling any panels, run a short rinse or quick-wash cycle with no laundry. Listen for knocking or rubbing. If the paddle stays secure and the drum rotates smoothly, the repair is complete.
What If the Drum Paddle Will Not Come Off?
If the drum paddle refuses to move, pause and recheck the parts diagram. Some paddles are not designed to be removed separately. On certain premium machines, stainless-steel lifters may be integrated into the drum. On other models, the paddle may be held by a hidden screw accessible only after removing a panel or hose. Forcing a non-removable paddle can create a repair bill big enough to make you whisper apologies to the washer.
Try these troubleshooting tips:
- Search your model number plus “drum baffle,” “drum lifter,” and “washer paddle.”
- Look for a screw at the top of the drum after rotating the paddle upward.
- Check whether a plastic tab must be pushed down instead of lifted up.
- Use a flashlight to inspect both ends of the paddle.
- Stop if the drum slot begins to bend.
Common Mistakes to Avoid
Using the Washer with a Broken Paddle
A loose or cracked washer drum paddle can snag clothes, tear fabric, and make noise. It can also allow small items to slip behind the drum. If the paddle is broken, stop using the washer until it is repaired or replaced.
Ordering by Looks Alone
Many drum paddles look similar online. Always order by model number and part number. A paddle with the wrong tab spacing may not lock into the drum.
Prying Too Hard
A flat-blade screwdriver is useful for tabs, but it is not a crowbar. Gentle pressure is enough when the correct locking point is released. Excessive force can snap clips or damage the drum.
Forgetting the Test Spin
After replacing the paddle, rotate the drum by hand and run an empty test cycle. This helps confirm that the paddle is locked before you trust it with towels, jeans, or your favorite shirt.
DIY or Call a Pro?
Removing a washer drum paddle is a reasonable DIY job when the part is accessible, the washer is unplugged, and the paddle uses visible screws or simple locking tabs. It becomes less DIY-friendly when the screw is hidden behind panels, the paddle is integrated into the drum, the tab is broken inside the slot, or a foreign object has dropped between the inner and outer tubs.
Call a professional if you notice water leaks, drum wobble, grinding noises, damaged metal slots, or electrical components exposed during access. Also consider professional service if your washer is still under warranty. Some manufacturers may deny coverage if a repair is performed incorrectly.
How to Prevent Drum Paddle Damage
Drum paddles work hard. Every wash cycle puts pressure on them, especially with heavy loads. To help them last longer, avoid overloading the washer. Wash shoes, backpacks, pet beds, and items with buckles or metal hardware carefully. Use mesh laundry bags for small items and close zippers before washing. Heavy objects banging around inside the drum can crack plastic paddles over time.
Also inspect pockets before loading laundry. Coins and screws are tiny villains. They can lodge under a paddle, scratch the drum, or create mystery noises that make you question your entire appliance ownership journey.
Real-World Experience: What Removing a Washer Drum Paddle Is Actually Like
The first thing most people notice during this repair is that the job looks easier than it feels. The drum paddle is right there inside the washer, practically waving at you. You assume it will pop out in thirty seconds. Then you discover it has a hidden locking tab, a stubborn screw, or a slide direction that is the opposite of what your instincts suggested. This is where patience saves the day.
In many real DIY situations, the hardest part is not removing the paddleit is figuring out how the manufacturer decided to hold it in place. One washer may have a screw that comes out neatly with a Phillips screwdriver. Another may require you to rotate the drum until the paddle lines up with an access opening under the top panel. A third may use tabs that need to be lifted with a flat-blade screwdriver before the paddle slides out. That is why taking a few minutes to inspect the part is smarter than charging in like a laundry-room gladiator.
A useful experience-based tip is to take photos before each step. Photograph the original paddle position, the tab direction, the screw location, and any panel you remove. These photos become your personal repair manual when it is time to put everything back together. Even if the repair seems obvious, your future self will appreciate the visual reminder. Future self is often tired and holding a screw with no memory of where it came from.
Another practical lesson: old paddles can be sharper than they look. Cracked plastic may have jagged edges, and stainless-steel drum slots can feel rough if the paddle has been loose for a while. Gloves are not optional decoration; they protect your hands while you wiggle, slide, and lift the part. A towel on the floor also helps catch screws and plastic fragments before they vanish into the laundry-room underworld.
When replacing the paddle, the most satisfying moment is the click or firm slide that tells you the new part has locked into place. Still, do not trust that feeling alone. Pull gently on the paddle. Rotate the drum. Press along both ends. If anything lifts, rattles, or shifts, remove it and try again. A paddle that is not fully seated may come loose during a wash cycle, and a tumbling plastic fin inside a spinning washer is not a relaxing soundtrack.
Many homeowners are surprised by how affordable the part can be compared with the cost of a service visit. That said, the value of DIY depends on confidence and access. If removing the top panel feels manageable and the part is clearly replaceable, this repair can be a satisfying weekend win. If the washer design is confusing, the part is stuck, or the drum looks damaged, calling a technician is not defeat. It is wisdom wearing work boots.
The best takeaway from real repair experiences is simple: go slowly, verify the attachment style, and never force the paddle. Most successful removals happen because the correct tab or screw was foundnot because more muscle was applied. Your washer rewards patience, and your clothes reward a smooth, secure drum paddle that no longer tries to eat sleeves for breakfast.
Conclusion
Removing a drum paddle from a washer is usually a manageable DIY repair when you understand how the part attaches. Start by unplugging the washer, emptying the drum, and inspecting the paddle for screws, clips, or locking tabs. Remove any screw carefully, release the tab gently, slide the paddle in the correct direction, and lift it out. Clean the area, inspect for damage, and install the replacement securely before running an empty test cycle.
The key is not speed; it is accuracy. Washer drum paddles may be small compared with motors, pumps, and control boards, but they play a major role in cleaning performance and fabric protection. Fixing a cracked or loose paddle can prevent torn clothes, reduce noise, and help your washer tumble laundry the way it was designed to. In other words, this little plastic fin deserves respect. Maybe not a parade, but definitely respect.