
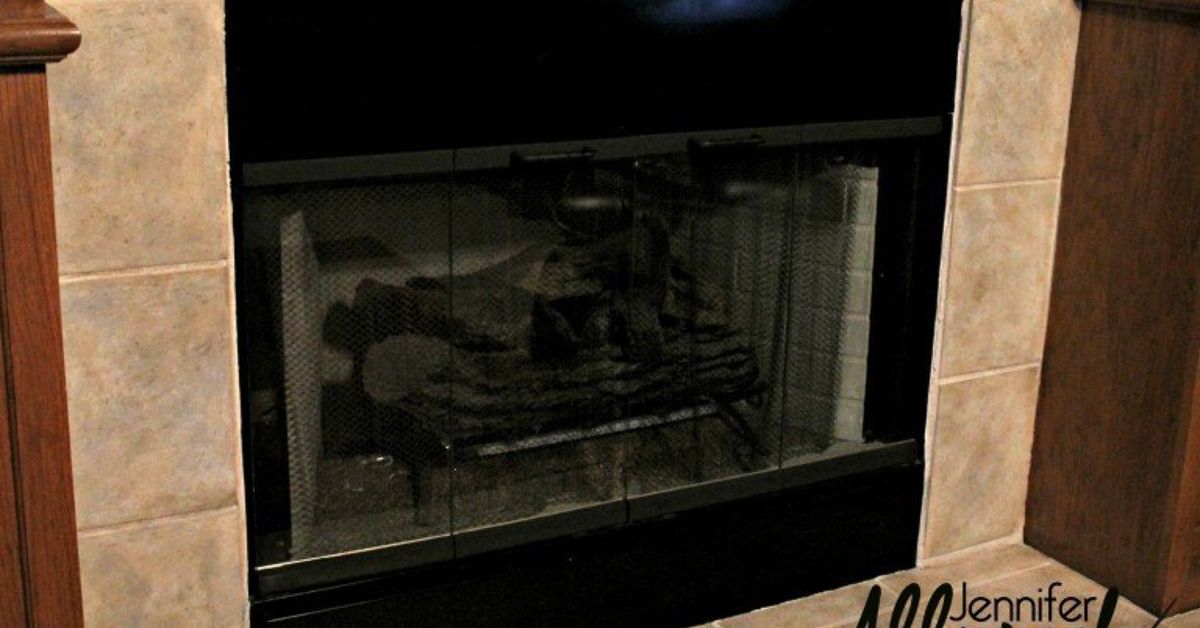
If your living room still features shiny brass fireplace trim and tired tile that screams “prime time cable in 1993,” take heart: you do not need to demolish the entire wall to make it look current. In many homes, the fastest way to modernize a fireplace is to update the trim, refresh or replace the surround tile, and make a few smart design choices that bring the whole feature into this decade. The result can feel dramatic, even if the project itself is surprisingly manageable.
A fireplace is usually the visual anchor of a room. When the trim is brassy and the tile is dated, the eye goes there immediatelyand not in the flattering, “wow, what a beautiful focal point” way. The good news is that brass trim and outdated fireplace tile are classic cosmetic problems. They can often be improved with careful prep, heat-appropriate materials, and a design plan that respects both style and safety.
Why Brass Fireplace Trim Looks So Dated
Brass trim had a long run, especially on builder-grade gas fireplaces from the late 1980s through the early 2000s. At the time, it read as polished and upscale. Today, that same bright metal often feels too reflective, too yellow, and too disconnected from the finishes people prefer now, such as matte black, soft bronze, warm steel, and simple painted surrounds.
The tile around older fireplaces can create the same problem. Small beige squares, glossy maroon tile, speckled faux-stone pieces, or heavy country-style borders tend to date a room instantly. Even when the fireplace itself works perfectly, the finish choices around it can drag down everything from your paint color to your furniture.
That is why updating your brass fireplace trim and outdated fireplace tile can have such a big payoff. It changes the mood of the whole room without requiring a full renovation budget or the emotional stamina of knocking dust out of your eyebrows for three weekends straight.
Start With Safety Before You Start With Style
Before you paint, tile, pry, scrape, or shop, identify what kind of fireplace you have. A wood-burning fireplace, a direct-vent gas fireplace, and a decorative gas unit can all have different requirements for doors, surrounds, mantels, clearances, and finishing materials. The user manual matters. So do local building requirements.
That means you should answer a few practical questions first:
- Is the brass trim decorative, removable, or part of the fireplace front assembly?
- Does the unit manufacturer allow refinishing, replacement fronts, or updated facing materials?
- Is the tile only on the surround, or does it extend to the hearth and wall?
- Will your new finish sit near surfaces that become hot during operation?
- Do you need noncombustible materials in specific zones around the opening?
If the fireplace has not been inspected in a while, it is wise to have it checked before investing in cosmetic upgrades. It is much more fun to choose tile when you are not also learning about venting issues, cracked panels, or the surprising mystery of why the pilot light refuses to cooperate.
Option 1: Paint the Brass Fireplace Trim
One of the simplest ways to update brass fireplace trim is to paint it. This works especially well when the trim is structurally sound but visually outdated. A painted finish can tone down the shine, help the firebox blend better with the room, and make old tile look less offensive while you plan a later upgrade.
Best Colors for Painted Fireplace Trim
Matte black is the crowd favorite for a reason. It feels timeless, hides visual clutter, and works with nearly every design style. That said, it is not your only option. Depending on the room, you might also consider:
- Soft black or charcoal for a gentler contrast
- Gunmetal for a modern industrial feel
- Dark bronze for traditional rooms with warm wood tones
- Color-matched trim paint for a minimalist built-in look, when allowed and appropriate for the surface
How to Get a Finish That Does Not Peel in a Week
The secret is not glamorous. It is prep. Metal trim needs to be cleaned well, dulled if necessary, and coated with products appropriate for the substrate and heat exposure. If the surround gets hot, use a finish designed for high-heat metal applications rather than whatever paint is loitering in the garage from your “accent wall era.”
A solid process usually looks like this:
- Turn off the fireplace and let all surfaces cool completely.
- Clean the trim thoroughly to remove dust, oils, residue, and polish buildup.
- Mask nearby glass, firebox openings, flooring, and finished walls carefully.
- Scuff or prep the surface as recommended for that metal type and coating system.
- Apply primer only if the product system calls for it.
- Apply thin, even coats and allow full dry time between coats.
- Cure the finish according to product directions before regular fireplace use.
If you are unsure whether the brass is lacquered, plated, or part of a removable surround, do a small test area first. That little bit of caution can save you from a large, flaky metal regret wall.
Option 2: Replace the Fireplace Front or Doors
Sometimes painting is the best answer. Sometimes replacement is smarter. If the brass front is damaged, warped, heavily scratched, or simply impossible to prep properly, replacing the front or doors may give you a cleaner long-term result. Many manufacturers offer updated fronts in black, bronze, or other finishes for compatible units.
This is especially worth considering if the brass is highly polished and visually dominant, or if the existing frame shape feels dated in addition to the finish. A sleeker front profile can modernize the fireplace even before you touch the tile.
Replacement tends to cost more than paint, of course, but it can also look more intentional. Think of it as the difference between giving your fireplace a haircut and giving it a full style makeover with better lighting.
How to Update Outdated Fireplace Tile
Once the brass is handled, the tile usually becomes the next big target. Old fireplace tile often dates a room because of one of three things: the color, the scale, or the sheen. Luckily, all three can be fixed.
Paint the Existing Tile
If the tile is sound, flat, and in a low-wear area, painting can be a budget-friendly temporary solution. This is more common for surrounds than hearth floors, since horizontal surfaces generally take more abuse. Painted tile can look surprisingly good when the surface is cleaned, scuffed, primed, and top-coated correctly.
This approach works best when you need a visual reset now but want to plan a more permanent fireplace makeover later. It is not always the forever solution, but it can buy you time and improve the room dramatically.
Tile Over the Old Tile
If the existing surround is stable and not too bulky, tiling over it can be a smart middle-ground option. It avoids major demolition while delivering a much more polished finished look. This method works best when the substrate is sound, the new material is appropriate for the area, and the edges can be finished neatly.
Large-format porcelain tile is especially popular because it gives a fireplace a clean, updated face with fewer grout lines. Fewer grout lines usually means a calmer visual resultand less opportunity for the surround to look busy, patchy, or suspiciously committed to Tuscan trends that expired two decades ago.
Remove and Replace the Tile Completely
If the old tile is loose, cracked, poorly installed, or visually beyond rescue, full replacement is often the best route. This gives you the most freedom to correct proportions, refresh the hearth, and select a finish that fits your home rather than your home’s original builder brochure.
A full replacement also allows you to inspect the substrate and correct issues before the new finish goes in. For homeowners planning a more custom fireplace wall, this option usually provides the best final result.
Best Tile Styles for a Modern Fireplace Update
Choosing the new tile is the fun part, or at least the part where the internet opens 47 tabs and somehow all of them seem emotionally necessary. To keep the project grounded, match the tile style to the architecture of the room.
For a Clean, Timeless Look
- Large-format porcelain in soft white, warm gray, taupe, or greige
- Matte ceramic subway tile stacked vertically or horizontally
- Simple stone-look porcelain with minimal veining
For More Texture and Character
- Zellige-inspired tile with subtle variation
- Slate, marble, or granite-look tile for a richer surface
- Handmade-look ceramic tile in earthy neutrals
For a Bold Focal Point
- Patterned encaustic-look tile used sparingly
- Vertical stacked mosaic tile for height
- Dark charcoal tile paired with a light wall and simple mantel
In most homes, the safest long-term design move is not the trendiest tile. It is the tile that complements the room, handles heat appropriately, and still looks good when the sofa changes and your throw pillows stop having opinions.
Design Tips That Make the Fireplace Look Expensive
Updating your brass fireplace trim and outdated fireplace tile is not only about swapping materials. The biggest transformations usually come from a few design decisions working together.
1. Simplify the Color Story
Limit the fireplace area to two or three main finishes. For example: black trim, creamy tile, and a warm wood mantel. Too many competing finishes can make a renovated fireplace still feel busy.
2. Use Scale Wisely
Tiny tile can make an already small fireplace feel fussier. Larger tile or longer linear pieces often make the surround feel taller, cleaner, and more current.
3. Do Not Forget the Wall Around It
A beautiful tile update can still look awkward if the surrounding wall color, mantel, or built-ins are fighting it. Sometimes painting the wall or mantel is what makes the new fireplace update truly click.
4. Respect the Heat Zone
Not every pretty material belongs right next to flame or hot metal. Keep the design ambitious, but keep the material choices sensible.
Common Mistakes to Avoid
- Skipping prep: Dirty metal and glossy tile do not reward optimism.
- Using the wrong paint: Standard wall paint is not a magic potion for hot metal.
- Ignoring manufacturer guidance: Fireplace units are not generic boxes.
- Choosing trendy tile without context: The fireplace should fit the room, not audition for social media.
- Forgetting edge details: Trim pieces, grout color, and transitions matter more than people think.
- Decorating too close to the opening: Safety beats styling every time.
A Practical Step-by-Step Plan
- Inspect the fireplace and identify the unit type.
- Read the manufacturer manual for trim, facing, and clearance guidance.
- Decide whether the brass should be painted or replaced.
- Evaluate whether the tile should be painted, covered, or removed.
- Create a simple palette with coordinated trim, tile, wall, and mantel finishes.
- Prep meticulously.
- Complete the trim update first, then the tile work.
- Finish with surrounding paint, styling, and restrained décor.
What the Finished Update Should Feel Like
A successful fireplace makeover does not necessarily look flashy. It looks intentional. The trim no longer glints at you like costume jewelry under a chandelier. The tile no longer drags the room backward in time. The fireplace finally feels like part of the home you have now.
That is the real goal when you update your brass fireplace trim and outdated fireplace tile. You are not trying to make the fireplace shout. You are helping it speak the same design language as the rest of the room.
Real-Life Experiences and Lessons From Fireplace Updates
Homeowners who tackle this kind of project often say the same thing afterward: they wish they had done it sooner. Brass trim and old tile can make a whole room feel tired, even when the furniture, paint, and lighting are perfectly fine. Once the fireplace is updated, people are often surprised that the room suddenly feels larger, brighter, and more intentional without any major structural change.
One of the most common experiences is realizing that brass was not the only problem. Many people begin with the idea of painting the metal black, only to discover that once the trim is toned down, the tile becomes the new star of the wrong show. That is not bad news. It is actually helpful, because it reveals what the room really needs. In many makeovers, the sequence ends up being: paint the trim, stare at the fireplace for three days, then admit the tile has to go too.
Another common lesson is that samples matter more than confidence. A tile that looks calm online can suddenly read icy, pink, beige, green, or “luxury dentist office” in your actual living room. Experienced renovators often tape up tile samples, paint swatches, and trim colors together near the fireplace, then look at them morning, noon, and night. This little exercise saves money and avoids the special misery of installing an entire surround only to realize it clashes with your floors.
People also underestimate how much prep determines the final result. The projects that look custom and polished usually are not the ones with the most expensive materials. They are the ones where the homeowner took time to clean thoroughly, mask carefully, level surfaces, choose the right products, and let each step cure properly. In other words, patience is not glamorous, but it photographs very well.
There is also a practical emotional benefit to these updates. Fireplaces tend to be central gathering spots, especially during cooler months or holidays. When the fireplace looks dated, the whole room can feel off. After an update, homeowners often restyle the mantel, move furniture a bit, add better lighting, and end up enjoying the room more often. The fireplace makeover becomes the domino that improves the rest of the space.
Some homeowners go minimalist and love it. Others lean into character with textured tile, a reclaimed wood mantel, or a dramatic dark surround. Both approaches can work beautifully. The best results usually happen when the fireplace matches the architecture of the home and the personality of the people living there. A sleek matte-black surround may be perfect in one house, while warm stone-look tile and a chunky wood mantel may make more sense in another.
Perhaps the most repeated experience of all is this: the fireplace becomes a focal point again, but for the right reasons. Instead of apologizing for brass and dated tile, homeowners start getting compliments. And that is a pretty satisfying trade.
Conclusion
If your fireplace still has shiny brass trim and outdated tile, you do not need to live with it just because it works. Cosmetic upgrades can dramatically improve the look of the room, and in many cases they are more practical than people expect. Whether you paint the trim, replace the front, tile over the surround, or start fresh with new materials, the key is to balance style, prep, durability, and fireplace safety.
Done well, this update is one of the highest-impact improvements you can make in a living area. It gives the room a stronger focal point, makes old finishes disappear, and helps the entire space feel more current. That little patch of brass and tired tile may have had a long run, but it does not need another season.












