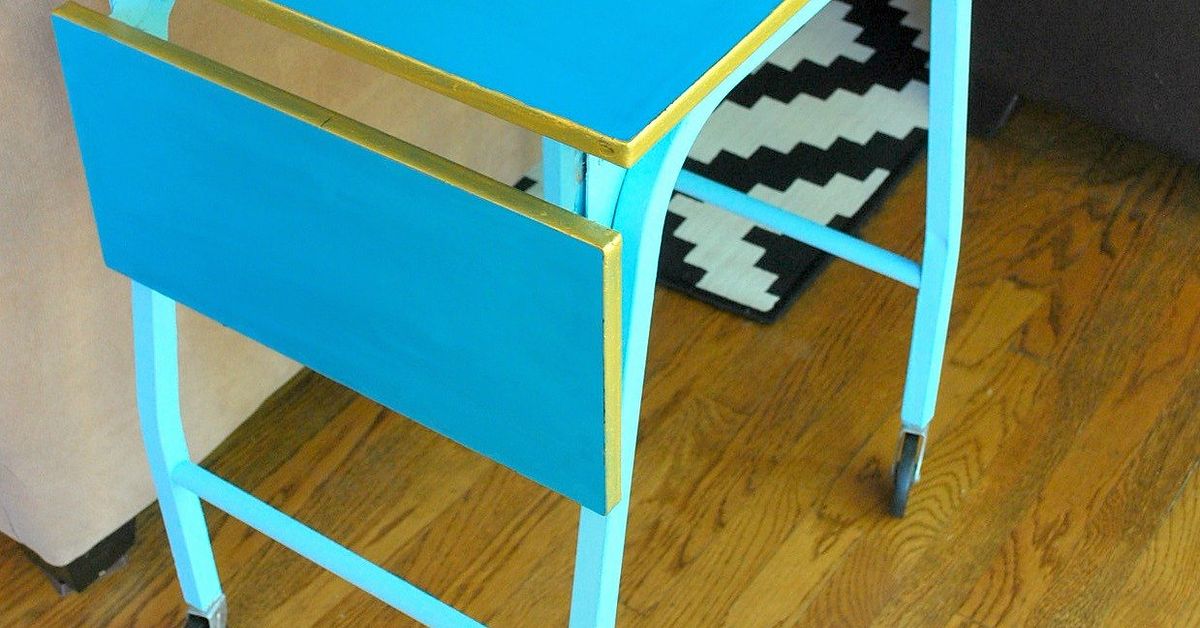
Some furniture politely asks to be noticed. A vintage typewriter table rolls into the room, rattles one caster, flashes a pair of folding wings, and announces that it once had an office job. These compact industrial tables were designed to hold heavy machines, survive daily use, and move wherever they were needed. That practical DNA makes one an excellent candidate for a modern side table, sofa companion, bedside stand, or delightfully overqualified drink table.
The best makeover does not erase the table’s history. It keeps the steel frame, mechanical details, aged hardware, and slightly stubborn personality while improving stability, finish durability, and everyday function. The result should look intentional rather than freshly attacked by a craft-store coupon.
Why a Vintage Typewriter Table Makes Such a Good Side Table
Typewriters helped reshape office work during the late nineteenth and twentieth centuries. Commercial production of the Sholes and Glidden Type-Writer began through Remington in 1873, and typewriters later became defining tools of the modern office. Dedicated stands and tables evolved around those machines, giving typists a sturdy surface at a practical working height.
That original purpose explains why surviving typewriter tables often have features that are unusually useful in today’s homes:
- A compact footprint: Small enough to sit beside a chair without swallowing the room.
- A strong frame: Built for a machine considerably heavier than a cup of coffee and one emotionally complicated houseplant.
- Casters: Easy to roll toward a sofa, reading chair, guest bed, or snack emergency.
- Folding leaves: Extra surface area appears when needed and disappears when company leaves.
- Industrial character: Steel legs, old fasteners, and mechanical hinges provide visual interest that mass-produced accent tables often lack.
A converted typewriter table also fits several decorating styles. Leave the metal dark and pair it with warm walnut for an industrial look. Use an aged cream finish for cottage character. Choose glossy black and a medium-brown top for a traditional office-inspired design. The piece is flexible because its form is simple, but its details are anything but boring.
Start With an Honest Condition Assessment
Before reaching for sandpaper, determine whether the table is a common utility piece or something historically significant. Look underneath the top, along crossbars, and near folding mechanisms for maker labels, patent numbers, stamped dates, or original decals. Photograph every mark before cleaning. Museum conservation guidance emphasizes documentation, material identification, and stabilization before aggressive treatment because old furniture can combine wood, veneer, steel, chrome, brass, paint, lacquer, and other finishes in a single object.
Check the Frame
Set the table on a level floor and press gently on each corner. A slight vibration may come from loose bolts; a dramatic lean suggests bent legs, failed welds, or mismatched casters. Inspect every wheel stem, axle, bracket, and lock. Casters are not decorative jewelry. The Consumer Product Safety Commission has documented product failures involving caster stems, welds, and rolling furniture, so replace questionable hardware rather than trusting it with a glass of iced tea near your favorite rug.
Check the Top
Determine whether the top is solid wood, plywood, veneer, fiberboard, laminate, or a later replacement. Veneer can be thin, so a belt sander may cut through it faster than you can say, “I meant to create a distressed look.” Hand sanding is safer when the material is uncertain. Professional furniture-refinishing guidance similarly advises caution with aggressive sanding on pieces that may have a thin veneer layer.
Check the Coating Before Disturbing It
Old painted furniture may contain lead, especially when its age and refinishing history are unknown. The EPA warns that sanding, scraping, drilling, sawing, and other disturbance of old painted surfaces can create hazardous lead dust. Use a reliable test method, isolate the work area, and follow lead-safe practices. When the risk is unclear or significant, consult a certified professional.
Choose the Final Function Before Choosing the Finish
A pretty finish cannot rescue an inconvenient design. Decide how the completed table will work in the room before purchasing paint, wood, or hardware.
As a Side Table
Keep the top relatively open and choose a finish that coordinates with nearby wood tones. One folding leaf can face the sofa for a laptop or book, while the other remains down to preserve walking space.
As a Drink Table
Prioritize water resistance, a level top, locked casters, and coasters with non-slip bases. A small raised edge can be added beneath a new wood top, but avoid permanently altering an intact antique component unless the change is necessary.
As a Flexible Accent Table
Use the folding leaves for temporary serving space. A removable tray is especially practical because it protects the finish, contains small spills, and lets the table move from reading corner to cocktail duty without an identity crisis.
Measure the intended location with the leaves both folded and open. Confirm that the table clears sofa arms, chair arms, baseboards, lamp cords, and knees. Old office furniture was designed around work equipment, not necessarily around a modern sectional with ambitions.
Tools and Materials for the Makeover
The exact list depends on the condition of the piece, but a typical vintage typewriter table restoration may require:
- Nitrile gloves, eye protection, and suitable respiratory protection
- Drop cloths or plastic sheeting
- A vacuum with a soft brush attachment
- Mild cleaner, clean rags, cotton swabs, and small nylon brushes
- Screwdrivers, wrenches, pliers, and penetrating lubricant
- Fine- and medium-grit sandpaper or abrasive pads
- A wire brush for sound, non-lead-coated rusty metal
- Rust-inhibiting metal primer and durable enamel
- Wood glue, clamps, stain, and a protective clear finish
- Replacement bolts, washers, caster hardware, or locking casters
- Felt pads, rubber bumpers, coasters, or a removable serving tray
Read every product label and keep coating systems compatible. Water-based and oil-based products can both work, but conditioners, stains, sealers, and topcoats should be chosen as a coordinated system rather than assembled like strangers at an awkward dinner party.
How to Convert a Vintage Typewriter Table Step by Step
1. Photograph and Disassemble Carefully
Take pictures from all angles, including hinge orientation, bolt direction, and washer placement. Label small parts in separate bags. If the folding leaves use springs or tensioned brackets, study the mechanism before removing anything. A five-second photograph can prevent a forty-minute argument with a mystery washer.
2. Dry-Clean Before Using Liquids
Remove loose dust with a soft brush and vacuum. Then test a mild cleaning solution in an inconspicuous area. Historic-furniture guidance favors cautious cleaning because excessive water, strong solvents, and casual polishing can damage old finishes. The National Park Service also cautions that products such as rubbing alcohol may harm finished wood.
For ordinary grime on a non-valuable utility table, a lightly damp cloth with mild soap may be enough. Do not soak joints, veneer edges, decals, or fiberboard. Dry the surface promptly.
3. Stabilize the Structure
Tighten loose fasteners, but do not crush old wood or strip the threads. Add washers where a bolt head has enlarged a hole. Replace missing hardware with matching sizes and grades. Bent metal may sometimes be corrected gradually with proper support, but cracked welds deserve professional repair.
Test the table again on a hard, level surface. All casters should contact the floor evenly. If the original wheels are charming but unreliable, save them in a labeled bag and install new locking casters using reversible adapters where practical.
4. Treat Rust Without Erasing Every Scar
Remove loose rust and flaking paint only after ruling out lead hazards. Feather sound edges with fine abrasive paper, clean away the dust, and apply a primer designed for bare or rusty metal. Manufacturers of protective metal coatings generally recommend cleaning, removing loose material, priming, and applying several light coats rather than one heroic coat that drips south for the winter.
Not every dark spot must disappear. Stable pitting beneath a sound new coating can preserve visual age. The goal is controlled character, not fake archaeological evidence.
5. Repair or Replace the Wood Top
If the original top is solid and attractive, repair loose veneer with appropriate glue and gentle clamping. Fill only distracting damage; small dents can remain part of the story. Sand with the grain, beginning no coarser than necessary and progressing to a fine grit. Established finishing guides recommend uniform sanding, complete dust removal, stain when desired, and a compatible protective finish.
If the top is swollen fiberboard or badly delaminated plywood, replacement may be more sensible. Use the old top as a template and preserve it if it contains labels or unusual hardware. Hardwood, quality plywood with edge banding, or reclaimed wood can all work.
Keep the replacement top proportional to the base. An oversized slab can make the slender frame look as though it is carrying a dining table through an airport.
6. Apply Color With Restraint
For the metal base, choose satin or semi-gloss enamel if you want a durable, easy-to-clean finish. Black, charcoal, warm white, olive, deep navy, and muted gray suit industrial furniture especially well. Spray several light passes, moving beyond the edge before changing direction. Avoid painting threaded parts, wheel bearings, labels, and friction surfaces.
Use spray finishes outdoors or in an appropriate, well-ventilated workspace, away from flames and ignition sources. Paints, varnishes, waxes, strippers, and aerosol products can release volatile organic compounds, and EPA guidance recommends maximum ventilation during painting and remodeling. Professional spray standards likewise emphasize ventilation and suitable protective equipment.
7. Protect the Top for Real Drinks
A drink table must tolerate condensation, small splashes, and the occasional coaster rebellion. Apply enough compatible clear finish to create an even protective film, allowing proper drying and light sanding between coats when the product instructions require it.
Polyurethane is often selected for frequently used furniture because it offers durable resistance to moisture, heat, and alcohol. Water-based clear finishes can help preserve lighter wood tones, while many oil-based products add a warmer amber appearance.
Let the coating cure fully before placing objects on it. “Dry to the touch” does not always mean “ready for a sweating glass, ceramic lamp, stack of books, and one impatient cat.” Add felt pads beneath accessories and continue using coasters even with a durable finish.
8. Reassemble and Perform a Practical Test
Reinstall the top, leaves, brackets, and casters. Open and close every moving component slowly. Lock the wheels and place increasing weight at the center before testing the edges. Do not sit, stand, or lean heavily on the table; its former job involved typing, not supporting interpretive dance.
Finally, roll it through the route it will actually travel. Confirm that the wheels do not catch on rug edges and that folding leaves cannot strike nearby furniture. Practical testing is the difference between a charming conversion and a mobile surprise.
Three Finish Ideas That Respect the Vintage Character
Classic Industrial
Use a satin black frame, warm walnut top, and cleaned original hardware. This combination highlights the table’s machine-age silhouette and works well with leather, brick, linen, and neutral upholstery.
Soft Vintage Office
Choose a muted cream or warm gray base, medium-brown wood, and lightly aged brass accents. Keep the wear subtle. Artificially sanding every edge can make a piece look less historic and more recently involved in a hallway collision.
Color-Forward Modern
Try deep green, navy, or oxblood on the frame with a natural oak top. The old structure supplies authenticity, while the color makes the completed side table feel designed rather than merely rescued.
Common Mistakes to Avoid
- Skipping the lead check: Unknown old paint should not be aggressively sanded first and questioned later.
- Over-restoring: Removing every mark can erase the character that made the table worth saving.
- Ignoring veneer: Thin veneer and power sanders are not natural friends.
- Painting over grease: Hinges, oil, wax, and grime can sabotage adhesion.
- Using weak casters: Wheels must match the stem, load, floor type, and intended use.
- Rushing cure time: A finish can feel dry while remaining soft underneath.
- Making irreversible changes too soon: Preserve original parts and use removable upgrades when practical.
Hands-On Experience Notes: What This Project Usually Teaches
The following is a composite workshop narrative based on common furniture-restoration experiences rather than a claim about one specific table.
The first surprise in a vintage typewriter table makeover is how little the table cares about your schedule. A project that appears to need “a quick cleaning and some black paint” often begins producing evidence: one caster is shorter, two screws are replacements, a folding bracket has been installed backward, and the wood top is not solid wood after all. This is not failure. It is the table introducing itself.
The most useful early habit is to slow down. Photographing the underside feels excessive until the hardware is spread across the workbench and three nearly identical washers have formed a small committee. Labels on masking tape save time. So does arranging removed parts in the order they came off. Restoration becomes easier when memory is treated as an unreliable intern rather than a master craftsperson.
Cleaning can also change the entire direction of the project. Beneath gray dust and oily residue, the original paint may turn out to be richer and more attractive than expected. A top that looked hopeless may have only a damaged clear coat. At that moment, the smartest decision can be to do less.
Gentle cleaning, localized rust treatment, and a protective finish may preserve more character than a complete strip-and-repaint job. The table does not need to look new. It needs to look cared for.
The second major lesson arrives during surface preparation: flaws become louder under fresh paint. Tiny ridges, sanding scratches, and greasy fingerprints that seemed invisible suddenly step forward under satin enamel like actors waiting for their cue. Careful preparation is not the glamorous part, but it creates the difference between “professionally restored” and “painted in a hurry before dinner.”
Several thin coats nearly always look better than one thick coat, and waiting between them is cheaper than repairing runs. Patience also matters when refinishing the wood. A stain color may look perfect on the label and completely different on the actual top. Testing underneath or on a scrap of matching wood prevents unpleasant surprises.
Rebuilding the top often creates the most satisfying visual change. A warm wood surface softens the steel frame and makes the table welcome in a living room. Yet the finish must follow the table’s future job. A display-only piece can live with a delicate surface. A drink table needs a tougher topcoat, full curing time, and a coaster plan.
The first cold glass placed on the completed table becomes a strangely serious test. Condensation gathers. Everyone watches. Nothing happens. This is a small but genuine victory.
The final lesson is that movement matters. A table can look perfect while standing still and become ridiculous when rolled. Wheels that swivel in opposite directions, a leaf that drops unexpectedly, or a slight wobble on hardwood will reveal itself immediately. Testing the table in its real locationbeside the sofa, across a rug edge, and within reach of a lamp cordturns a decorative project into useful furniture.
When the work is complete, the best part is not that an old object has been made fashionable. It is that a specialized piece of office furniture has gained a second career without pretending it never had a first one. The scars remain, the mechanical details still make sense, and the new top is ready for coffee, books, flowers, or a celebratory drink. Retirement, apparently, suits typewriter tables very well.
Conclusion
Converting a vintage typewriter table into a side table and drink table is a practical way to preserve industrial history while creating furniture that fits modern life. The strongest makeovers begin with inspection, respect original materials, address safety issues, stabilize the frame, and use finishes selected for actual daily wear.
Keep the folding mechanisms when possible, upgrade failed casters, protect the top against moisture, and allow a few honest scratches to remain. The completed piece should not look as though it escaped from an office-supply catalog yesterday. It should look like it worked for decades, took a well-earned break, and returned with better boundaries around beverages.